
Nothing ruins a pan of peanut butter fudge faster than that sandy crunch. You wanted a soft bite that melts, not sugar that squeaks between your teeth.
old fashioned stovetop peanut butter fudge
The classic stovetop peanut butter fudge method can deliver that nostalgic texture, but only if you control three things: sugar crystals, heat, and timing. Get those right, and the fudge sets smooth, slices clean, and still tastes creamy the next day.
This guide walks through the old-school boiled syrup approach (the one many families swear by). You’ll learn why graininess happens, exactly what “soft-ball stage” means, and how to fix a batch if crystals show up. Most of the best peanut butter fudge recipes aren’t “secret,” they’re just consistent about the small details.
What makes stovetop peanut butter fudge go grainy (and what a soft bite really needs)
Grainy fudge is almost always a crystal problem. Sugar forms crystals as it cooks and cools. If you let a few large crystals form, they multiply like ice on a windshield. The result is gritty fudge, even if the flavor is perfect.
Three common triggers cause big crystals:
First, undissolved sugar. If granulated sugar doesn’t fully dissolve before the mixture boils, those grains act like “seeds.” Later, the syrup attaches to them and forms larger crystals.
Next, crystals on the pot walls. While the syrup boils, tiny splashes stick to the sides. Those droplets dry out and form crystals. If you stir aggressively or scrape the sides, you knock crystals back into the batch. That’s instant seeding.
Finally, stirring at the wrong time. Stirring is helpful while dissolving sugar. During the boil, though, extra agitation can encourage crystal growth, especially if the pot walls aren’t clean.
So what creates the soft, creamy bite you want? It’s not “zero crystals.” Fudge is supposed to crystallize. The goal is many tiny crystals, not a few big ones. You get that by dissolving the sugar first, boiling to the right temperature, cooling without disturbance for a short window, then beating at the right moment so the crystals form small and uniform.
Peanut butter choice matters too. For this old-school style, creamy, no-stir peanut butter is the safer tool. Natural peanut butter often separates, and it can make the set feel dry or crumbly. It also increases the risk of oily streaks if the oils split under heat.
Some cooks add “insurance” ingredients that reduce crystal risk:
- A small spoonful of corn syrup (or glucose) interferes with crystal structure.
- A tiny pinch of cream of tartar (acid) can break some sucrose into glucose and fructose, which also slows crystal growth.
You can make great fudge without either, but they help when humidity is high or your stove runs hot.
The soft-ball stage is your texture switch, not a fancy detail

The soft-ball stage is where the fudge texture is decided. For peanut butter fudge, aim for about 234 to 240°F.
No thermometer? Use the cold-water test. Drop a small bit of syrup into very cold water. If it forms a soft ball you can pick up and squish flat, you’re there.
Miss the stage and the texture shifts fast:
- Under-cook (too low): it stays soft, may not set, and can slump when sliced.
- Over-cook (too high): it sets dry, crumbly, or hard, and graininess becomes more likely.
A good visual cue: at the right stage, the boil looks active and thick, not watery. The bubbles rise more slowly and pop more heavily.
If you only remember one thing, remember this: nail soft-ball, then stop the heat quickly.
Your pot, spoon, and pan setup matters more than people think
Good gear prevents avoidable mistakes.
Use a heavy-bottom saucepan so the syrup heats evenly. Thin pots create hot spots, which can scorch milk solids and push sugar past soft-ball too fast.
Also, start clean. Any sugar stuck to the pot walls can seed crystals. Keep a pastry brush and water nearby, or use a clean damp cloth to wipe down the inside walls early in the boil.
For the pan, line an 8-inch square pan with parchment and leave overhang. That overhang becomes handles, so you can lift the slab out for clean slicing. If you only have a 9-inch pan, it works, but the fudge will be thinner.
Most importantly, measure everything before you turn on the burner. Once the syrup hits temp, the clock runs.
The foolproof stovetop method for smooth peanut butter fudge, step by step
This is the old-school “boiled syrup” approach: sugar, dairy, and butter cooked to soft-ball, then peanut butter and vanilla mixed in off heat. Many of the best peanut butter fudge recipes follow this backbone, even when they add marshmallow creme for extra softness.
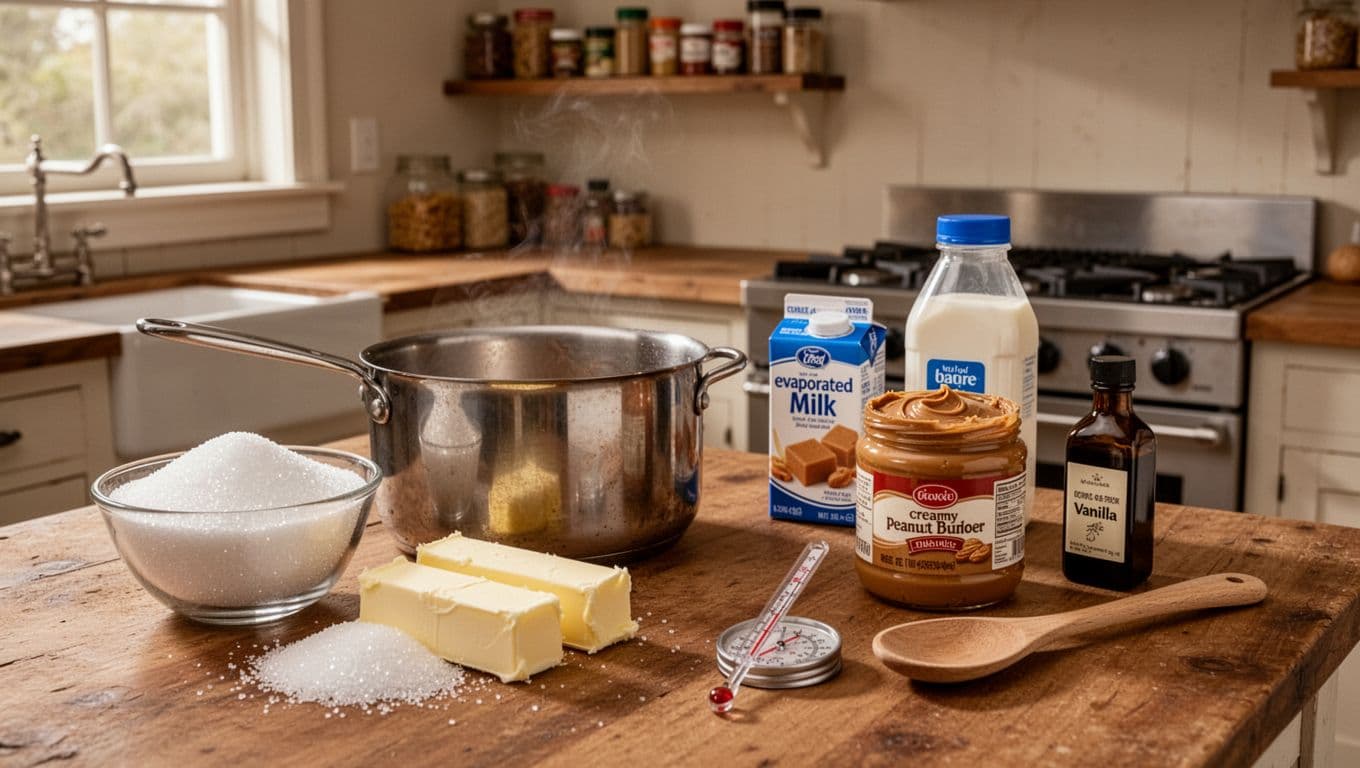
What you’ll need (core ingredients): sugar, butter, evaporated milk (or whole milk), creamy no-stir peanut butter, vanilla. Optional: marshmallow creme, corn syrup, and a pinch of salt.
Step-by-step walkthrough (stove to pan)
- Prepare the pan first. Line an 8-inch square pan with parchment, leaving a 2-inch overhang. Lightly grease the parchment corners so it sits flat.
- Combine syrup ingredients in the pot. Add sugar, butter, and evaporated milk to a heavy saucepan. If you want extra crystal protection, add 1 tablespoon corn syrup. Stir on medium heat until the mixture looks uniform.
- Dissolve the sugar before you boil. Keep stirring as the mixture warms. The goal is to dissolve sugar fully before the boil gets strong. If you see grainy sediment on the spoon, keep going.
- Bring to a controlled boil, then stop stirring. Once it reaches a steady boil, reduce stirring to a minimum. Stir only enough to prevent scorching, especially if your burner runs hot.
- Wash down the pot sides early. If you see sugar splashes on the walls, brush them down with a damp pastry brush. Do this early, not late, so you don’t splash water into near-finished syrup.
- Cook to soft-ball (234 to 240°F). Clip a thermometer so it reads the syrup, not the pot bottom. Start watching closely as you approach 230°F. When it hits your target, remove the pot from heat right away.
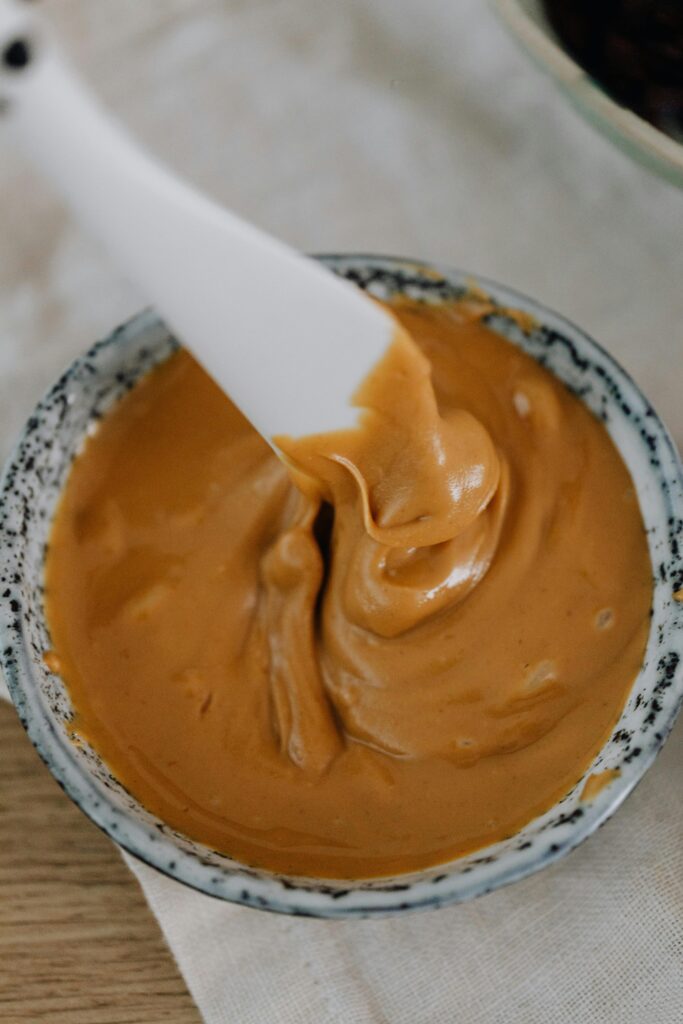
- Add peanut butter and vanilla off heat. Stir in creamy peanut butter and vanilla until fully smooth. If you use marshmallow creme (often 7 oz), add it now too. Work steadily, because the mix thickens fast.
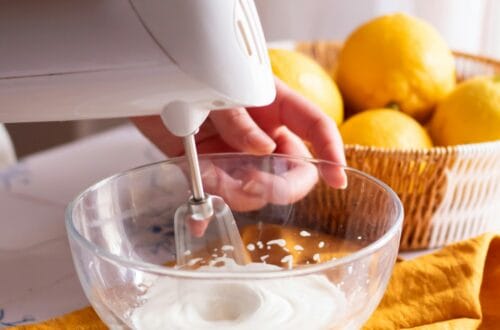
- Beat to set the right crystal size. Beat with a sturdy spoon until the mixture loses some shine and thickens to a pourable but heavier texture. This usually takes a few minutes. Then stop before it turns crumbly in the pot.
- Pour and spread quickly. Scrape into the prepared pan and smooth the top. Don’t overwork the surface.
- Cool and slice. Let it set at room temp until firm. If you’re in a hurry, chill it, but serve at room temp for the softest bite.
For clean cuts, warm your knife under hot water, wipe it dry, then slice. Re-warm and wipe between cuts.
Storage (practical, not fussy): keep airtight at room temp for about 1 week, refrigerate up to 1 month, or freeze up to 3 months. If it’s chilled, let pieces sit out 15 to 20 minutes before serving so the texture turns creamy again.
When to stir, when to stop, and when to beat hard
Stirring isn’t the enemy. Bad timing is.
- Stir while dissolving: this prevents undissolved grains and reduces scorching.
- Limit stirring during the boil: extra agitation plus sugar on the walls is how crystals get seeded.
- Beat after removing from heat: beating encourages lots of tiny crystals, which reads as creamy.
A common mistake is scraping the pot sides at the end. Those dried crystals are like throwing gravel into wet cement. Instead, pour from the center and leave any crusty ring behind.
Simple add-ins that protect texture without changing the old-fashioned vibe
Corn syrup and cream of tartar aren’t “cheats.” They’re stabilizers.
A tablespoon of corn syrup helps keep crystals small, and it doesn’t make the fudge taste like corn syrup. A very small pinch of cream of tartar can help too, but use a light hand because too much can affect flavor.
If you’re making a shortcut style that uses powdered sugar (no thermometer), sift it first. Clumps can create gritty pockets that feel like crystals, even when the syrup is fine. That style is fast and reliable, but it’s a different texture than the classic boiled-syrup bite.
Troubleshooting: fix grainy fudge, too-soft fudge, and dry, crumbly fudge
Most problems map to one of two causes: temperature drift or crystal seeding. Use this quick table to diagnose before you remake the batch.
| What you see | Most likely cause | What to try next |
|---|---|---|
| Grainy, sandy texture | Sugar crystals seeded (pot walls, stirring at boil), undissolved sugar, or natural peanut butter | Rewarm gently with a splash of milk, dissolve fully, then re-cook to soft-ball |
| Too soft, won’t set | Didn’t reach soft-ball, or not enough cooling time | Chill longer first, then remake if still loose |
| Too firm or crumbly | Overcooked past soft-ball, or over-beaten | Serve slightly warmer, cut smaller pieces, remake next time at lower temp |
| Oily streaks or separation | Natural peanut butter, overheating after PB added | Use no-stir PB, stir PB in off heat only |
| Bitter or scorched taste | Hot spots, thin pot, too-high heat | Use heavier pot, lower heat, stir during dissolve only |
The takeaway: fix the process, not just the ingredient list. Small moves change outcomes.
Fast rescue moves you can try before you toss the batch
- Too soft after cooling: Refrigerate for an hour, then re-check. Many batches just need time.
- Grainy but still edible: Melt the fudge back into the pot with 1 to 2 tablespoons milk. Heat gently and stir until smooth, then re-cook to soft-ball.
- Crystals on the pot wall mid-cook: Use a damp pastry brush to wash them down early. Don’t scrape later.
- Too sweet on the tongue: Add a tiny pinch of salt to the warm mixture next time, or pair pieces with black coffee.
- Slightly soft but tasty: Serve chilled and cut smaller squares. It reads more like candy that way.
How to get clean slices and a soft bite the next day
Let the slab set fully before you cut. If the center is still warm, your knife drags and the edges smear.
Use the warm-knife trick, and wipe between cuts. That keeps edges sharp, especially for gift boxes. Then store pieces airtight so the surface doesn’t dry out.
Chilled fudge often tastes firm and muted. Give it 15 to 20 minutes at room temp before serving. The peanut butter aroma comes back, and the bite turns soft again. That holding power is why peanut butter fudge works so well for parties and holiday trays.
Conclusion
Soft, old-school peanut butter fudge isn’t about luck. Hit soft-ball stage, keep the pot sides clean, use creamy no-stir peanut butter, and beat after the heat is off. Those steps prevent big crystals, which is what makes fudge feel grainy.
Pick one method and repeat it a few times. After that, you’ll recognize the cues by sight and feel, not just by the thermometer. Try a small batch first, then scale up for a holiday tin or a cookie tray. Once you lock in that soft bite, it’s hard to go back.