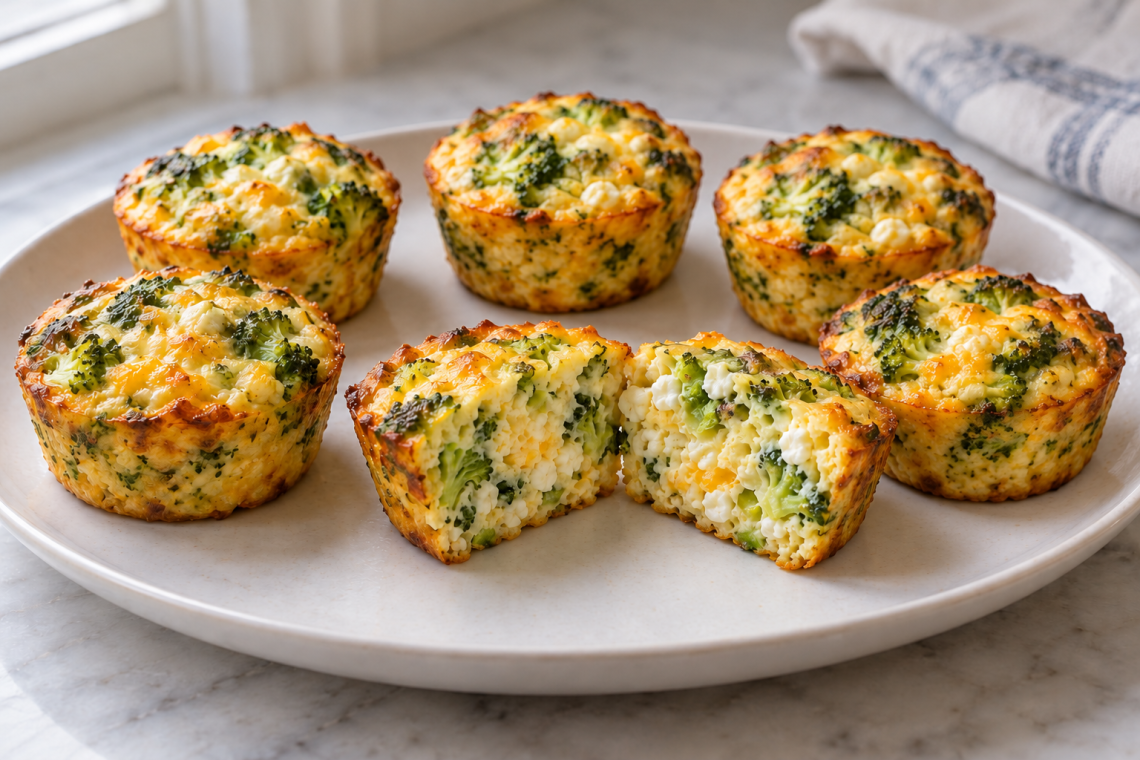
You can make cottage cheese broccoli egg cups without a blender with a bowl, whisk and muffin pan. The cottage cheese remains slightly visible, giving the eggs small creamy pockets. Well-drained broccoli adds a savory filling without making the cups watery.
This recipe makes six standard egg cups rather than a tray sized for a crowd. Two cups work as part of breakfast with toast or fruit; three make a more substantial portion. The important preparation happens before the eggs reach the pan: cook the frozen broccoli as directed on its package, chop it finely, and remove excess moisture.
Six egg cups at a glance
| Yield | 6 standard egg cups; 2–3 servings |
|---|---|
| Prep time | 15 minutes |
| Baking time | About 25 minutes; start checking at 22 minutes (usual range 22–27 minutes) |
| Rest | 5 minutes; estimated total 45 minutes |
| Oven | 350°F / 175°C, conventional |
Have a standard metal muffin pan, mixing bowl, whisk, small sieve, flexible spatula and food thermometer ready. A nonstick pan still needs greasing. Silicone muffin liners are another option, but they must sit on a sturdy tray and may change the baking time. Thin paper cupcake liners can cling to eggs and are less convenient here.
The egg mixture and savory filling
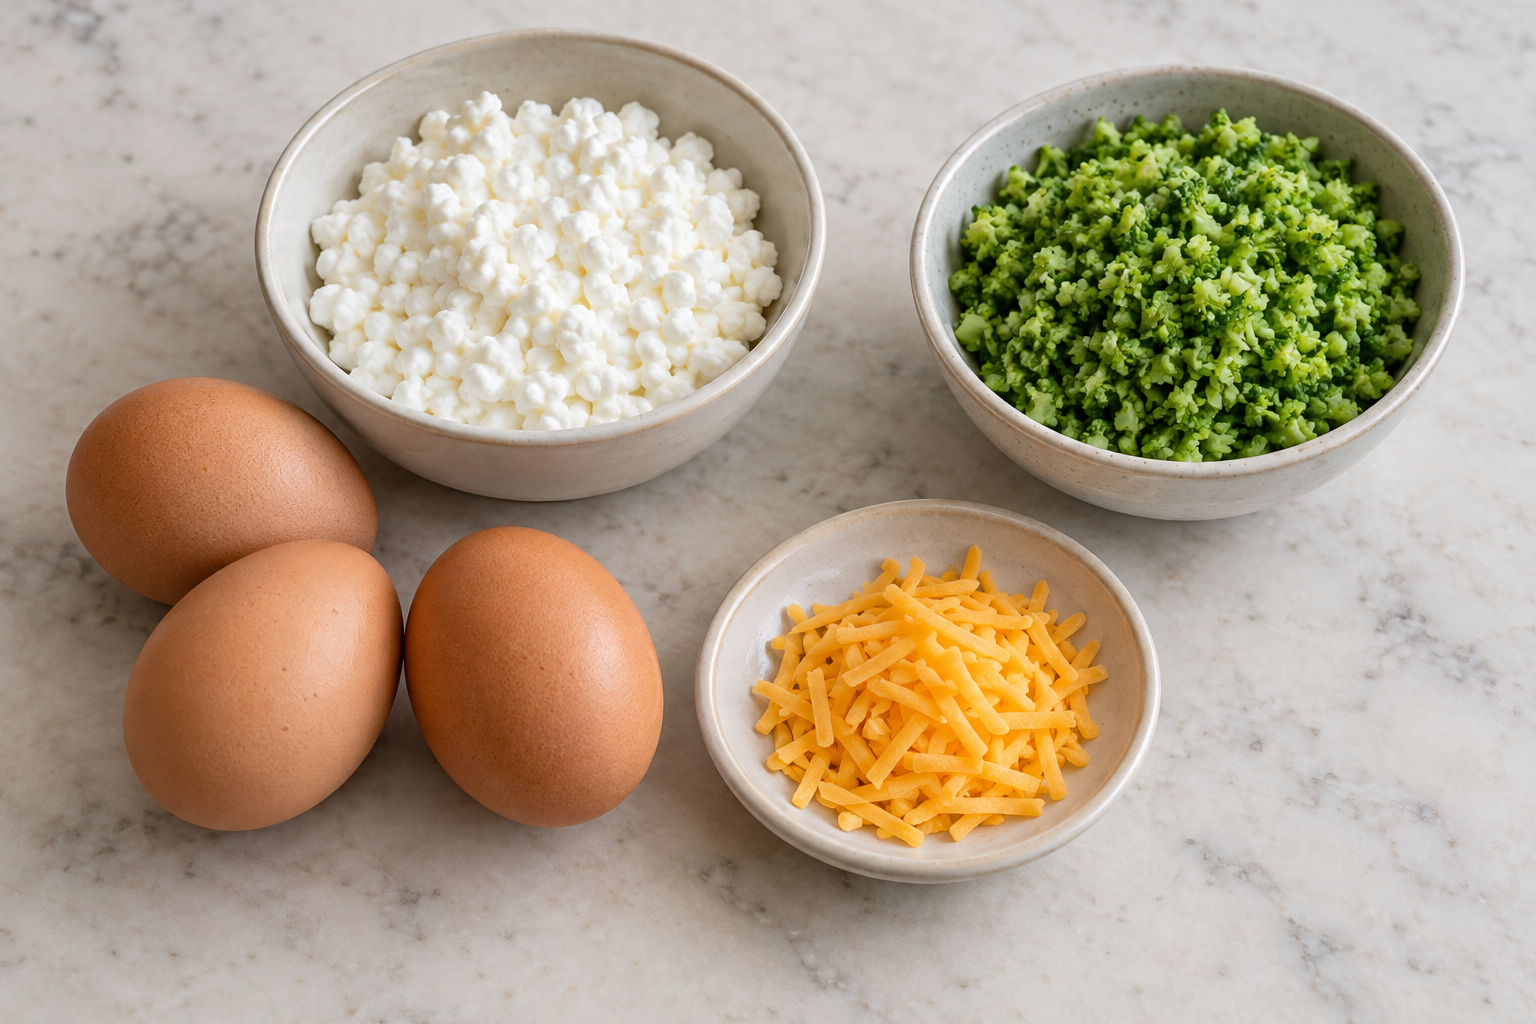
Eggs and cheese
- 3 large eggs
- ½ cup (113 g) small-curd cottage cheese, preferably 4% milkfat
- ¼ cup (28 g) shredded sharp cheddar
There is no added milk. The eggs and cottage cheese already supply enough liquid for this small batch. Cottage cheese brands differ in salt and moisture, so stir the container before measuring. If there is an obvious layer of watery liquid, spoon the cheese into a sieve briefly; do not squeeze the curds dry.
Sharp cheddar adds flavor in a modest quantity. Grate it finely so a small amount reaches every cup.
Vegetables and seasoning
- ¾ cup (100 g) cooked, finely chopped and well-drained broccoli
- 1 tablespoon finely sliced scallion, optional
- ⅛ teaspoon fine salt, or omit if the cheeses taste very salty
- ⅛ teaspoon black pepper
- ¼ teaspoon garlic powder
The scallion is optional, but it gives a fresh onion note without needing a separate sautéing step. Garlic powder disperses more evenly than raw chopped garlic in this short bake.
For the pan
- 1 teaspoon neutral oil for thoroughly greasing the muffin wells
Drain, cool and chop the broccoli
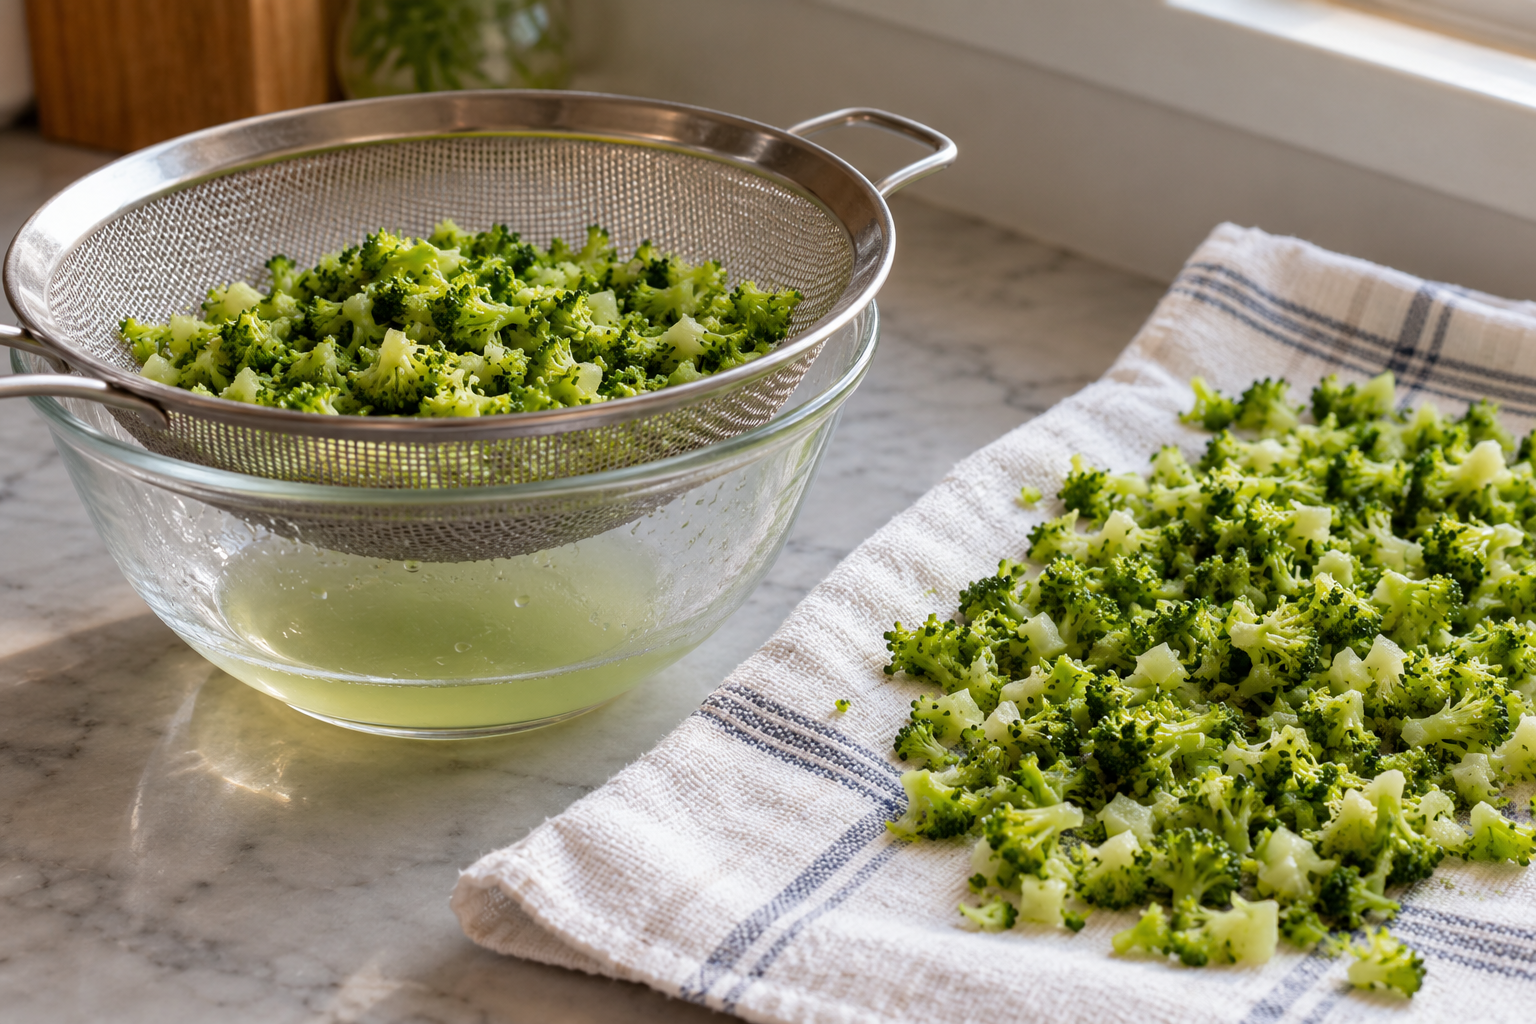
Frozen broccoli releases water as it heats. If that water goes into the egg mixture, it can collect under the cups and make their centers seem underdone. Measure the broccoli after cooking and draining, not straight from the frozen bag. Start with about 1½ cups frozen florets to obtain approximately ¾ cup chopped, cooked broccoli; actual yield varies with stem size.
Follow the package’s cooking instructions rather than briefly thawing it and assuming it is ready to eat. Transfer the cooked broccoli to a sieve, let the steam escape, then press gently with a spoon. Spread it on a clean towel and blot. You want tender, moist pieces, not a dripping handful or completely dried-out vegetables.
Chop large stems into pieces smaller than a pea. Small pieces distribute through each cup and are easier to portion. Set the broccoli aside until warm rather than steaming hot so it does not begin cooking the eggs during mixing.
Build a small draining station
Put the sieve over a bowl before cooking the broccoli, with a clean towel and chopping board alongside. That gives released water somewhere to go without balancing hot vegetables over the egg bowl. After draining and blotting, chop through a loose pile with the knife tip resting on the board, gathering stray stem pieces back into the pile as needed. Check for a large piece hiding underneath before measuring the finished vegetables.
Use the towel to blot the surface, then leave the chopped broccoli spread out while you grease the pan. Spreading exposes more of it to the air than leaving a steaming mound in the sieve. It should be comfortable to handle before it meets the eggs. Keep this short preparation step separate from the storage instructions; cooked vegetables should not be left waiting on the counter for an extended period.
Make cottage cheese broccoli egg cups without a blender
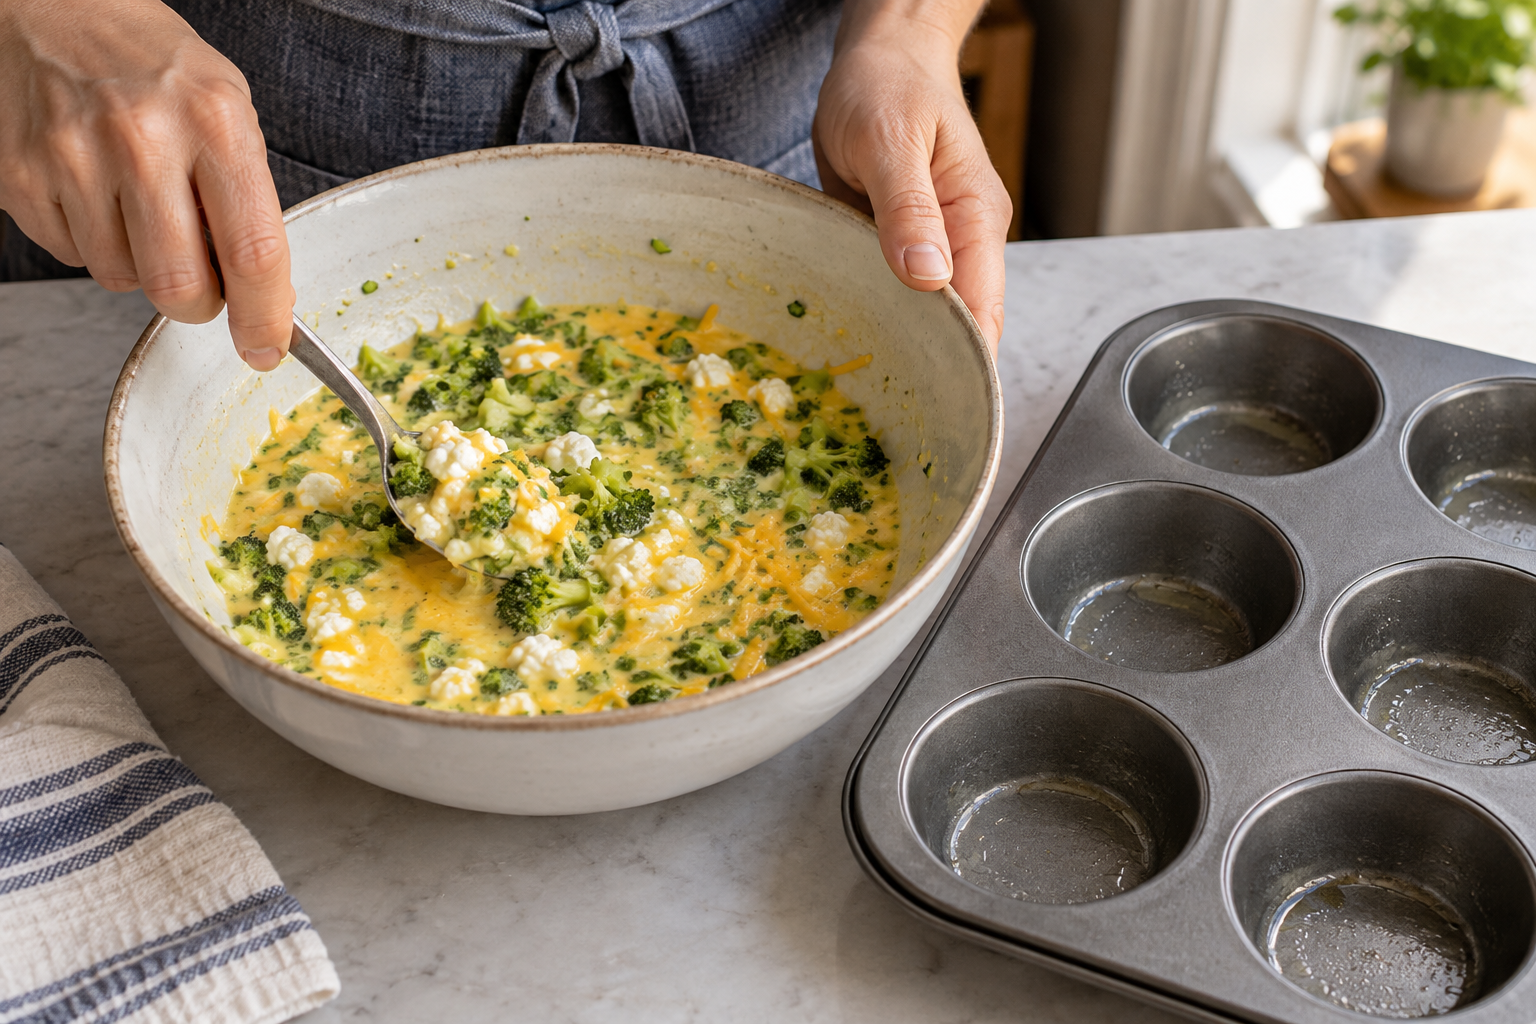
- Heat and prepare. Set a rack in the middle of the oven and preheat to 350°F / 175°C. Brush the oil over the bottoms and sides of six muffin wells. Prepare the broccoli as described above.
- Whisk the eggs. Crack the eggs into a bowl and whisk until the whites and yolks are fully combined. Add the cottage cheese, salt, pepper and garlic powder. Whisk briefly to distribute the curds. The mixture should remain slightly lumpy.
- Add the fillings. Fold in the broccoli, cheddar and optional scallion. Scrape the bottom of the bowl to check that the broccoli is not collecting in one place. Avoid beating in a large amount of air; a foamy mixture can puff dramatically and then collapse.
- Portion evenly. Spoon the mixture between the six wells, alternating liquid and vegetables as you work. Fill them no more than about three-quarters full. If your pan has unusually small wells, put excess in a separately greased oven-safe ramekin rather than overfilling.
- Bake and check the centers. Start checking at 22 minutes; baking usually takes 22–27 minutes. Insert a thin-tip food thermometer into the center of each cup, without touching the metal pan. Each center must reach at least 160°F / 71°C, the FoodSafety.gov temperature for egg dishes. The eggs should be set rather than sloshing. If a center is cooler, continue baking briefly and recheck before starting the five-minute rest.
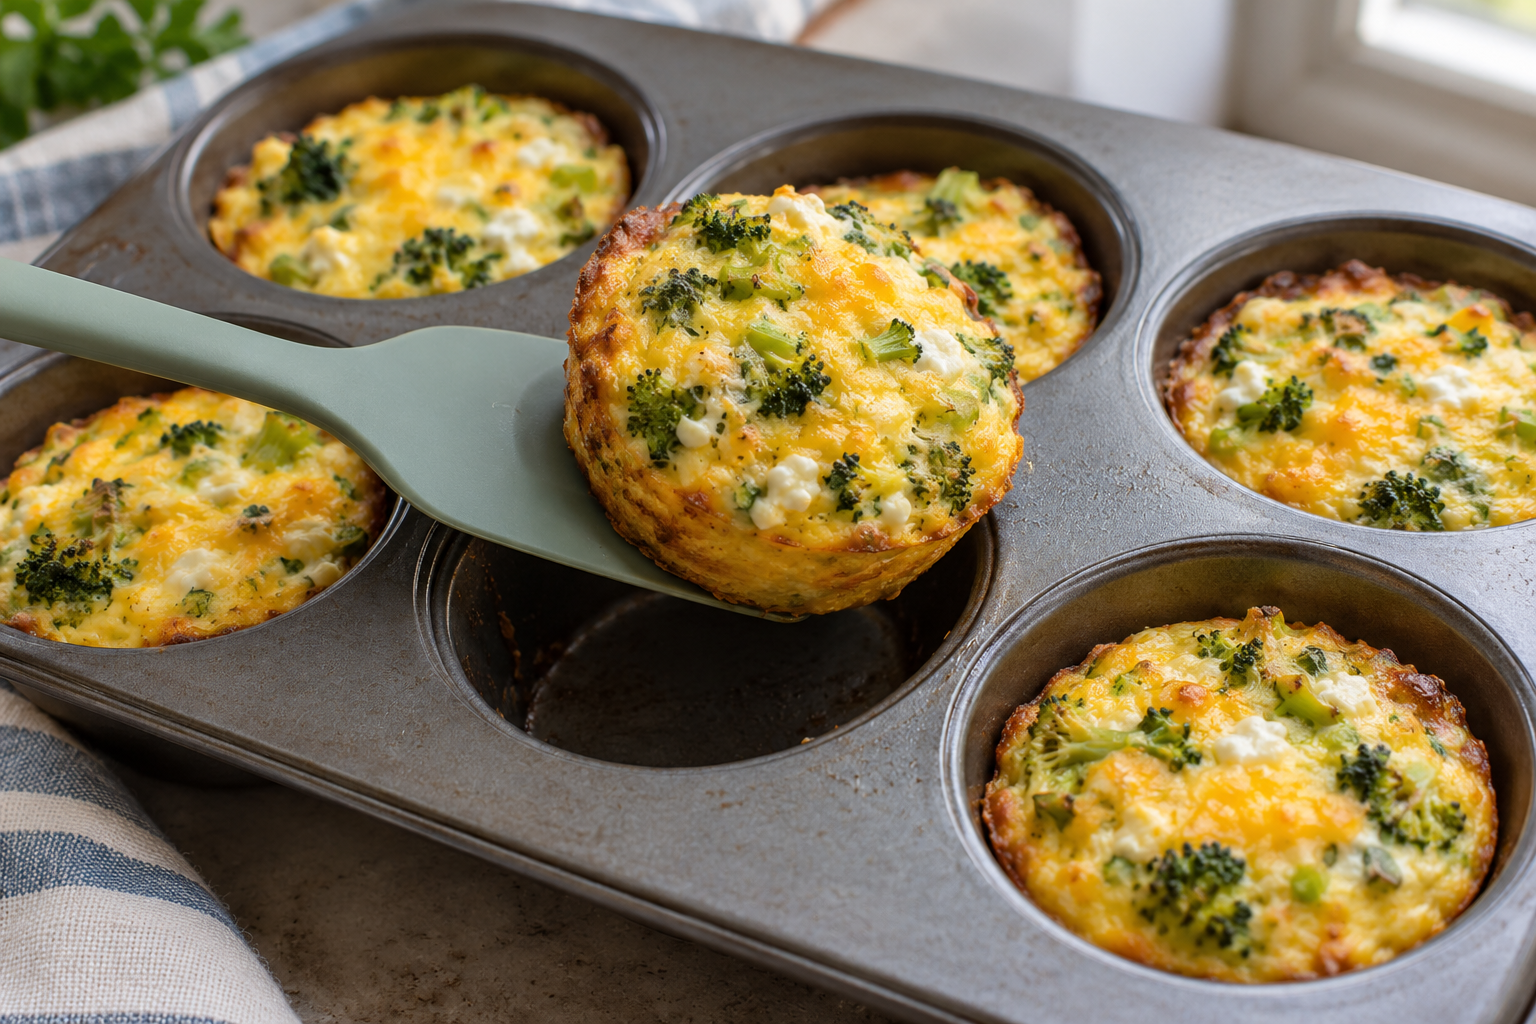
- Rest and release. Leave in the pan for 5 minutes. Run a thin silicone or plastic spatula around each edge, then lift the cups out. Some settling is normal. Serve promptly or begin cooling them for storage.
Keep each cup’s filling balanced
- Stir before scooping. Lift broccoli and curds from the bottom of the bowl so a pouring jug does not send mostly liquid into the first wells.
- Share the filling first. Spoon some mixture into every well, then make a second pass to even out the portions.
- Check the level. Keep each well no more than three-quarters full and gently nudge exposed broccoli under the egg. Do not pack the mixture down.
Check the center, then release gently
Read the pattern across all six cups
Before changing the cottage cheese or oven temperature, compare the cups with one another. A problem in one well usually points to portioning, greasing or release; the same problem across the pan points more strongly to timing, oven heat or the mixture itself.
| Pattern after baking | What to check next time |
|---|---|
| One cup tears while the others release | Inspect that well for a missed patch of oil, worn coating or lifting before the full edge was loosened. |
| One side of the pan browns more | Note the pan position and uneven oven heat before changing the ingredients; rotate once near the end if needed. |
| The tallest cup stays softer | Make the fill depths more even and check the deeper portion separately. |
| Every cup is firm or rubbery | Begin checking at the early end of the baking range and remove the pan once the centers are safely set. |
Change one thing at a time. Keep a short note of the cottage cheese brand, pan material and actual baking time when a batch needs troubleshooting. If only the cups on one side stick, start with the pan and release technique rather than changing the entire mixture. If you change the cheese and the pan together, it becomes harder to tell which adjustment helped. Photographing the filled pan before baking can also make uneven portions easier to spot when you compare the finished cups.
Position the thermometer for a shallow egg cup
Check the thermometer instructions for its sensing area and required insertion depth. Use a thermometer suitable for a shallow portion, place the sensing area in the center and keep it clear of the metal pan. If the fill depths or browning differ, check more than one cup. The USDA FSIS thermometer guidance explains why probe type and insertion depth matter.
A properly baked cup holds together when lifted but still feels tender when cut. Cottage cheese curds may remain white, so white flecks do not automatically mean raw egg. Use the center temperature alongside the visual cues. A pool of clear liquid under a cup more often points to wet vegetables or eggs that were baked too long.
Release without tearing the base
Once the five-minute rest is complete, loosen the entire circumference of a cup before lifting one side. Support the base with the spatula rather than pulling on the top edge. If a small piece catches, stop and slide the tool underneath that point; tugging usually separates the tender center from the stuck base. For the next batch, check the bottom corner where the side meets the pan, since it is easy to miss that narrow ring when brushing on oil.
Serve today or prepare breakfast ahead
Pair the cups with toast, roasted potatoes or a small fruit bowl. They also fit into a savory brunch with sliced tomatoes and a little mustard on the side. Let them cool slightly before serving to children, since broccoli pieces and melted cheese can hold heat inside.
- Chill promptly. After the five-minute pan rest, release the cups and arrange them in a shallow container in a single layer. Refrigerate within 2 hours of cooking, or within 1 hour when the surrounding temperature is above 90°F / 32°C. Do not wait for them to become completely cold on the counter. The FDA egg-safety guidance also advises prompt refrigeration for cooked egg dishes. When taking breakfast away from home, pack the egg cups separately from toast or wet fruit and keep them chilled until reheating.
- For the next few breakfasts. Keep covered at 40°F / 4°C or below and use within 3–4 days.
- For the freezer. Freeze cooled portions separately so they do not form one block. Keep at 0°F / −18°C or below; two months is a practical quality target. Thaw overnight in the refrigerator before reheating.
Reheat a refrigerated portion in the microwave at moderate power in short intervals, rotating halfway through. Continue until the center reaches 165°F / 74°C; time depends on appliance power and portion size. A loose cover limits drying. The USDA guidance on leftovers provides the storage and reheating basis.
For another breakfast you can portion ahead, see the spinach and cheddar egg sandwiches. The breakfast quesadillas without eggs offer a separate option for mornings when you prefer a tortilla-based meal.
Filling changes to consider separately
Fresh broccoli can replace frozen when cooked, cooled, chopped and measured to the same prepared quantity. Thawed spinach is not a cup-for-cup equivalent because it packs more densely and releases different amounts of moisture. If experimenting, use a smaller, thoroughly squeezed amount and keep the total filling modest.
Monterey Jack is a reasonable swap for cheddar when a milder flavor is preferred. Feta is saltier and does not melt the same way. Use less and reconsider the added salt. This recipe has not been validated with fat-free cottage cheese, liquid egg substitutes or a dairy-free cheese combination, so those changes should be treated as separate trials.
Moisture and set checklist
The biggest variable is not the egg mixture; it is the water carried by the broccoli. Use this checklist to protect the centers from becoming wet and the edges from becoming rubbery.
| Checkpoint | What to look for | Why it matters |
|---|---|---|
| Broccoli | Cool, finely chopped and thoroughly drained with no water collecting underneath. | Surface water turns to steam and can leave a loose pocket around the vegetables. |
| Filled cups | Similar amounts of broccoli and egg mixture in every well, with a little headroom. | Even portions finish together and are less likely to overflow. |
| Center set | The center reaches at least 160°F / 71°C on a suitable food thermometer; appearance alone is not enough. | Waiting for deep browning can overcook the edges before the center is ready. |
| Release | Rest briefly, then loosen the perimeter with a thin flexible utensil. | Immediate lifting can tear the soft base; waiting until completely cold can encourage sticking. |
Small cottage-cheese curds are normal in a whisked mixture and give the cups a tender texture. For a more even appearance without using a blender, choose small-curd cottage cheese, break up large curds with the whisk and distribute the mixture with a spoon between pours so the heavier pieces do not settle in the bowl.
When reheating, use moderate heat and check that the centers reach 165°F / 74°C, following the storage guidance above. Long, aggressive reheating squeezes moisture from the eggs and makes the outside firm. A crisp piece of toast or fresh fruit supplies contrast without changing the listed ingredient quantities.
Questions before you start
Will I taste cottage cheese curds?
Small curds remain soft and slightly visible. They are part of this hand-mixed version. If a completely uniform texture matters to you, a blended recipe is a better fit than trying to whisk curds away.
Can I use raw frozen broccoli?
Cook it according to its package first. That lets you remove released water and ensures it is prepared as directed before it goes into the egg mixture.
Why did my cups deflate?
Eggs expand as they heat and settle as they cool. A little shrinkage is expected. Large hollow centers and a dramatic collapse can follow excess whisking or overbaking.
Can these be made in an air fryer?
The pan size and airflow would need separate testing. This method is developed for a conventional oven; using the same temperature and time in an air fryer is not a verified conversion.
What if my pan makes mini or jumbo muffins?
The six-cup yield and baking range here refer to standard wells. For the closest match, choose that pan before you mix. Mini and jumbo wells would divide the mixture into different portions, so neither the stated yield nor the baking time transfers directly. If you use the overflow ramekin mentioned in the method, treat it as a separate portion when checking doneness; its result cannot tell you whether the muffin-pan cups are ready. Keep the remaining wells evenly filled instead of making one extra-deep cup to use up the mixture.
Can I double the batch?
Yes, double the ingredients for 12 standard wells and keep the same oven setting. Check a middle cup and an outer cup for safe doneness, since a full pan may heat differently.
Do these need flour or baking powder?
No. Cottage cheese broccoli egg cups without a blender set through the eggs. They are small baked egg portions, so flour and baking powder are unnecessary in the listed formula.
The six-cup breakfast recipe
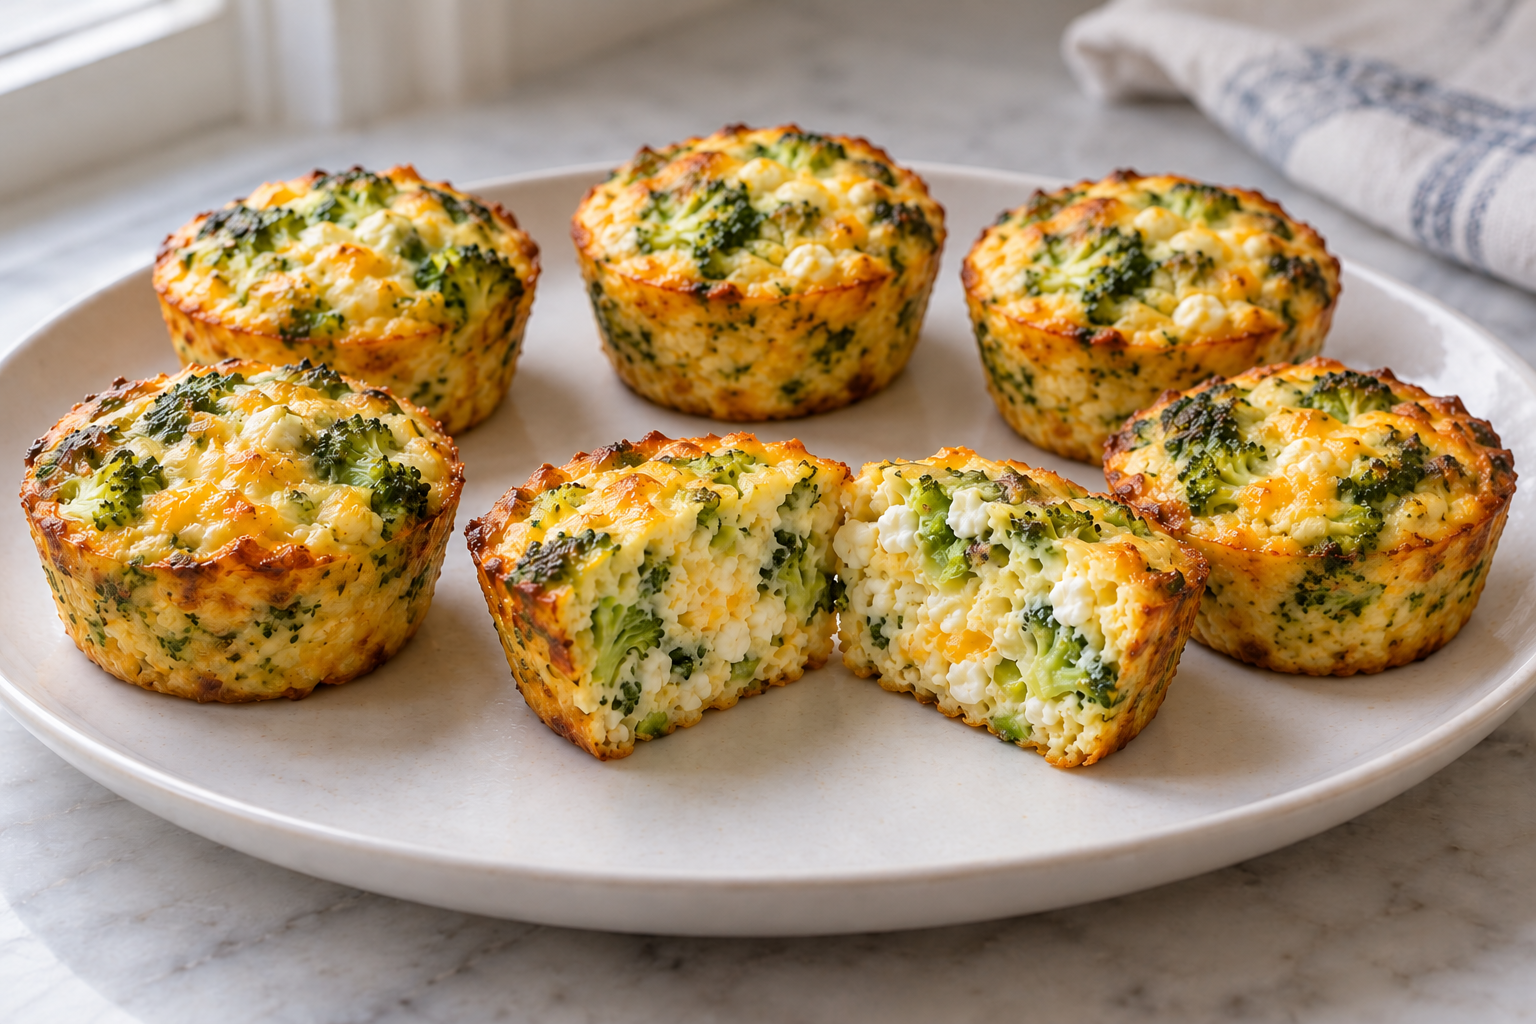
Cottage Cheese Broccoli Egg Cups Without a Blender
Ingredients
Equipment
Method
- Place a rack in the center of the oven and preheat to 350°F / 175°C on the conventional setting. Brush the oil thoroughly over the bottoms and sides of six standard muffin wells.
- Cook the frozen broccoli according to its package directions. Drain in a sieve over a separate bowl, let the steam escape, press gently and blot excess water with a clean towel. Finely chop, including any larger stems, then measure ¾ cup (100 g) of prepared broccoli. Let it cool briefly until comfortably warm rather than steaming hot before combining with the eggs. Do not leave it on the counter for an extended period.
- Whisk the eggs in the mixing bowl until the yolks and whites are combined. Add the cottage cheese, salt if using, pepper and garlic powder. Whisk briefly to distribute the curds; leave the mixture slightly lumpy and avoid whipping in a large amount of air.
- Fold in the drained broccoli, cheddar and optional scallion with a spatula. Scrape the bottom of the bowl so the vegetables and cheese are evenly distributed.
- Spoon the mixture evenly among the six greased wells. Stir from the bottom between spoonfuls and alternate liquid and vegetables so each cup has a similar filling. Keep every well no more than about three-quarters full. If your pan has unusually small wells, bake excess in a separately greased oven-safe ramekin and check it separately for doneness.
- Bake for approximately 22–27 minutes, beginning to check at 22 minutes. The edges should be set and the centers should not slosh when the pan is moved gently. Insert a thin-tip food thermometer into the center of each cup, without touching the metal pan. Each center must reach at least 160°F / 71°C. If a center is cooler, continue baking briefly and recheck before beginning the five-minute rest. The card uses 25 minutes as an estimate, not a substitute for the temperature check.
- Rest in the pan for 5 minutes. Loosen each edge gently with a thin silicone or plastic spatula, support the base and lift out. Some settling is normal. Serve promptly, or transfer to a shallow container and refrigerate promptly according to the storage notes.
Notes
Rate this recipe
Made these broccoli egg cups? Choose a star rating and tell us how they turned out in the comment form below.