Family Recipe HQ • Kitchen guide
Reheat fried chicken uncovered on a rack in a 375°F oven, or use an air fryer for a small batch. Dry circulating heat helps the coating regain crispness. Heat the thickest meat to 165°F (74°C), even if the outside already feels hot.
Before you start: check the chicken, then heat the oven
This guide is for previously cooked fried chicken that has been stored safely. Check when it was cooked or purchased before deciding how to warm it. Chicken that was left out too long should be discarded; crisping the outside cannot make it safe again.
Leave the pieces in the refrigerator while the appliance preheats. Remove the takeout box, paper liners, plastic, and any sauce cups before heating. Use a rack specifically rated for oven use: a cooling rack with an unsuitable coating or plastic feet does not belong in a hot oven.
For a mixed family bucket, take a moment to separate wings and drumsticks from large breasts. The smallest pieces will usually need attention first. If you only need lunch for one person, reheat that portion and keep the rest refrigerated.
Pick the method for your batch
| Method | Best fit | Trade-off |
|---|---|---|
| Oven at 375°F | Several portions or thick bone-in pieces | More room and gentler control; allow extra time. |
| Air fryer at 375°F | A few pieces in one layer | Quick surface crisping; watch dark coating. |
| Microwave | Speed matters more than crust | Check multiple spots; coating softens. |
| Skillet | Small pieces or boneless tenders | Turn often enough to avoid burning; thick bone-in cuts are harder to warm evenly. |
How to Reheat Fried Chicken in the Oven
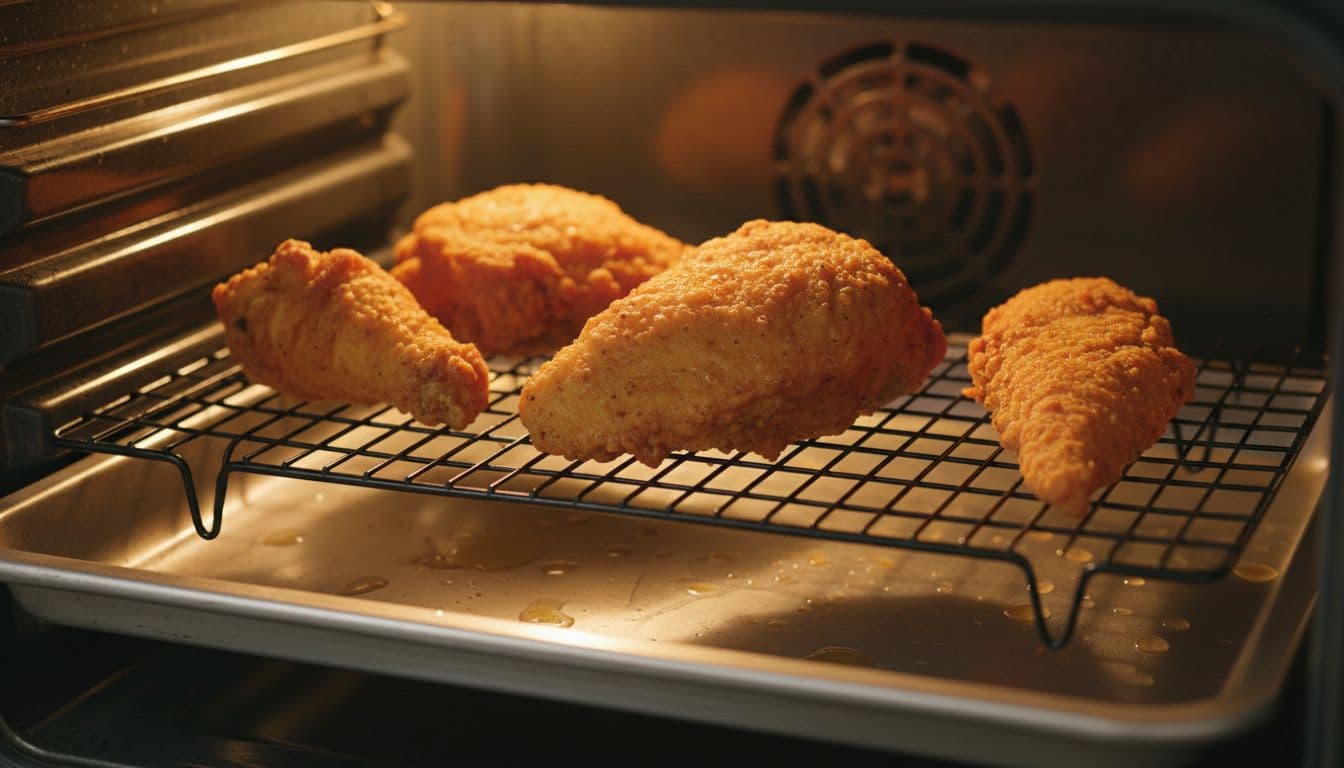
You need a rimmed baking sheet, an oven-safe wire rack, and an instant-read thermometer. The rack keeps the bottom crust above collected moisture. Without a rack, place the chicken directly on a lined sheet and turn each piece once.
- Heat the oven to 375°F. Keep the chicken refrigerated while the oven preheats; it does not need to sit at room temperature.
- Set a wire rack over a foil-lined baking sheet. Arrange the chicken in one uncrowded layer without stacking.
- Bake uncovered. Begin checking refrigerated wings at 10–12 minutes, drumsticks at 15–18 minutes, thighs at 15–20 minutes, and breasts at 18–22 minutes. These are starting ranges, not guaranteed finish times.
- Turn pieces halfway through if they are sitting directly on the sheet. On a rack, turning is optional but can help even the browning.
- Check several pieces. Insert the thermometer into the thickest meat without touching bone. Remove each piece only after it reaches 165°F; thick pieces may need longer.
If the breading darkens before the center is hot, reduce the oven to 350°F and continue checking. Do not cover the chicken because trapped steam softens the crust. For more detail on checking bone-in pieces, see the chicken-wing thermometer guide.
How to check the center without crushing the crust
Grip the chicken gently with tongs and guide the thermometer into the thickest meat. Keep the sensing tip clear of bone, the wire rack, and the baking sheet. On a thin boneless tender, entering from the side can help you reach the center instead of pushing through into the hot tray. Follow your thermometer’s minimum insertion-depth instructions.
Check each piece you plan to serve, especially when the tray contains different cuts. A hot, crackling coating can surround a cooler center. If a piece is below 165°F, put it back and check again after a few minutes. Avoid repeatedly cutting the chicken open to guess whether it is hot enough; a thermometer gives you a clearer answer.
Reheating a mixed batch without drying out the small pieces
Group similar sizes together on the rack so you can check them efficiently. Remove each finished piece when its thickest meat reaches 165°F instead of leaving every wing in the oven while a large breast catches up. Serve finished pieces promptly, and plan the rest of the meal so they are not waiting under a cover.
For a larger batch, use a second tray instead of packing the first one tightly. Leave space for hot air to move around both pans. If your oven browns unevenly, rotate the trays and swap their positions partway through. Check both trays separately; doubling the number of pieces does not mean doubling the reheating time.
What the rack does—and what it cannot fix
The rack lifts the breading above moisture and rendered fat on the sheet, helping the underside dry as it heats. It cannot remove all the moisture from a coating that has soaked in gravy or sauce. If you have no oven-safe rack, use the sheet-pan method and turn the pieces gently once; expect the bottom to be a little less crisp.
How to Reheat Fried Chicken in an Air Fryer
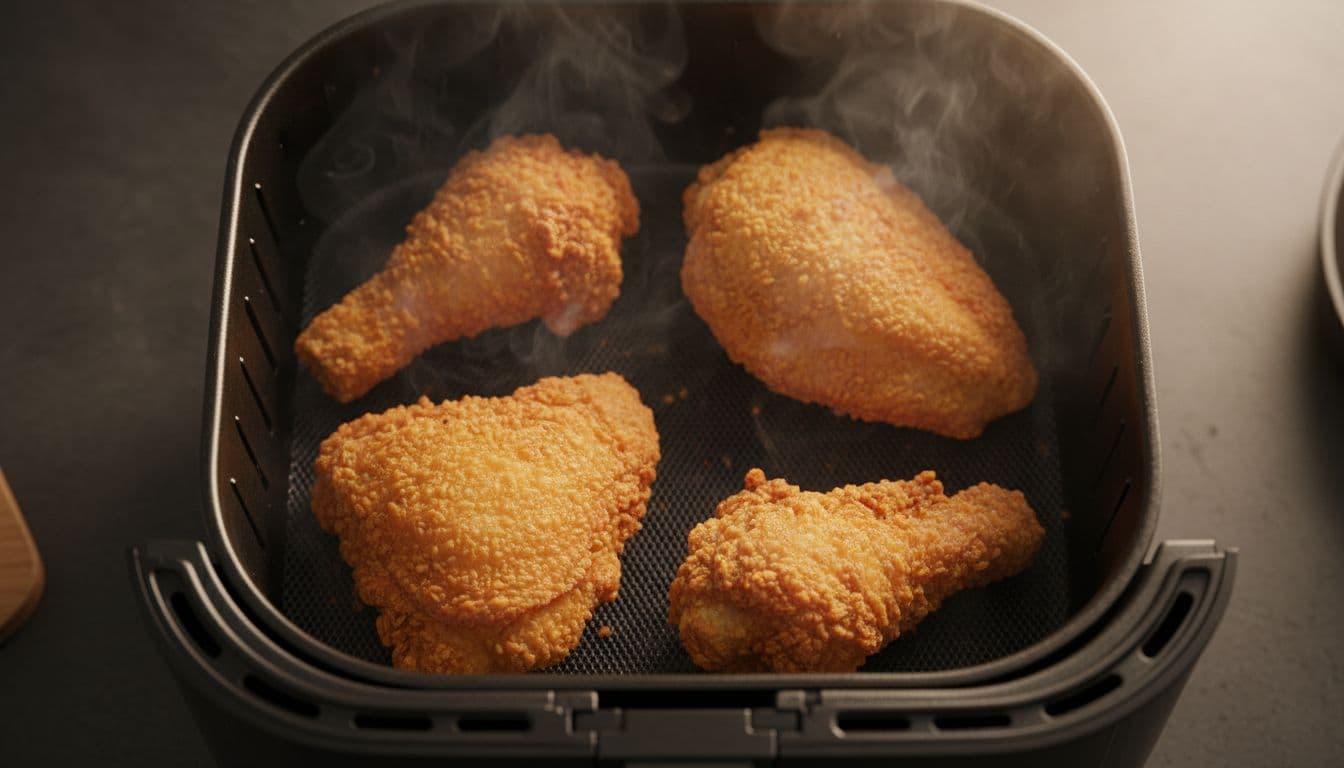
Use the air fryer for a single layer of pieces with space around them. Preheat to 375°F if your model recommends preheating.
- Wings: begin checking after 5–7 minutes.
- Drumsticks: begin checking after 7–8 minutes.
- Thighs: begin checking after 7–9 minutes.
- Breasts: begin checking after 8–10 minutes.
Turn the pieces once. Continue heating until the thickest meat in several pieces reaches 165°F without the probe touching bone. These are starting ranges, not finish times. If the coating browns too quickly, lower the air fryer to 350°F. Large bone-in breasts and thighs often heat more evenly in the oven.
Plain, sauced, and sweet-glazed chicken need different attention
For plain fried chicken, warm it first and add barbecue sauce, hot honey, or gravy just before eating. Serving sauce in a small bowl gives each person control and keeps more of the crust dry. Put juicy slaw, pickles, or dressed salad beside the chicken rather than directly underneath it.
If the chicken is already coated in a sweet glaze, start checking the surface earlier. The glaze can darken before the middle is hot. Reduce the oven or air fryer to 350°F if needed and keep checking the meat. A wet coating may stay softer even after the chicken reaches 165°F; do not keep cooking it indefinitely in pursuit of a completely dry crust.
For a dedicated small-batch method, see our air-fryer fried chicken reheating guide.
Microwave and Skillet Options
Microwave
A microwave heats quickly but usually leaves the crust soft. Place one or two pieces on a microwave-safe plate and cover them loosely with a paper towel. Heat at medium power in 30-second intervals, turning between intervals. Allow the standing time recommended for your microwave or product, then check more than one spot because microwaves can leave cold areas. The thickest meat must reach 165°F before serving.
A brief oven or air-fryer finish can dry the surface after microwaving, but the final chicken still needs to measure 165°F.
Skillet
A skillet is most useful for wings, tenders, and other small or boneless pieces. Lightly coat the pan with neutral oil and heat it over medium. Add the chicken in one layer and begin checking after 2–3 minutes per side. Lower the heat if the coating darkens before the center warms. Continue until the thickest meat reaches 165°F. Use the oven for thick bone-in pieces.
How to Reheat Frozen Fried Chicken
This method is for fully cooked fried chicken that you froze as leftovers. Commercial frozen breaded chicken may be raw even if it looks browned; follow its package cooking directions instead. You may thaw cooked leftovers in the refrigerator first, but never on the counter.
To reheat fully cooked leftovers directly from frozen, remove all packaging, place separated pieces on an oven-safe rack over a baking sheet, and heat uncovered at 375°F. Begin checking large bone-in pieces after about 30 minutes; small wings and boneless pieces need earlier checks. Some large pieces may take 30–40 minutes or longer. Cut, thickness, and starting temperature matter more than the estimate. Do not use this timing for a solid frozen block of chicken.
Turn pieces once if they are not on a rack. Continue until the thickest meat in every sampled piece reaches 165°F without the probe touching bone. If the coating browns too quickly, lower the oven to 350°F while the center finishes heating.
Troubleshooting Soggy, Dark, or Dry Chicken
- Soggy bottom: Use a wire rack, leave space between pieces, and keep the chicken uncovered.
- Coating getting too dark: Lower the oven or air fryer to 350°F and keep checking the center.
- Some pieces hot and others cold: Group similar cuts and remove smaller pieces as they reach 165°F.
- Meat drying out: Start checking early and stop heating each piece when it reaches 165°F.
- Crust still soft: Give safely heated chicken another minute or two of dry heat, watching closely.
- No wire rack: Use a lined sheet and turn each piece once. Do not stack or cover the chicken.
Storage and Food-Safety Rules
Refrigerate fried chicken within 2 hours of cooking or purchase, or within 1 hour when the surrounding temperature is above 90°F. Use shallow containers so leftovers cool promptly, and keep the refrigerator at 40°F or below.
Use refrigerated cooked chicken within 3–4 days. For longer storage, wrap the pieces well and freeze them for up to 4 months for best quality. Reheat only the portion you plan to eat; repeated heating mainly harms texture and adds unnecessary handling.
Reheat leftovers to 165°F. Discard chicken that spent too long at room temperature or has an uncertain storage history. A normal smell does not prove mishandled leftovers are safe, and reheating cannot reverse unsafe storage.
See the official FoodSafety.gov safe-temperature chart and cold-storage chart.
Common questions before you reheat fried chicken
Should I add oil, butter, or water?
Plain fried chicken usually has enough fat in its coating, so this oven method does not require more oil. Extra oil will not solve a cold center, and pouring water onto the breading works against a crisp finish. Start with the dry rack method and check the temperature early.
Can I wrap the pieces in foil?
You can line the baking sheet with foil beneath the rack for easier cleanup. Wrapping the chicken itself traps steam and softens the coating. If the crust is getting too dark, lower the heat while the center continues warming.
Does fried chicken need to come to room temperature first?
No. Use it straight from the refrigerator once the oven is ready. Bringing it to room temperature is unnecessary for this method and adds time out of refrigeration.
Can I use a toaster oven?
Yes, if the tray and an oven-safe rack fit with adequate clearance from the heating elements. Use the oven method, check earlier because the cavity is small, and follow the appliance instructions. Keep foil away from exposed elements and never cover the oven floor or air vents.
Why is the chicken hot but the coating still soft?
The crust may have absorbed moisture during storage, the pieces may be crowded, or a sauce may be keeping the surface wet. Separate the pieces and give safely heated chicken a brief uncovered finish while watching closely. If the meat is already drying out, serve it; extra time cannot restore every coating to its original texture.
What can I serve with the reheated chicken?
Choose sides that can be ready before the chicken finishes: a crisp salad, slaw served separately, bread, or pickles. For a sandwich, slice a fully reheated boneless piece and assemble it just before eating. Keeping the warm coating away from wet fillings until serving helps the sandwich stay crisp.
For the handling guidance behind this method, see FoodSafety.gov’s thermometer, chilling, and thawing advice. The reheating times here are practical checking estimates; a thermometer determines readiness.
Printable oven reheating recipe
Keep the temperature checks and troubleshooting notes beside you while cooking. Use Print Recipe on the card for a dedicated print view, or choose your browser’s Save as PDF destination.
THE COMPLETE RECIPE
Oven-Reheated Fried Chicken
Yield: 4 pieces

Ingredients
- 4 pieces fully cooked fried chicken Refrigerated, safely stored, and preferably similar in size. No additional oil or seasoning is required.
Equipment
- 1 Rimmed baking sheet Large enough to keep the chicken in one layer.
- 1 oven-safe wire rack Must fit securely inside the baking sheet.
- 1 instant-read food thermometer Follow the probe’s minimum insertion-depth instructions.
- 1 pair of tongs
- aluminum foil Optional, for lining the sheet beneath the rack.
Instructions
- Preheat the oven. Heat a conventional oven to 375°F (190°C) with a shelf in the center. Keep the chicken refrigerated while the oven heats.
- Set up the tray. Line a rimmed baking sheet with foil if desired, then set an oven-safe wire rack on top. Arrange the cold chicken on the rack in a single layer with space between pieces. Remove all takeout packaging.
- Reheat uncovered. Place the tray on the center shelf. Start checking wings at 10–12 minutes, drumsticks at 15–18 minutes, thighs at 15–20 minutes, and breasts at 18–22 minutes. These are first-check estimates, not guaranteed finish times; thick pieces may take longer than 25 minutes.
- Measure every piece. Insert the thermometer into the thickest meat, keeping the sensing tip away from bone and the rack. For thin boneless pieces, insert from the side. Continue heating any piece below 165°F (74°C), checking again every few minutes. Remove pieces individually once they reach 165°F.
- Adjust for darkening crust. If the breading is getting too dark before the middle is hot, reduce the oven to 350°F (175°C) and continue heating to 165°F. The color or crunch of the crust does not tell you whether the center is ready.
- Serve promptly. Transfer to clean plates in one layer. Add sauce just before eating, or serve it on the side. Avoid piling the hot pieces into a covered bowl, which traps steam against the coating.
Notes
Rate This Recipe
Made this recipe? Choose a star rating in the comment form and share how it turned out. Your cooking time and any ingredient changes can help the next reader.
Rate This Recipe