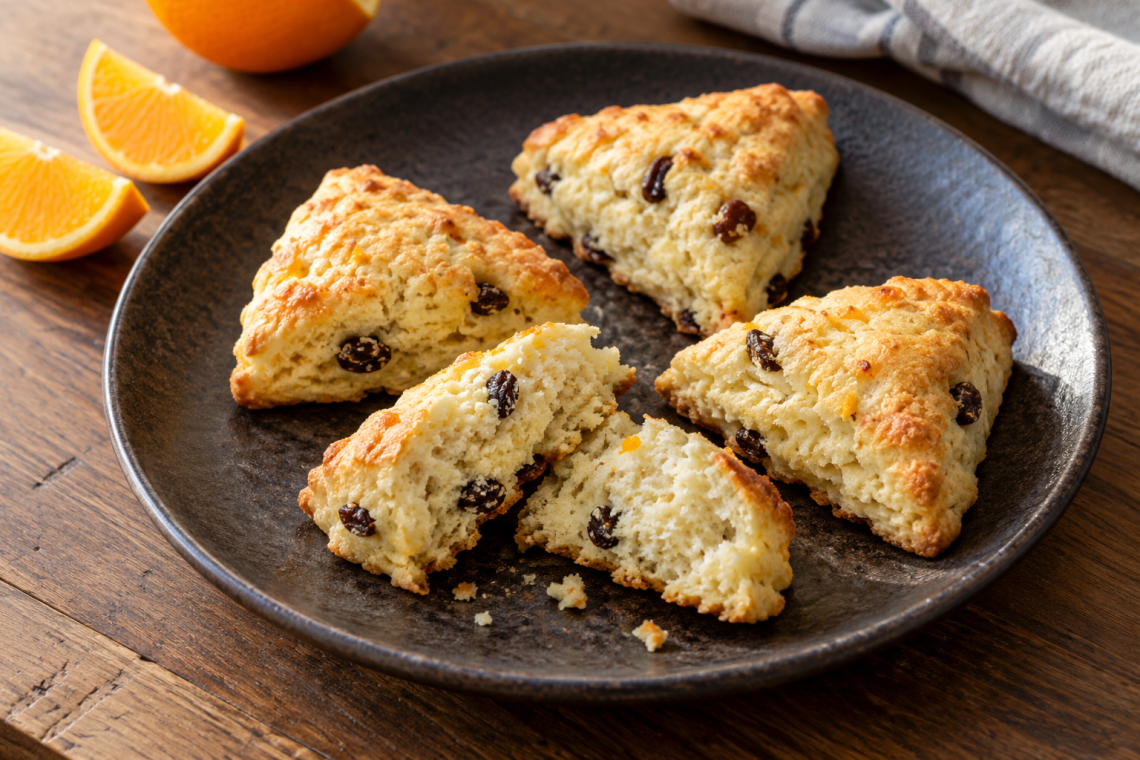
Small batch orange raisin scones without cream are useful when you want a fresh bake for a few people and have milk in the refrigerator. This recipe makes four small triangular scones with orange zest, soft raisins and a lightly sweet crumb. Cold butter supplies richness; heavy cream is unnecessary.
The dough should come together with minimal handling. Keeping the butter cool and leaving small pieces in the flour gives the scones a more interesting texture than working everything into a smooth paste. A short chill after shaping helps them hold their edges while the oven finishes heating.
Jump to recipe · Rate this recipe
Plan the chill as well as the bake
Four small scones
One small round makes four triangular wedges. Serve one per person with brunch, or share the batch between two people for a more substantial breakfast.
About 58 minutes, including the pauses
Prep 15 minutes · Chill 15 minutes · Bake about 18 minutes · Cool 10 minutes. Baking can take 16–20 minutes; use the set sides and lightly golden base to judge readiness.
The hands-on portion is short, but the dough should not be rushed straight into an underheated oven. Have the serving plates ready while the scones cool; very hot scones can seem gummy when split too soon.
Use a small baking sheet, parchment, a mixing bowl, a pastry cutter or your fingertips, a fine grater and a sharp knife. A kitchen scale is especially helpful for this small batch because a modest measurement error makes a larger proportional difference than it would in a dozen scones.
Arrange a cold-dough workspace
Clear enough counter space for the small round before opening the milk. Put the lined sheet, knife and a light dusting of flour nearby, then return the measured butter to the refrigerator until the dry mixture is ready. This reduces the time spent handling the butter while looking for equipment. If the counter is warm from an oven or dishwasher, choose another working spot so the shaped dough can remain cool during the short transfer to the sheet.
Measure the dough and finishing ingredients
Flour mixture and orange zest
- 1 cup (120 g) all-purpose flour
- 2 tablespoons (25 g) granulated sugar
- 1 teaspoon baking powder
- ⅛ teaspoon fine salt
- 1 teaspoon finely grated orange zest
Cold butter, fruit and milk
- 2 tablespoons (28 g) cold unsalted butter, cut into small cubes
- ¼ cup (40 g) raisins
- ¼ cup (60 ml) cold whole milk, plus 1–2 teaspoons only if needed
For the tops
- 1 teaspoon milk for brushing
- 1 teaspoon coarse or granulated sugar for the tops, optional
Zero the scale with the empty bowl in place, then weigh 120 g flour; an extra 10 g is about 8% more in this small batch. If measuring by volume, spoon the flour gently into the cup and level it. The King Arthur Baking ingredient chart lists 120 g for a cup of all-purpose flour. Use level measuring spoons for the baking powder and salt. Packing the cup can make this small dough dry enough to tempt you into adding excessive milk.
Prepare the orange zest and raisins
Zest for flavor
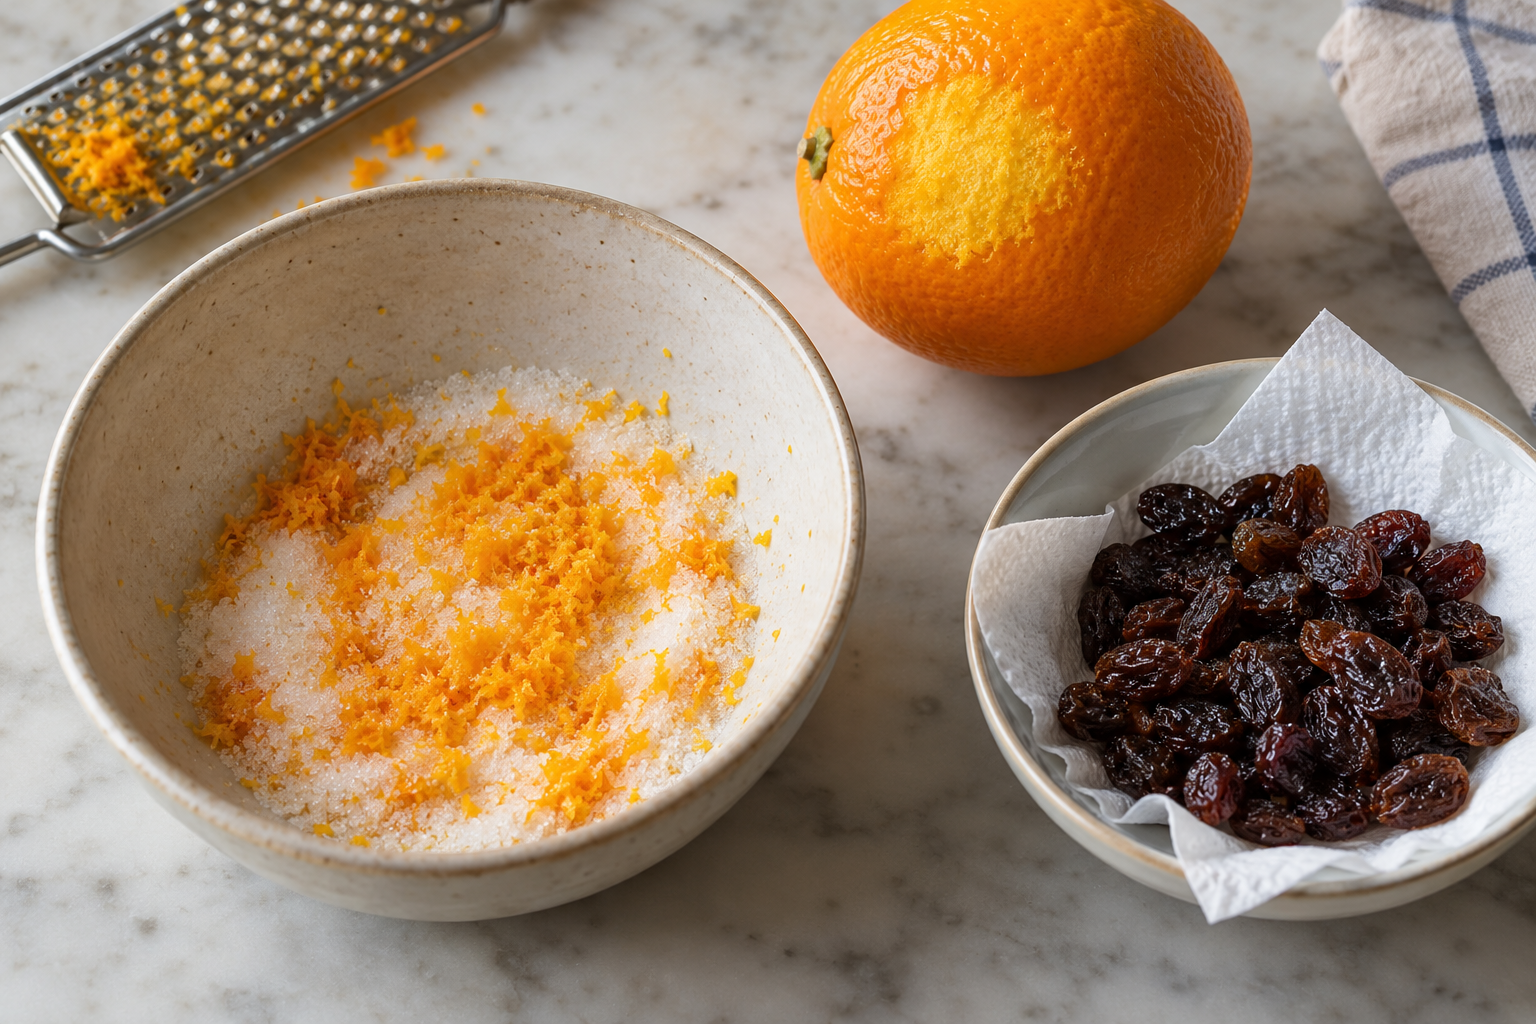
Wash and dry the orange, then grate only the colored surface of the peel. The white layer underneath can taste bitter. Rub the zest into the sugar with your fingertips before adding the other ingredients. This distributes the fragrant peel and reduces the chance of one scone having all the orange flavor.
Orange juice is not included because zest gives citrus flavor without adding a meaningful amount of liquid. Pouring juice into the measured milk changes the dough’s moisture and acidity. If you want a more pronounced orange finish, serve the baked scones with orange marmalade rather than improvising extra liquid in the bowl.
Raisins for even bites
Soft raisins can go directly into the flour. If yours are hard and dry, cover them with hot water for 5–10 minutes, then drain thoroughly, blot them dry and let them cool completely before they meet the butter-and-flour mixture. This can be done while you weigh the other ingredients. Do not pour the soaking water into the dough. Cooling prepared fruit helps avoid softening the cold butter, a principle also explained in King Arthur Baking’s guide to adding fruit to scones.
Very large raisins can be roughly chopped after soaking. The goal is several small fruit pieces in each scone, not a large cluster that makes the dough difficult to cut. Dried cranberries or currants are possible variations, but their sweetness and size differ; keep the weight the same and expect a changed flavor.
Check the fruit on the outside as well as inside
Separate raisins that are stuck together before they meet the dough. A compact cluster can leave one wedge heavily filled and another nearly plain. After cutting, look at the pointed ends and cut faces for fruit hanging completely outside the dough. Ease those pieces back toward the surface without kneading the wedge again. You are protecting exposed fruit from drying, not trying to hide every raisin or make the outside perfectly smooth.
Make small batch orange raisin scones without cream
- Prepare the sheet. Line a small baking sheet with parchment. Set an oven rack in the middle. Keep the butter and milk chilled until needed.
- Combine the dry ingredients. Rub the zest into the sugar in the bowl. Add the flour, baking powder and salt, then whisk or stir thoroughly. Make sure the baking powder is evenly distributed.
- Work in cold butter. Add the butter cubes. Cut them into the flour with a pastry cutter, or rub quickly with your fingertips. Stop when the mixture has small flakes and a few pea-sized butter pieces. It should not become a greasy paste.
- Add fruit and milk. Stir in the prepared raisins, then pour in the ¼ cup milk. Fold with a fork or spatula just until shaggy clumps form. Squeeze a little dough together: it should hold. If dry flour still falls away, add another teaspoon of milk and reassess.
- Shape with restraint. Tip onto a lightly floured surface. Press loose pieces together, then pat into a round about 5 inches wide and ¾ inch thick. Fold it in half once if needed to gather it, but do not knead repeatedly.
- Cut and chill. Cut into four equal wedges with a sharp knife, pressing straight down. Transfer to the lined sheet with about 1 inch between pieces. Refrigerate for 15 minutes while heating the oven to 400°F / 200°C.
- Brush and bake. Brush the tops lightly with the remaining teaspoon of milk and add optional sugar. Bake for 16–20 minutes, until the tops and bottoms are lightly golden and the sides look set rather than wet.
- Cool. Transfer to a rack and wait 10 minutes before splitting. Serve warm, when the outer edges have a little crispness and the middle has settled.
Move the wedges with their thickness intact
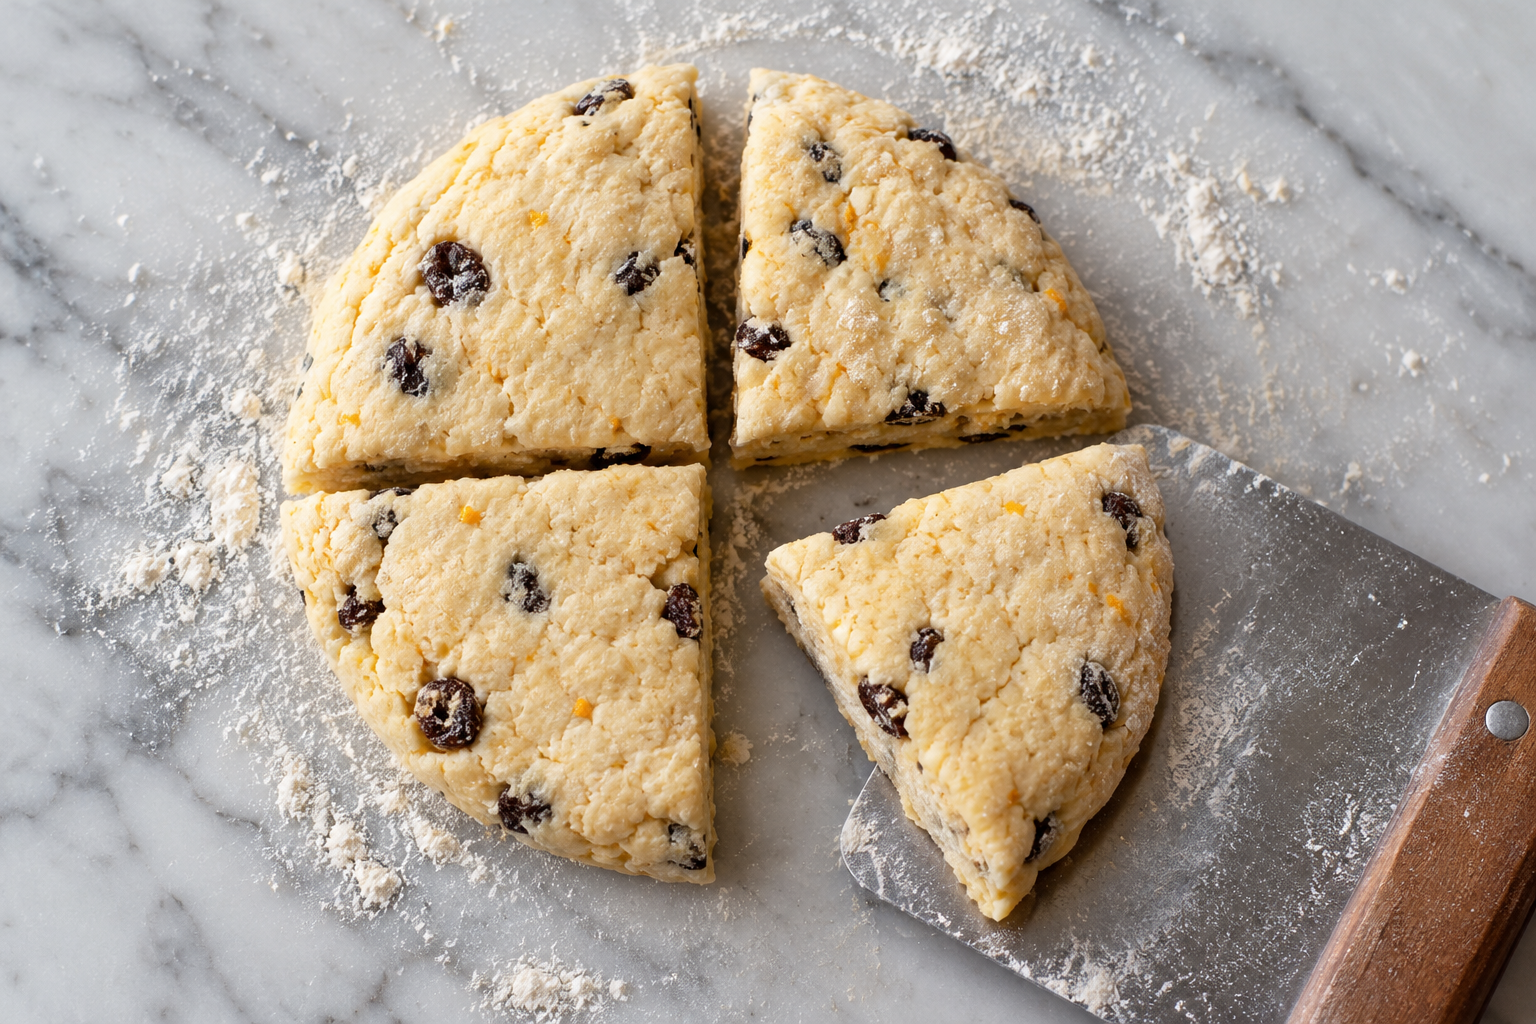
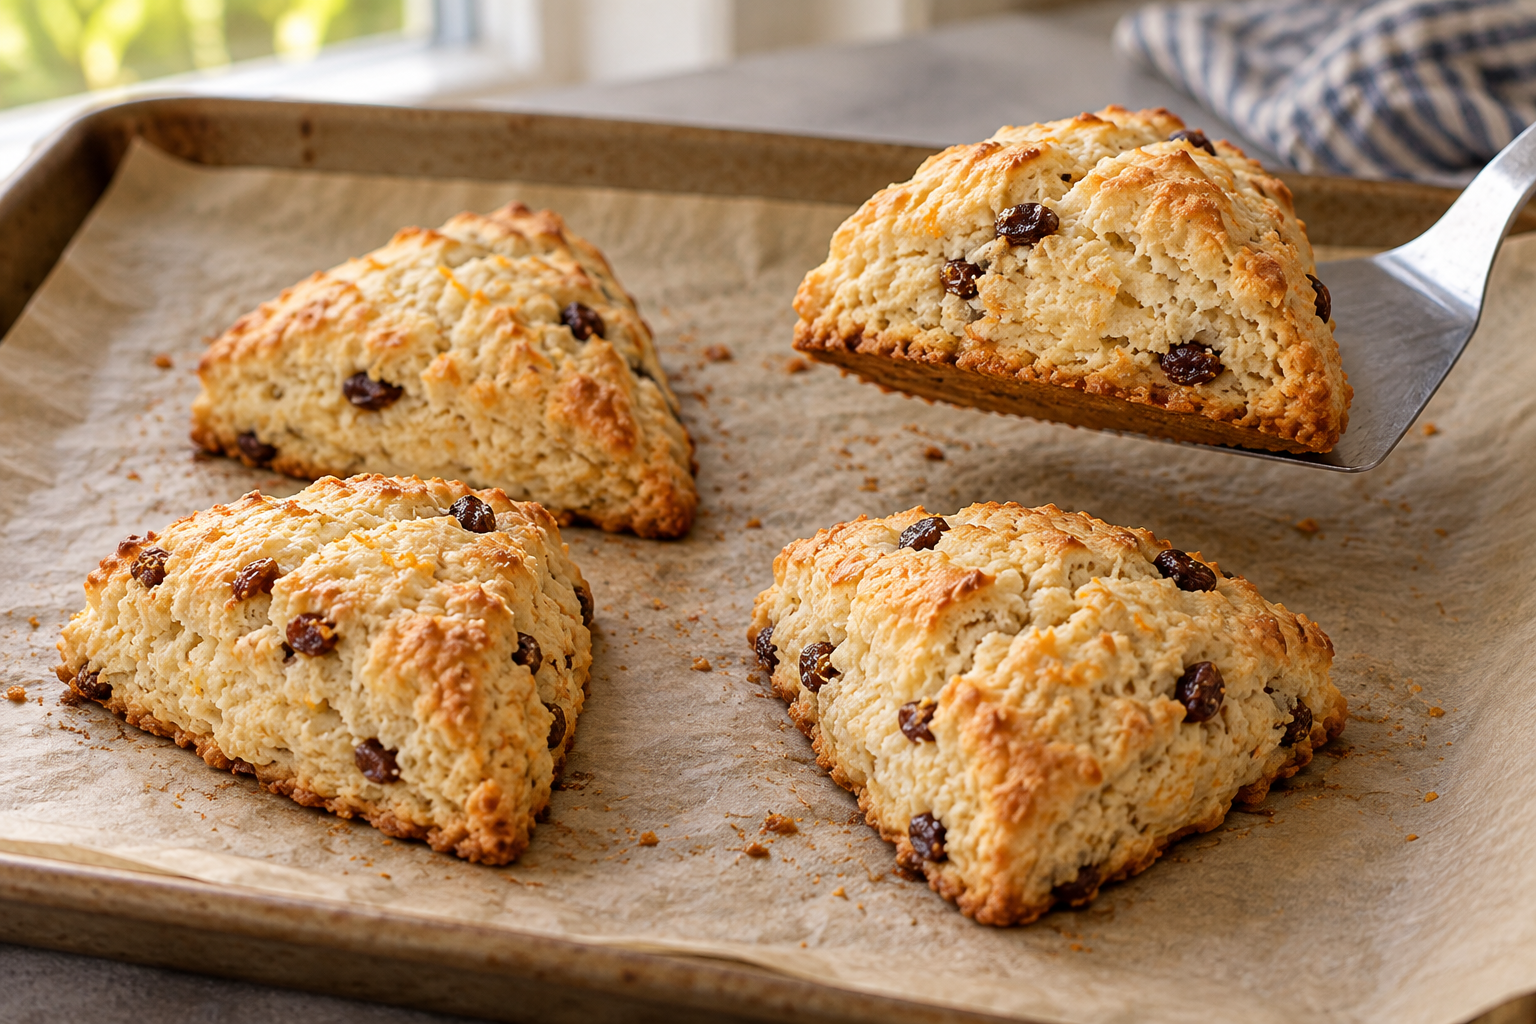
Slide a broad spatula or the flat side of a bench scraper beneath a cut wedge and support it while moving it to the sheet. Lifting by the pointed end can stretch that end thin enough to brown sooner than the center. Leave the cut sides visible rather than smoothing them repeatedly with your fingers. If loose crumbs remain on the board, press them onto a bare area gently instead of adding another full round of kneading.
The gaps between wedges affect the crust as well as their appearance. Separated sides are exposed to the oven and can brown, while touching sides stay softer and paler. Keep the listed 1-inch spacing for this batch instead of gathering the pieces back into a closed round. King Arthur Baking’s shaping guide explains this texture difference; its alternative shapes are not a reason to change this recipe’s four-wedge yield or thickness.
Keep the butter, moisture and edges under control
Keep the butter in pieces
Butter should still be visible when the milk goes in. Warm hands can soften it quickly, especially in a warm kitchen. If the bowl starts feeling greasy, place it in the refrigerator briefly before continuing. Adding more flour to absorb melted butter changes the balance instead of correcting the temperature.
Add milk slowly at the end
Different flour brands and measuring habits affect how much liquid the dough seems to need. Start with the listed quantity and use the extra teaspoon only for loose, dry flour that will not hold together. A dough that sticks slightly is easier to manage than one made wet enough to pour.
Cut cleanly
A sharp downward cut disturbs the edges less than sawing back and forth. Avoid mashing the wedges flat while moving them. Their thickness helps determine how long the middle takes to bake, so keep all four approximately equal.
Diagnose the dough and the finished scone
| Problem | Likely cause | Useful correction |
|---|---|---|
| Dough crumbles apart | Too much flour or not enough milk | Add milk a teaspoon at a time and press gently. |
| Dough spreads | Butter warmed or excess liquid | Chill shaped wedges and measure carefully next time. |
| Scones are tough | Too much kneading or handling | Stop as soon as the shaggy dough holds together. |
| Raisins burn on the surface | Dry fruit protruding from the dough | Tuck obvious exposed raisins slightly inward before baking. |
If the tops look ready but the sides remain doughy, give the scones another two minutes and check again. A pale patch where two wedges touched is different from shiny, raw dough. An uneven oven may require a single rotation near the end of baking.
Compare the underside with the side seam
Use a spatula to lift one scone slightly when checking the bake. A deeply browned bottom with pale, unset sides suggests that the lower surface is getting ahead of the middle. Keep the next check focused on the sides as well as the top. After cooling, split through the center with a gentle sawing motion so you can see the crumb without compressing it into a dense line.
Serve four or plan the next batch
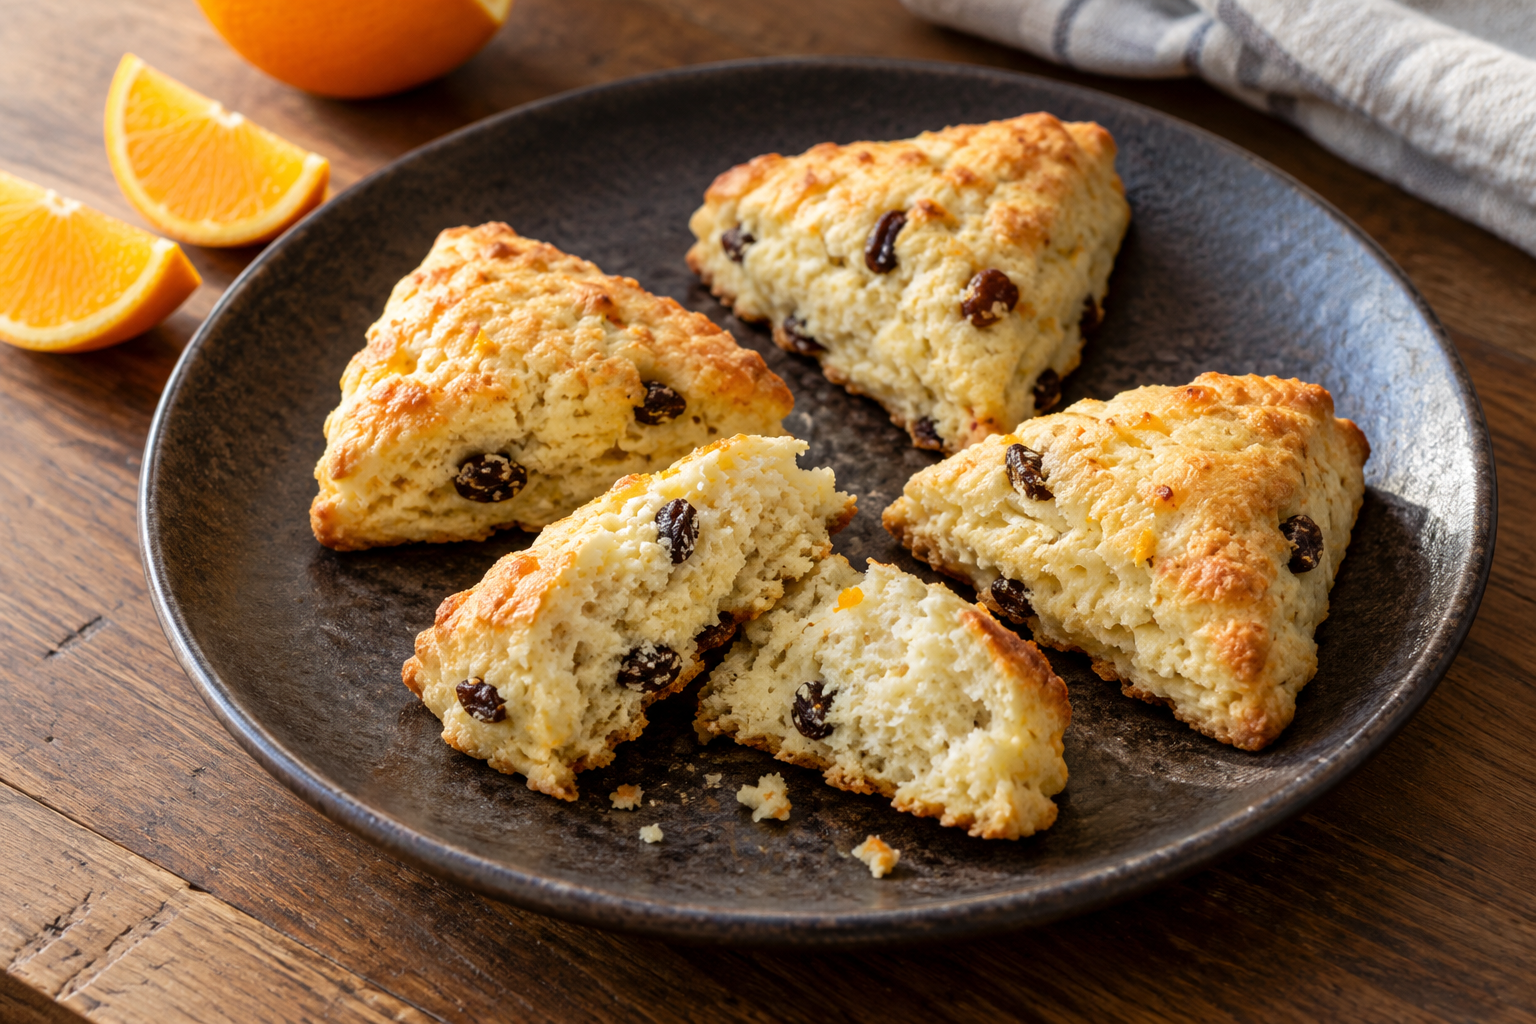
Serve with butter, marmalade or a spoonful of jam. They are lightly sweet enough to accompany eggs at brunch without feeling like a heavily iced pastry. For a small afternoon plate, split one scone and add a few orange segments alongside.
These scones are best on the day they are baked. Once completely cool, store in an airtight container at cool room temperature for up to two days, or freeze individually for up to two months for quality. In a hot or humid kitchen, freeze what you will not eat promptly. Warm thawed scones in a 300°F / 150°C oven for several minutes, checking before they dry out.
To make eight, double the measured ingredients and shape two separate rounds. This keeps the dough thickness familiar. Use a larger sheet with room around the wedges, and begin checking at the original time rather than doubling it.
For a citrus bake with a different crumb, try cranberry orange muffins with Greek yogurt. For a brunch prepared in advance, the small apple cinnamon French toast casserole uses a longer soaking method.
Dough checkpoints from bowl to cooling rack
- After cutting in the butter: keep a mixture of small crumbs and a few visible flakes. A perfectly uniform, sandy mixture has lost the larger butter pieces that help form tender layers.
- After adding the milk: stop while the dough still looks shaggy. Press a handful gently; if it holds together, do not add more liquid merely to make the bowl look neat.
- After folding: the dough should be cohesive but not smooth like bread dough. Use only enough flour on the counter to prevent sticking, because extra flour can make a four-scone batch noticeably dry.
- Before baking: the shaped pieces should feel cool and firm. If the butter has softened or the dough looks glossy, chill the tray again rather than compensating with a hotter oven.
- After baking: look for set sides, lightly browned bottoms and a center that is no longer wet. Let the scones rest on the pan briefly before moving them to a rack.
Raisins can pull moisture from the crumb when they are very dry. If yours are hard, soften them briefly, then drain and blot them completely before mixing. Wet raisins add unmeasured water, while warm raisins can soften the butter. The orange zest should be rubbed into the sugar before the liquid goes in so its fragrant oils spread throughout the small batch.
Wait until the scones are cool before adding any glaze. A warm surface melts the coating into a thin translucent layer; a cool surface holds a more defined finish. For serving without glaze, a little softened butter or orange marmalade adds moisture without changing the dough itself.
Frequently asked questions
Can I use 2% milk?
Yes, it is a reasonable substitution for whole milk, though the result may feel a little less rich. Start with the same quantity and judge the dough before adding more.
Are these dairy-free because there is no cream?
No. Small batch orange raisin scones without cream still contain butter and milk. A dairy-free version would need suitable substitutions and separate validation.
Can I leave out the raisins?
Yes, but the yield by weight will be smaller and the flavor less sweet. Keep the dough thickness similar and begin checking for browning a little earlier.
Do I need an egg?
No egg is included in this formula. The flour, butter and milk form the dough; adding an egg would introduce extra liquid and require rebalancing.
Can I use self-rising flour?
It already contains leavening and salt, with amounts that vary. Use the listed all-purpose flour for the reference version rather than adding self-rising flour on top of the baking powder.
Can I freeze unbaked wedges?
That variation needs a timing check from frozen. Freezing the fully baked, cooled scones is the more predictable option for this recipe.
Small-Batch Orange Raisin Scones Recipe Card
Small-Batch Orange Raisin Scones Without Cream
Ingredients
Equipment
Method
- Line a small baking sheet with parchment. Set an oven rack in the middle. Keep the butter and milk chilled until needed.
- Rub the zest into the sugar in the bowl. Add the flour, baking powder and salt, then whisk or stir thoroughly. Make sure the baking powder is evenly distributed.
- Add the butter cubes. Cut them into the flour with a pastry cutter, or rub quickly with your fingertips. Stop when the mixture has small flakes and a few pea-sized butter pieces. It should not become a greasy paste.
- Stir in the prepared raisins, then pour in the ¼ cup milk. Fold with a fork or spatula just until shaggy clumps form. Squeeze a little dough together: it should hold. If dry flour still falls away, add another teaspoon of milk and reassess.
- Tip onto a lightly floured surface. Press loose pieces together, then pat into a round about 5 inches wide and ¾ inch thick. Fold it in half once if needed to gather it, but do not knead repeatedly.
- Cut into four equal wedges with a sharp knife, pressing straight down. Transfer to the lined sheet with about 1 inch between pieces. Refrigerate for 15 minutes while heating the oven to 400°F / 200°C.
- Brush the tops lightly with the separate teaspoon of milk, then sprinkle the optional sugar evenly over the wedges. Bake for 16–20 minutes, until the tops and bottoms are lightly golden and the sides look set rather than wet.
- Transfer to a rack and wait 10 minutes before splitting. Serve warm, when the outer edges have a little crispness and the middle has settled.