PUMPKIN / OATS / WALNUTS / EIGHT SOFT ROUNDS
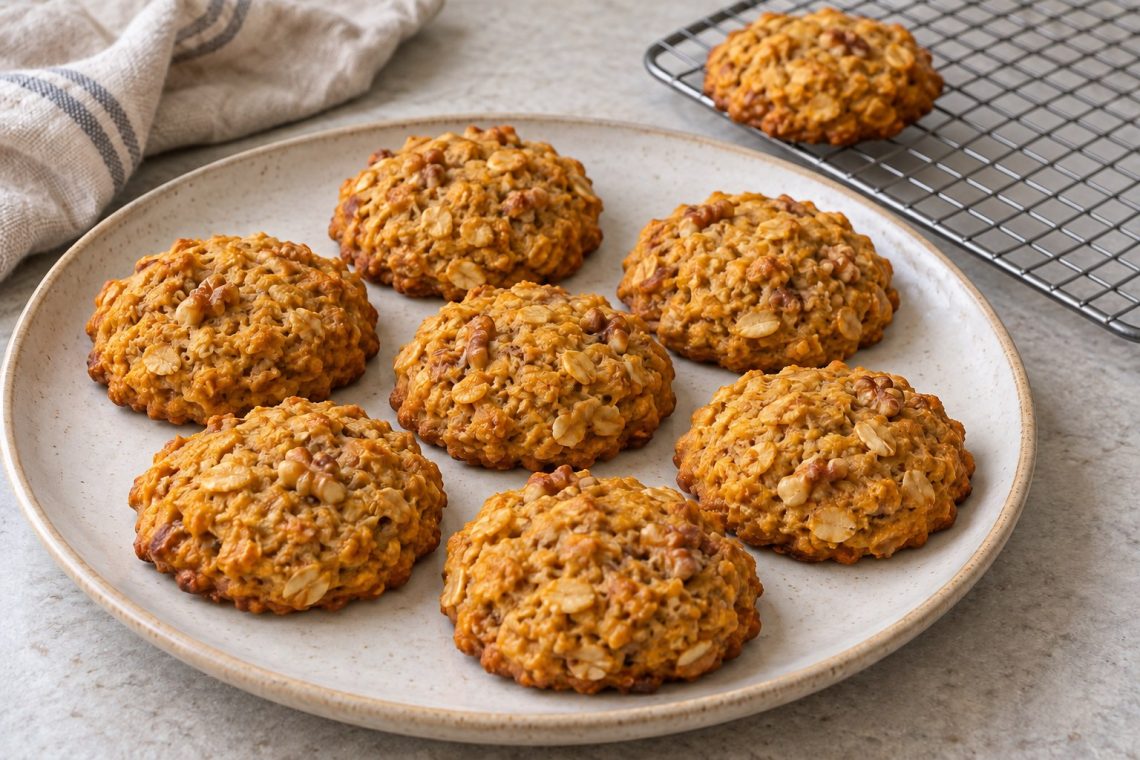
These pumpkin walnut breakfast cookies are soft, lightly sweet rounds with visible oats, chopped walnuts, and a little cinnamon. Pumpkin keeps the centers moist, while flour and oats give them enough structure to lift after cooling. There are no eggs, and the texture is closer to a tender breakfast bite than a crisp bakery cookie.
The dough is thick and does not spread much on its own. Portion it evenly, flatten each mound before baking, and let the cookies settle before moving them. Those steps matter more than chasing a deeply browned top, which can leave the outside dry before the soft center has had time to set.
Pumpkin walnut breakfast cookies: batch size and timing
- Prep
- 10 minutes
- Bake
- About 20 minutes
- Additional time
- 20 minutes: 5 minutes dough rest and 15 minutes cooling
- Total
- About 50 minutes
- Yield
- 8 cookies; 4 servings of 2 cookies
Allow a little longer cooling before storage if the centers still feel warm. Use a rimmed sheet pan about 13 by 18 inches, parchment paper, two mixing bowls, a spatula, measuring spoons, and a cooling rack. A kitchen scale helps divide the small batch evenly, but is not essential.
Ingredients for eight soft breakfast cookies
- 3/4 cup old-fashioned rolled oats, about 60 g
- 1/2 cup all-purpose flour, 60 g, spooned into the cup and leveled
- 1/2 cup plain canned pumpkin puree, about 120 g
- 2 tablespoons maple syrup
- 1 tablespoon neutral oil, such as canola or sunflower oil
- 1/4 cup walnuts, about 28 g, chopped into small pieces
- 1/2 teaspoon baking powder
- 1/2 teaspoon ground cinnamon
- 1/8 teaspoon fine salt
- 1/4 teaspoon vanilla extract
Choose plain pumpkin puree
Use pumpkin puree rather than pumpkin pie filling. Pie filling already contains sweeteners and seasonings, so it changes the balance of this small batch. Stir the puree before measuring if liquid has collected at the top.
The puree should mound softly on a spoon rather than pour like juice. Homemade pumpkin puree can work, but excess water makes the dough harder to shape and the centers slower to set. Drain a loose puree before measuring instead of compensating with a large amount of extra flour.
Keep the oats visible and measure flour lightly
Old-fashioned rolled oats give a noticeable oat texture. Steel-cut oats are too firm for this short bake and should not be substituted directly. Quick oats can make a softer, more uniform cookie, but they may thicken the dough differently during its rest.
Use a scale for the flour if possible. If measuring by volume, loosen the flour, spoon it into the cup, and level the top. Scooping firmly from the bag can add enough extra flour to make these cookies dry. Baking powder supplies a modest lift; it will not turn the moist dough into a tall cake.
Mix, flatten, and bake the small batch
- Prepare the oven and tray. Heat the oven to 350°F (175°C). Line the sheet pan with parchment. Position a rack near the middle of the oven so the bottoms do not sit too close to the lower heating element.
- Combine dry and wet ingredients separately. Stir the oats, flour, baking powder, cinnamon, and salt together in one bowl, breaking up any flour lumps. In the second bowl, mix the pumpkin, maple syrup, oil, and vanilla until smooth.
- Make the dough and let it rest. Fold the dry mixture into the pumpkin mixture just until no dry flour remains. Fold in the chopped walnuts. Leave the dough for 5 minutes so the oats can absorb some moisture. It should be thick, sticky, and scoopable, not pourable.
- Portion and flatten. Divide into eight equal mounds, about 40 g each or a heaped 2 tablespoons. Place them at least 1 inch apart. With the back of a slightly damp spoon, flatten each to roughly 2 1/2 inches across and 1/2 inch thick, smoothing ragged edges.
- Bake until set. Bake for about 18–22 minutes, checking at 18 minutes. The tops should lose their wet shine, the edges should look set, and the bottoms should be lightly golden; lift one edge with a spatula to check the underside. If a cookie is very thick, it may need longer; do not remove the batch with visibly wet dough in the centers.
- Cool before lifting. Leave the cookies on the tray for 5 minutes, then move them carefully to a rack for about 10 minutes before serving. The centers should be soft but cohesive. Cool completely before packing or storing, allowing more time if they are still warm.
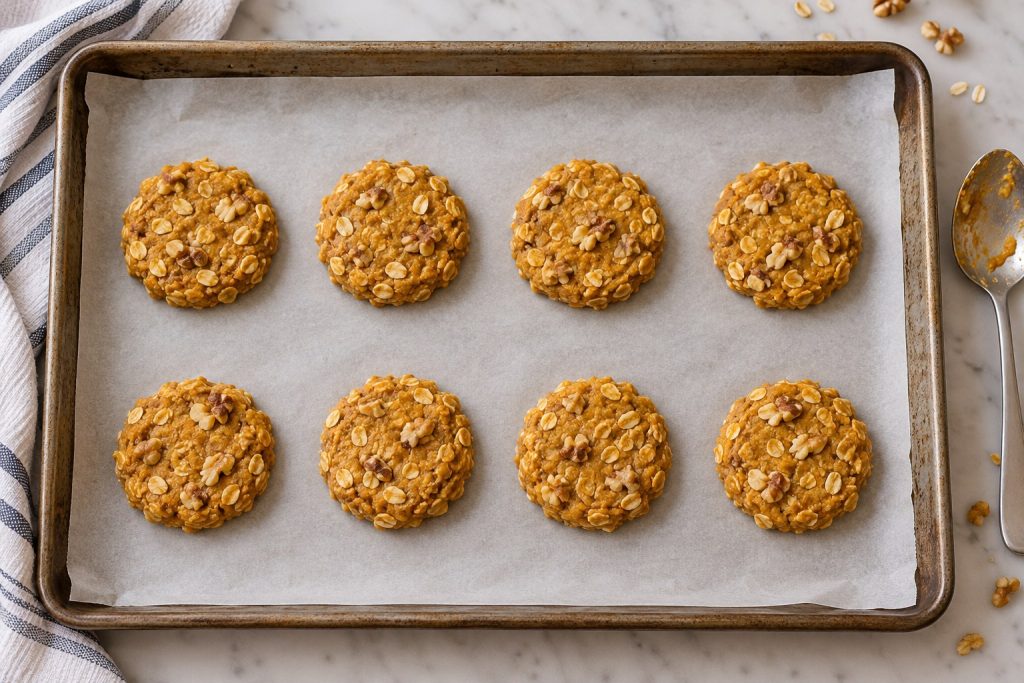
What a properly baked soft cookie looks like
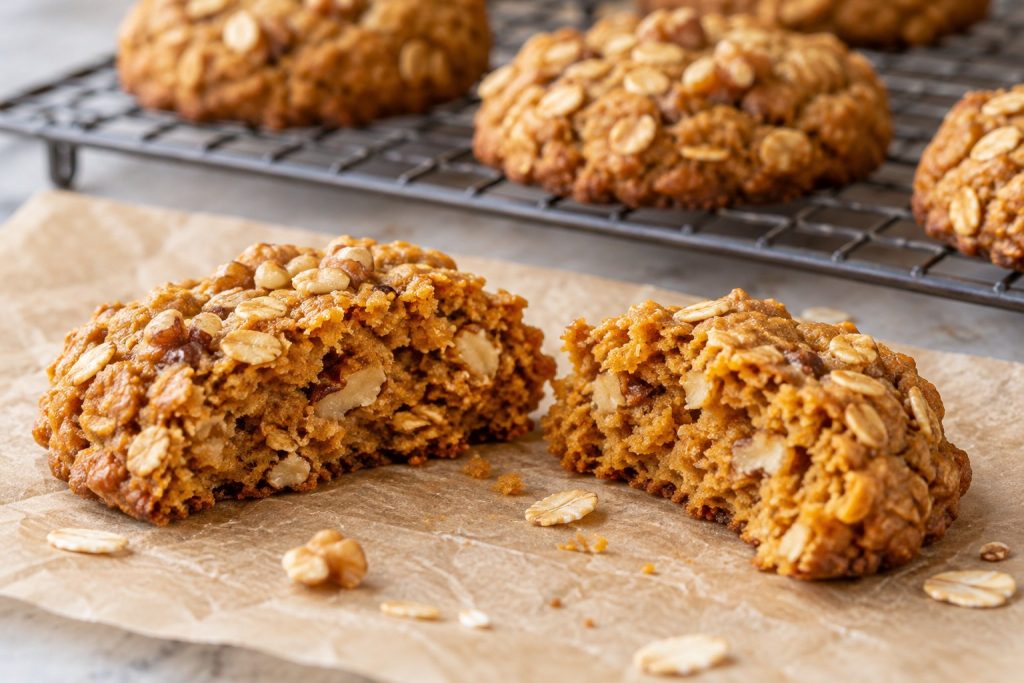
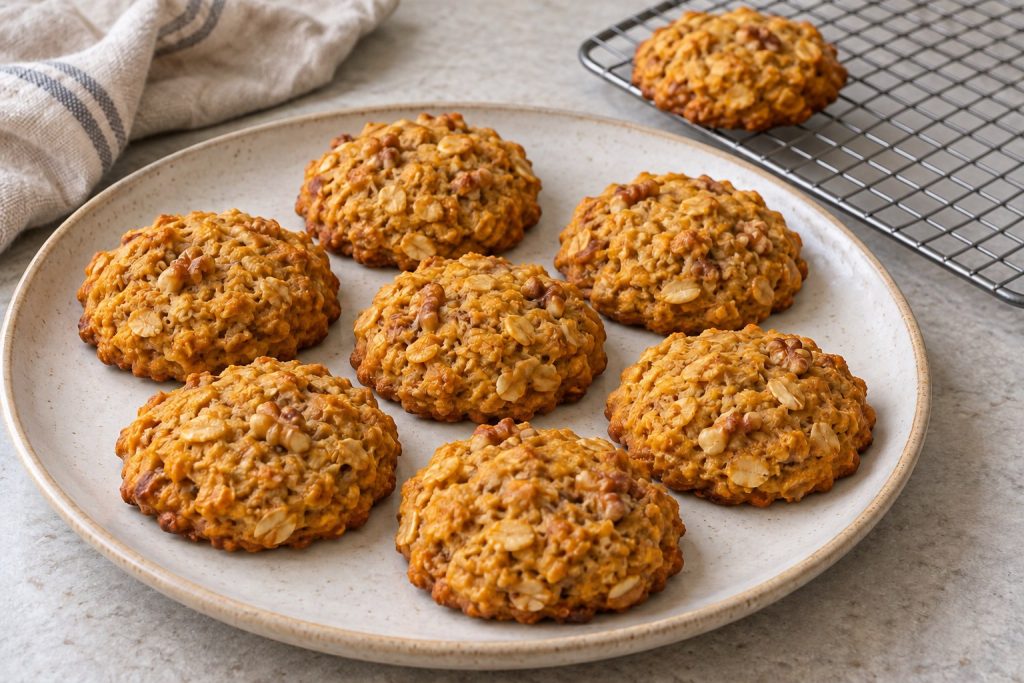
Expect pale orange-brown tops, visible oat flakes, and a lightly colored base. A deep brown top is not the goal. Once the cookie has cooled enough to handle, the center should look moist and set, with no raw-looking flour paste or wet pocket.
If you are unsure, split one cookie after its short tray rest. A center that is still visibly wet needs more baking; return the remaining cookies to the oven and check again after a few minutes. A soft center alone is not a fault in a pumpkin cookie, so judge whether it holds together rather than expecting a dry crumb.
Do not taste the unbaked dough, even though it contains no eggs. The FDA’s flour guidance explains that raw flour can carry harmful bacteria and that dough containing it should be cooked before eating. Wash bowls and utensils after handling the raw dough.
Fix wet dough, dry cookies, and crumbling edges
| Problem | What helps |
|---|---|
| Dough is too loose to mound | Give it another 5 minutes to hydrate. If still pourable, check whether the pumpkin was unusually watery. |
| Dough looks dry or crumbly | Fold in water 1 teaspoon at a time, only until it holds together. Avoid packing the flour when measuring. |
| Cookies break when moved | Leave them on the tray longer and lift with a thin spatula; hot cookies are more fragile. |
| Edges dry before the center sets | Flatten more evenly next time and avoid oversized mounds. Cover loosely if extra center baking is needed. |
| Walnuts fall away from the edges | Chop them smaller and press loose pieces gently into the dough before baking. |
On a small screen, scroll the table sideways to see every column.
Walnut size and useful substitutions
Chop the walnuts into pieces around 1/4 inch or smaller. Large halves interrupt the soft dough and can make the cookies split when lifted. Small pieces distribute crunch through each bite without needing more nuts.
Pecans can replace walnuts in the same amount. You can also leave out the nuts for a softer cookie; do not replace their full volume with extra flour. If avoiding an ingredient for an allergy, check labels and preparation needs for the person eating them.
For a different spice profile, use a small pinch of ground ginger alongside the cinnamon. Stronger spices are easier to add than remove, so keep additions modest. The vanilla can be omitted without affecting the dough structure.
Honey changes the flavor and may make the cookies feel stickier than maple syrup. Increasing the liquid sweetener substantially changes the dough’s moisture, so serve with a little extra sweetness at the table instead of pouring several more tablespoons into the mix.
How to serve a lightly sweet breakfast cookie
Serve pumpkin walnut breakfast cookies slightly warm or cool, usually two per person with fruit or another breakfast item. They are easy to portion as a snack, but their soft texture is better protected in a small rigid container than loose in a bag.
If you want another egg-free bake, try eggless applesauce muffins. For a savory way to use the remaining plain canned pumpkin, pumpkin black bean soup without cream takes the ingredient in a different direction.
Keep the soft cookies fresh after cooling
Cool in a single layer so steam can escape, then place in an airtight container. For this moist pumpkin version, refrigerate for longer storage and separate stacked layers with parchment to prevent sticking.
Use within 3–4 days, keeping the refrigerator at 40°F or below. Refrigerate promptly after cooling, within 2 hours of baking, or 1 hour in temperatures above 90°F, following USDA handling guidance. Do not seal the cookies while hot and leave the container on the counter overnight.
For freezing, place cooled cookies in a single layer until firm, then transfer to an airtight freezer container with parchment between layers. Thaw in the refrigerator. They can be eaten cool; warming is optional and should be gentle so the soft edges do not dry out.
Questions about egg-free pumpkin cookies
Will these become crisp if baked longer?
They are designed to stay soft. Extra baking can dry the edges without giving the center a crisp cookie texture. Stop when the centers are set and the bottoms are lightly golden.
Why did my cookies stay the same shape?
The thick pumpkin-oat dough has limited spread. Flatten each mound before baking; leaving tall scoops makes the centers slower to cook.
Can I use pumpkin pie filling?
Plain pumpkin puree is the intended ingredient. Pie filling already includes sweeteners and spices, so using it changes the balance and may change the dough consistency.
Can I double the batch?
Yes. Keep the cookies the same size and thickness and use enough tray space. If baking two trays together, rotate their positions if your oven browns unevenly and check each tray separately.
What holds these together without eggs?
Hydrated oats and flour form the structure around the moist pumpkin. Cooling helps that structure settle. Pumpkin contributes moisture, but it does not behave like an egg in every baking recipe.
THE COMPLETE RECIPE
Small Batch Pumpkin Walnut Breakfast Cookies Without Eggs
Yield: 8 cookies
Ingredients
- 3/4 cup old-fashioned rolled oats about 60 g
- 1/2 cup all-purpose flour 60 g; spoon into the cup and level
- 1/2 cup plain canned pumpkin puree about 120 g; not pumpkin pie filling
- 2 tablespoons maple syrup
- 1 tablespoon neutral oil such as canola or sunflower oil
- 1/4 cup walnuts about 28 g; chopped into pieces about 1/4 inch or smaller
- 1/2 teaspoon baking powder
- 1/2 teaspoon ground cinnamon
- 1/8 teaspoon fine salt
- 1/4 teaspoon vanilla extract
Equipment
- Rimmed sheet pan, approximately 13 by 18 inches
- Parchment paper
- Two mixing bowls
- Spatula
- Measuring cups and spoons
- Cooling rack
- Kitchen scale, optional
Instructions
- Prepare the oven and tray Heat the oven to 350°F (175°C). Line the sheet pan with parchment. Position a rack near the middle of the oven so the bottoms do not sit too close to the lower heating element.
- Combine dry and wet ingredients separately Stir the oats, flour, baking powder, cinnamon, and salt together in one bowl, breaking up any flour lumps. In the second bowl, mix the pumpkin, maple syrup, oil, and vanilla until smooth.
- Make the dough and let it rest Fold the dry mixture into the pumpkin mixture just until no dry flour remains. Fold in the chopped walnuts. Leave the dough for 5 minutes so the oats can absorb some moisture. It should be thick, sticky, and scoopable, not pourable.
- Portion and flatten Divide into eight equal mounds, about 40 g each or a heaped 2 tablespoons. Place them at least 1 inch apart. With the back of a slightly damp spoon, flatten each to roughly 2 1/2 inches across and 1/2 inch thick, smoothing ragged edges.
- Bake until set Bake for about 18–22 minutes, checking at 18 minutes. The tops should lose their wet shine, the edges should look set, and the bottoms should be lightly golden; lift one edge with a spatula to check the underside. If a cookie is very thick, it may need longer; do not remove the batch with visibly wet dough in the centers.
- Cool before lifting Leave the cookies on the tray for 5 minutes, then move them carefully to a rack for about 10 minutes before serving. The centers should be soft but cohesive. Cool completely before packing or storing, allowing more time if they are still warm.
Notes
Rate This Recipe
Made this recipe? Choose a star rating in the comment form and share how it turned out. Your cooking time and any ingredient changes can help the next reader.
Rate This Recipe