MASHED BEANS / TENDER CARROT / CRISP BREAD
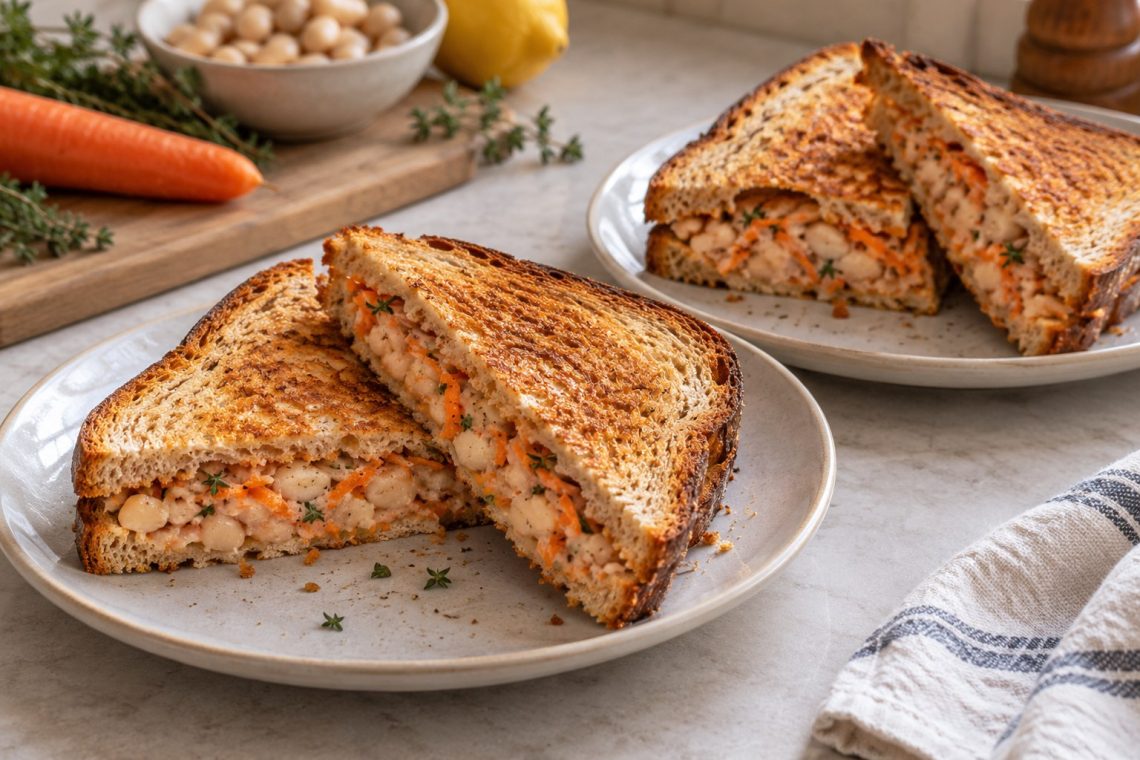
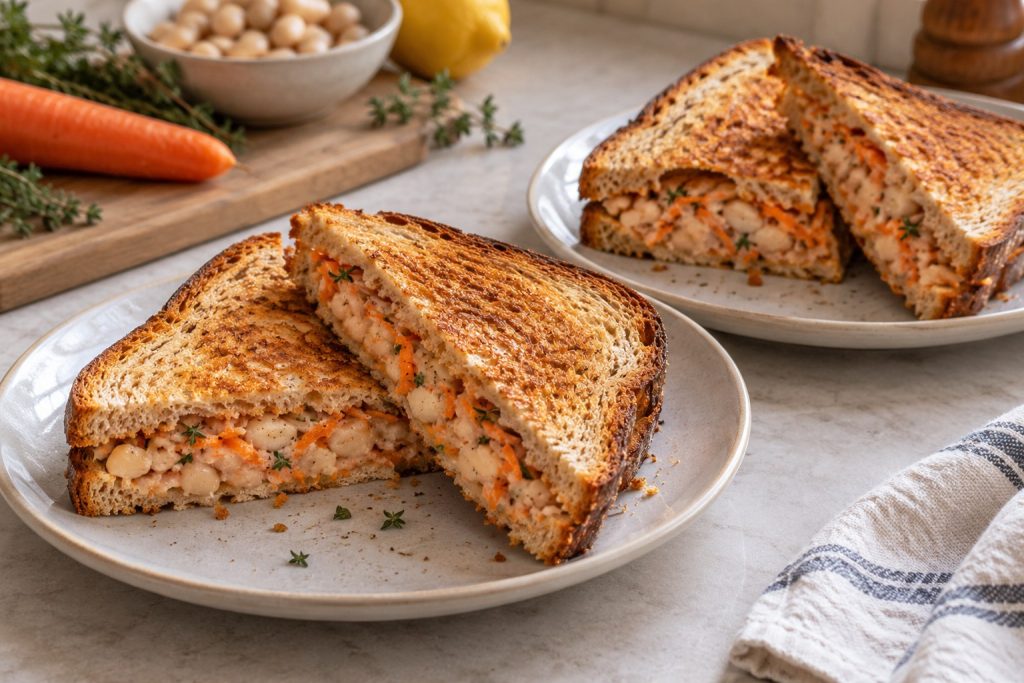
This warm cannellini carrot sandwich pairs crisp toasted bread with a soft white bean filling, tender grated carrot, garlic, and a little lemon. Partly mashed cannellini beans give the sandwich its creamy texture without cheese. The carrot cooks quickly because it is grated, and the filling is already warm before the bread reaches the skillet, so you can concentrate on getting a golden crust without scorching it.
It is a practical lunch for two from one can of beans. Choose broad, sturdy bread, keep the filling in an even layer, and toast over moderate heat. Those three choices make the sandwich easier to turn and help the center stay pleasantly soft while the outside becomes crisp.
Warm cannellini carrot sandwich: recipe overview
- Prep
- 10 minutes
- Cook
- 15 minutes
- Total
- 25 minutes
- Yield
- 2 generous sandwiches
The cooking estimate assumes both sandwiches fit in the pan together. If you toast them one at a time, allow another 4–6 minutes. Use a box grater, colander, bowl, fork, flexible spatula, and a 12-inch skillet. A nonstick or well-seasoned skillet makes the dry toast easy to lift; you do not need a sandwich press.
Build a filling that spreads without squeezing out
A good filling gathers into a soft mound on the spatula. It should spread under gentle pressure while retaining a few pieces of bean. If it drips, it is too wet; if it breaks into dry clumps, it needs a very small splash of water. Make adjustments by the teaspoon because a little moisture goes a long way in this small batch.
Mash the beans in a bowl before they enter the skillet. This makes it easier to control the texture, and it avoids scraping a nonstick surface with a metal fork. You can still press a few extra beans with the flat face of a wooden spoon if the warm mixture is too loose.
The carrot should mingle with the beans instead of forming a separate layer. That helps each bite include the sweeter vegetable and the savory mash. Spread the filling toward the corners, but keep the outer border clear; the top slice will push it outward a little as the sandwich settles.
Ingredients for the white bean and carrot filling
- 1 can cannellini beans, 15 ounces (425 g) net weight, rinsed and well drained; about 1 1/2 cups or 240 g drained
- 1 medium carrot, about 70 g, washed, trimmed, and coarsely grated
- 1 tablespoon olive oil
- Up to 1 tablespoon water, only if needed to loosen the filling
- 1 small garlic clove, finely minced
- 1/8 teaspoon dried thyme
- 1 teaspoon fresh lemon juice
- 4 broad slices sturdy sandwich bread, roughly 4–5 inches wide and about 1/2 inch thick
- 1 teaspoon Dijon mustard, optional, for spreading on the bread
- Fine salt to taste; start with 1/8 teaspoon after combining the filling
- Freshly ground black pepper to taste; start with a small pinch
Cannellini beans provide the soft center
Cannellini beans have enough body to remain visible in the filling, while their soft centers mash readily. Drain away the can liquid and rinse before measuring any texture adjustment. Adding water to beans that are still dripping is a common route to a sandwich that slides apart.
Fully cooked white beans from a homemade batch also work; use about 1 1/2 cups. If they are very firm, cook them until tender before starting this recipe. The short skillet time is intended to warm cooked beans, not finish cooking dried beans.
Choose bread that supports the filling
Look for slices with a reasonably even crumb and a broad surface. Large holes let filling escape, while very thick bread can brown before the middle feels warm. A sturdy sandwich loaf, a close-textured sourdough, or a firm whole-grain loaf works well. Very soft, thin bread can be used, but fill it more lightly and turn it carefully.
The recipe contains no cheese. If you also need a dairy-free sandwich, check the bread and mustard labels rather than assuming every loaf is made without milk or butter.
Grate the carrot rather than chopping it
Use the coarse holes of a box grater for thin, short shreds. They soften quickly and mix evenly into the mashed beans. Matchstick-cut carrots from a bag are usually thicker and need longer cooking; chop them shorter and cook until flexible before adding the garlic.
How to make a mashed cannellini carrot sandwich without cheese
- Prepare the beans and bread. Drain the rinsed beans well and put them in a bowl. Mash roughly half with a fork, leaving some whole beans and chunky pieces. Grate the carrot and mince the garlic. Set out the bread so you can assemble the sandwiches as soon as the filling is ready.
- Soften the carrot. Warm the olive oil in the skillet over medium heat. Add the grated carrot and cook for about 4 minutes, stirring often, until the shreds bend easily and no longer have a raw, rigid bite. If they brown quickly, lower the heat. The aim is tenderness rather than a dark crust.
- Warm the bean filling. Stir in the garlic and thyme for about 30 seconds, just until fragrant. Add the partly mashed beans and cook for 2–3 minutes, folding them through the carrot until warm throughout. If the mixture sticks or looks crumbly, add water 1 teaspoon at a time, using only enough to make it spreadable, up to the measured 1 tablespoon total.
- Season and assemble. Remove the pan from the heat and stir the lemon juice into the filling. Taste and add salt and pepper. Spread the optional mustard thinly over two bread slices. Divide the warm filling between them in an even layer, leaving about a 1/2-inch border. Top with the remaining bread and press very gently to settle it.
- Toast over gentle heat. Transfer any remaining filling from the skillet and carefully wipe away loose bits. Return the pan to medium-low heat. Add both sandwiches if they fit without crowding. Toast for 2–3 minutes per side, turning with a wide spatula, until the bread is golden and crisp. Use light pressure only; squeezing hard pushes out the filling.
- Cut and serve. Move the sandwiches to a board and let them settle for about a minute. Cut with a serrated knife using a gentle sawing motion. The center should be warm and soft, the carrot tender, and the bread dry and crisp rather than greasy.
Get crisp bread with a dry skillet
The tablespoon of oil belongs in the filling. The assembled sandwich can toast in a dry skillet, which gives it a crisp, toast-like surface. Start with a clean pan so stray garlic and bean fragments do not burn beneath the bread.
Check the underside early, especially with thin bread or a heavy cast-iron pan that retains heat. Lower the heat if you see dark patches before the rest of the slice colors. Do not cover the sandwiches while toasting: trapped steam softens the surface you are trying to crisp.
If your pan holds only one sandwich, keep the second assembled sandwich ready on a plate and toast it immediately afterward. A very full skillet is harder to work in and makes an awkward flip more likely.

Fix a dry filling, slipping layers, or dark toast
| Problem | Likely cause | Adjustment |
|---|---|---|
| Filling feels crumbly | Very dry beans or too much uncovered heating | Fold in water 1 teaspoon at a time over low heat until the mash spreads. |
| Filling is loose | Beans were not drained well | Cook briefly uncovered, then mash a few more beans before assembling. |
| Bread browns too fast | The skillet is too hot | Move the pan off the heat briefly, lower the burner, and check the next side sooner. |
| Sandwich slides apart | A thick mound or heavy pressing | Spread a thinner, even layer and support the whole sandwich with a wide spatula. |
| Carrot remains firm | Thick shreds or a short cooking time | Give the carrot more time before adding the garlic; add a teaspoon of water if needed. |
On a small screen, scroll the table sideways to see every column.
Useful variations without adding cheese
Great northern beans: Use the same drained amount. They can be slightly firmer, so mash according to the texture rather than stopping at exactly half. Butter beans also work if you break up their larger pieces.
A little spinach: Fold a small handful of finely sliced fresh spinach into the softened carrot, then cook until wilted and any released moisture has evaporated before adding the garlic and beans. Keep the amount modest so the sandwich filling remains cohesive.
Different herbs: Replace the thyme with a small pinch of dried rosemary crushed finely, or stir in a teaspoon of chopped parsley at the end. Large, tough herb pieces are distracting in a soft filling.
No mustard or garlic: Leave out the optional mustard for a milder sandwich. Garlic can also be omitted; taste the filling after adding the lemon and adjust the pepper rather than automatically increasing the salt.
What to serve with a warm white bean sandwich
Cucumber slices, a small pickle, or a crisp side salad contrast with the soft filling. Add those on the side so their moisture does not soak the toast. For smaller appetites, cut each sandwich into halves and serve one half with soup.
The lemon in this sandwich pairs naturally with small-batch lemon lentil zucchini soup. For a sweeter, herbier soup-and-sandwich lunch, try pumpkin white bean soup with sage.
Store the filling separately for another lunch
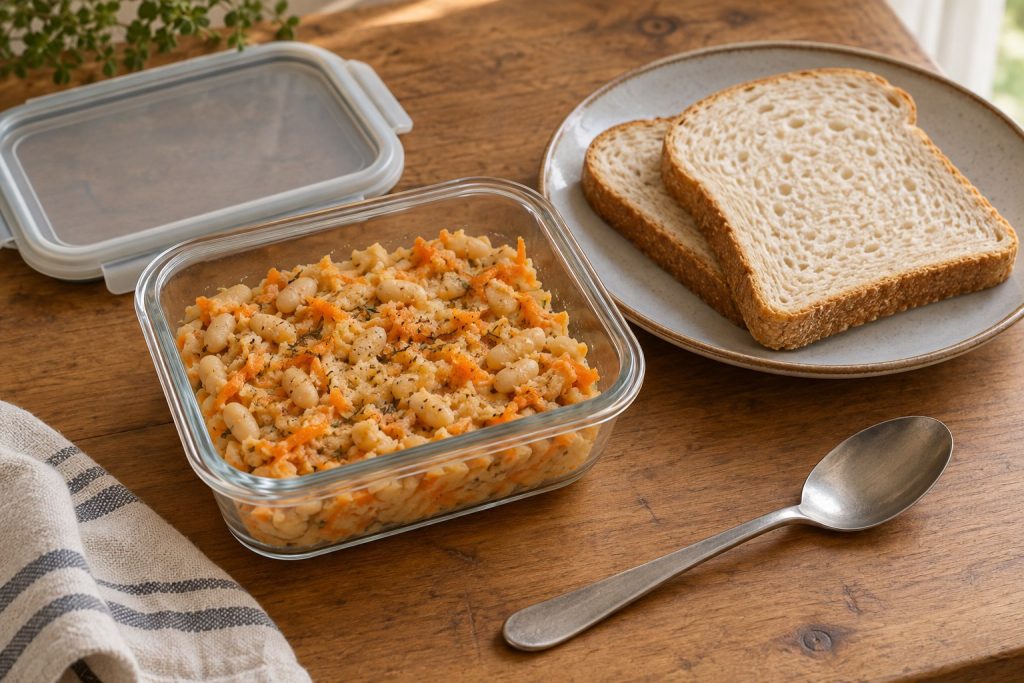
For the best bread texture, refrigerate extra filling separately and assemble after reheating. Put it in a shallow covered container rather than leaving it in the skillet to cool for a long period.
Under USDA leftover guidance, refrigerate within 2 hours, or 1 hour above 90°F, at 40°F or below. Use within 3–4 days and reheat leftovers to 165°F, checked with a food thermometer. Count any previously cooked beans in that storage time.
Reheat the filling gently with a splash of water, stirring for even warmth, then assemble and toast fresh sandwiches. An already assembled leftover sandwich can be reheated, but the bread will usually be softer and its center must reach the same reheating temperature.
For a packed lunch, chill the filling before packing and keep it cold in an insulated bag with at least two cold sources, following USDA lunch-packing advice. Pack bread separately if you can toast or assemble at the destination. Wrapping a warm sandwich tightly traps steam and softens the crust.
Questions about cannellini carrot sandwiches
Do I need a sandwich press?
No. A skillet and wide spatula are enough. If you use a press, close it gently and check early; heavy pressure can force out the filling before the bread has toasted.
Can I mash all the beans?
You can, but the center will be denser and more uniform. Keeping some beans intact makes the sandwich feel less like a thick bean spread. Start by mashing half and adjust only if the mixture needs more cohesion.
Can the filling be eaten cold?
Yes, when it has been prepared and stored safely. The beans will feel firmer when chilled. Taste before serving because the lemon and seasoning may seem less pronounced than they did when warm.
Can I freeze the bean and carrot filling?
The filling is more suitable for freezing than an assembled sandwich. Cool it promptly, freeze in a small airtight portion, and thaw in the refrigerator before reheating. Stir well after heating; a little water may be needed to restore the spreadable texture.
Can I serve it as an open-faced sandwich?
Yes. Toast the bread separately, warm the filling, and spread it on top just before eating. Use a knife and fork if the toast is narrow or the topping is generous.
THE COMPLETE RECIPE
Warm Cannellini Carrot Sandwich Without Cheese
Yield: 2 generous sandwiches
Ingredients
- 1 15-ounce can cannellini beans 425 g net can weight; rinsed and well drained, about 1 1/2 cups or 240 g drained
- 1 medium carrot about 70 g; washed, trimmed, and coarsely grated
- 1 tablespoon olive oil for the filling
- 1 tablespoon water maximum; add only if needed, 1 teaspoon at a time
- 1 small garlic clove finely minced
- 1/8 teaspoon dried thyme
- 1 teaspoon fresh lemon juice
- 4 broad slices sturdy sandwich bread roughly 4–5 inches wide and about 1/2 inch thick
- 1 teaspoon Dijon mustard optional, spread on the bread
- 1/8 teaspoon fine salt starting amount, added after tasting the filling
- 1 small pinch freshly ground black pepper or to taste
Equipment
- 12-inch skillet
- Mixing bowl and fork
- Coarse grater
- Cutting board and knife
- Measuring spoons
- Wide spatula
- Serrated bread knife
Instructions
- Prepare the beans and bread Drain the rinsed beans well and put them in a bowl. Mash roughly half with a fork, leaving some whole beans and chunky pieces. Grate the carrot and mince the garlic. Set out the bread so you can assemble the sandwiches as soon as the filling is ready.
- Soften the carrot Warm the olive oil in the skillet over medium heat. Add the grated carrot and cook for about 4 minutes, stirring often, until the shreds bend easily and no longer have a raw, rigid bite. If they brown quickly, lower the heat. The aim is tenderness rather than a dark crust.
- Warm the bean filling Stir in the garlic and thyme for about 30 seconds, just until fragrant. Add the partly mashed beans and cook for 2–3 minutes, folding them through the carrot until warm throughout. If the mixture sticks or looks crumbly, add water 1 teaspoon at a time, using only enough to make it spreadable, up to the measured 1 tablespoon total.
- Season and assemble Remove the pan from the heat and stir the lemon juice into the filling. Taste and add salt and pepper. Spread the optional mustard thinly over two bread slices. Divide the warm filling between them in an even layer, leaving about a 1/2-inch border. Top with the remaining bread and press very gently to settle it.
- Toast over gentle heat Transfer any remaining filling from the skillet and carefully wipe away loose bits. Return the pan to medium-low heat. Add both sandwiches if they fit without crowding. Toast for 2–3 minutes per side, turning with a wide spatula, until the bread is golden and crisp. Use light pressure only; squeezing hard pushes out the filling.
- Cut and serve Move the sandwiches to a board and let them settle for about a minute. Cut with a serrated knife using a gentle sawing motion. The center should be warm and soft, the carrot tender, and the bread dry and crisp rather than greasy.
Notes
Rate This Recipe
Made this recipe? Choose a star rating in the comment form and share how it turned out. Your cooking time and any ingredient changes can help the next reader.
Rate This Recipe