BLACK BEANS / SWEET CORN / CRISP TORTILLAS
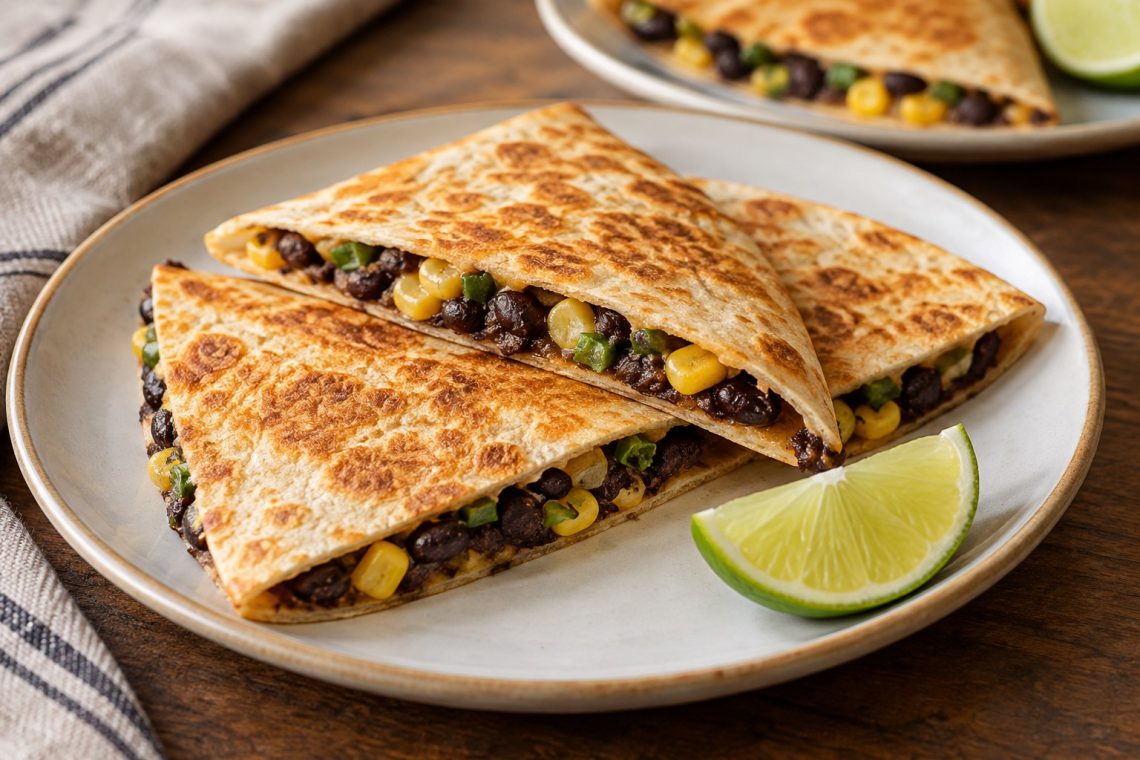
These black bean corn quesadillas without cheese use partly mashed beans to hold sweet corn and scallion inside a crisp tortilla. Cumin and smoked paprika give the filling a warm, savory flavor, while a little lime keeps it from tasting heavy. There are no tomatoes in the filling or any need for a cheese substitute.
The important details are simple: cook and dry the corn, mash enough beans to bind the mixture, and spread the filling thinly. Four 8-inch flour tortillas make four folded quesadillas, enough for two lunch portions. A broad spatula helps you turn them without losing the filling at the open edge.
Recipe summary
- Prep
- About 15 minutes
- Cook time
- About 20 minutes, including the corn and two skillet batches
- Additional time
- 0 minutes; no separate chilling step
- Total
- About 35 minutes; the corn package may require more time
- Yield
- 2 lunch servings: 4 folded quesadillas
Equipment: 12-inch skillet, broad spatula, mixing bowl, fork or potato masher, colander, measuring spoons, knife and cutting board. A microwave-safe bowl or saucepan may be needed for the corn, depending on its package instructions. Stay near the skillet during toasting; this is not an unattended cooking step.
Two preparations that prevent a loose filling
Cook frozen corn, then remove surface water
Thawing is not the same as following a frozen vegetable’s cooking instructions. Prepare the corn as directed on its package before adding it to the beans. Drain it, let the initial steam escape and blot gently. The FDA’s storage and frozen-food guidance also explains why commercially frozen foods should be cooked according to their packaging.
Do not use creamed corn here. You need separate kernels with no sauce or puddle of water. If the package’s cooking method works only for a larger amount, cook that amount as directed, then measure 1/2 cup for the filling and refrigerate the rest promptly.
Make a binder before adding the kernels
Mash about half the drained beans thoroughly. A few bean skins are fine, but a bowl of merely cracked beans will not provide much grip. Fold in the whole beans only after the mashed portion has taken on a spreadable, almost refried-bean texture. The corn and scallion should be held throughout this base rather than rolling loose around it.
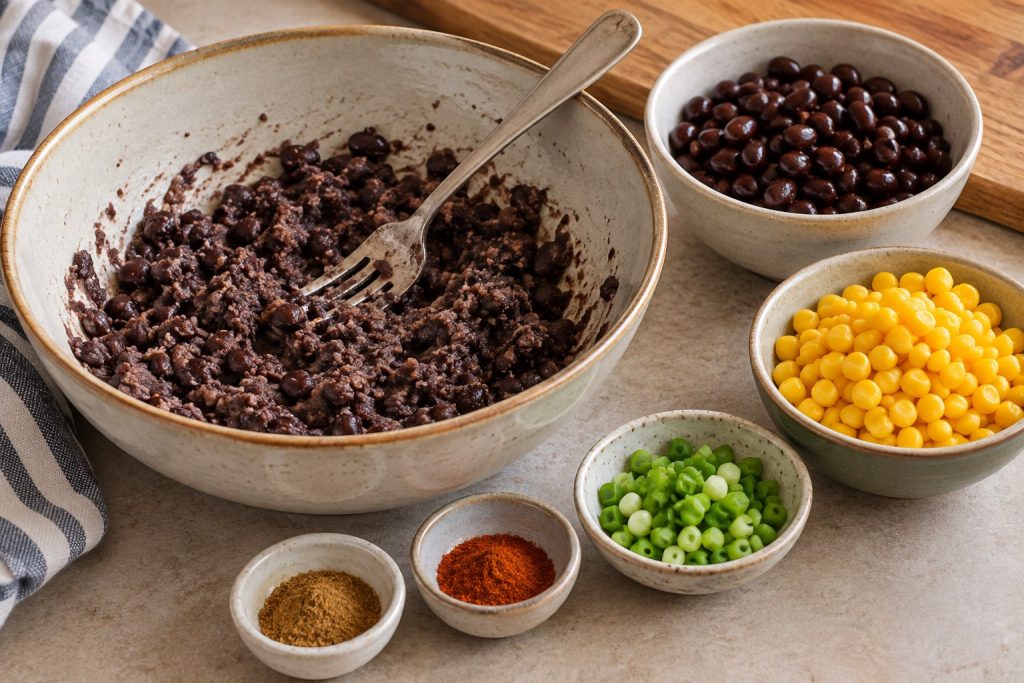
The measured filling and tortillas
- 1 can black beans, 15 ounces net weight, drained and rinsed; usually about 1 1/2 cups after draining
- 1/2 cup plain frozen sweet corn, cooked according to package directions, drained and patted dry
- 1/2 teaspoon ground cumin
- 1/4 teaspoon smoked paprika
- 1 teaspoon lime juice
- 2 tablespoons finely chopped scallion
- 4 ready-to-eat flour tortillas, about 8 inches across
- 2 teaspoons olive oil, divided between the skillet batches
- Salt to taste; begin with a small pinch if the beans are already salted
- 1/8 teaspoon black pepper, or to taste
Use the whole drained can of beans. The approximate cup yield is a guide because brands pack different amounts of liquid. The 8-inch tortilla size gives this filling more room than a small street-taco tortilla; switching to smaller tortillas changes how many you will need.
How to make black bean corn quesadillas without cheese
- Prepare the corn and beans. Cook the frozen corn according to its package directions. Drain, let the initial steam escape and pat dry. Rinse and thoroughly drain the black beans while the corn cooks. Finely chop the scallion. The finished filling should not have to absorb leftover rinsing or cooking water.
- Mash and season. Put half the beans in a mixing bowl. Mash firmly with the cumin, smoked paprika, lime juice and black pepper until thick and spreadable. Fold in the remaining beans, cooked corn and scallion. Taste and add a small pinch of salt if needed. Mash another spoonful of beans if the kernels are not held by the mixture.
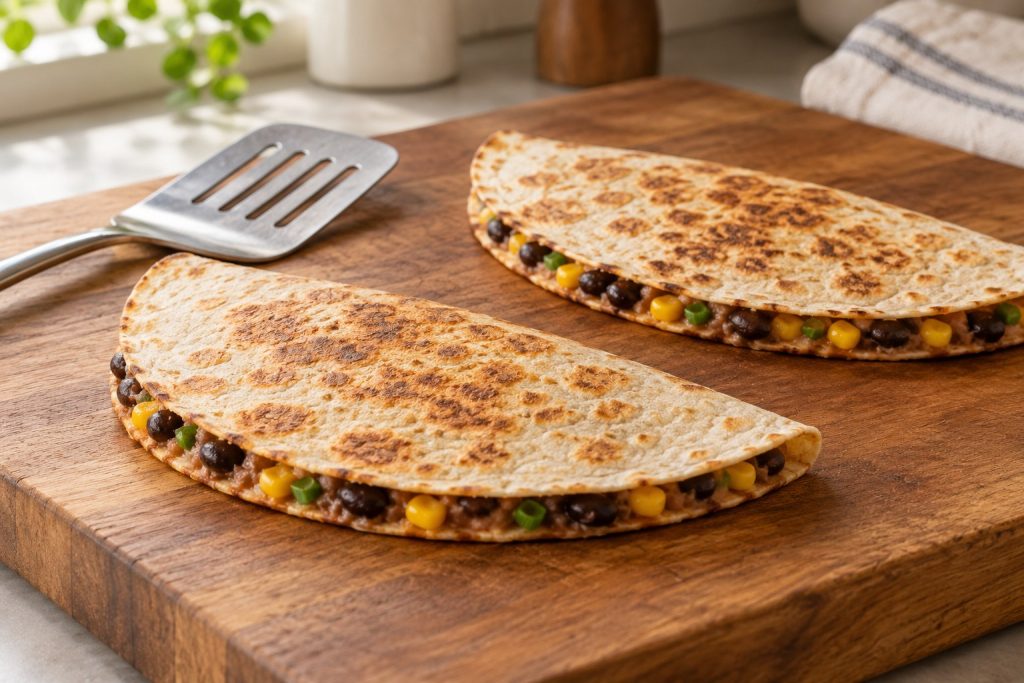
- Divide into four portions. Set out the tortillas and divide the filling roughly equally. Spread each portion over one half of a tortilla in an even layer about 1/4 inch thick, leaving a 1/2-inch bare border. Fold the empty half over and press lightly. Do not try to seal the edge by crushing it flat.
- Heat the first batch. Warm the 12-inch skillet over medium heat and add 1 teaspoon olive oil, spreading it into a thin film. Place two folded quesadillas in the pan if they fit flat without overlapping. If your skillet’s cooking surface is smaller, cook one at a time and divide the oil across the extra batches.
- Toast and turn gently. Cook for about 2–3 minutes on the first side, until golden patches develop and the underside feels crisp against the spatula. Support each quesadilla fully with the spatula and turn gently. Toast the second side for another 2–3 minutes, until golden and the filling is hot throughout. Lower the heat if the tortilla colors too quickly.
- Repeat and cut. Transfer the first batch to a board in a single layer. Add the remaining teaspoon oil and cook the other two quesadillas. Let each batch rest for about 1 minute before cutting; the first batch can rest while the second cooks. Cut each folded quesadilla into two wedges and serve two folded quesadillas, or four wedges, per person.
The skillet times are starting points; begin with ready-to-eat tortillas, or fully cook raw tortillas according to their package before filling. Tortilla thickness, pan material and burner strength affect browning, so check underneath instead of turning up the heat to meet the clock. The corn has already been cooked separately; the skillet step heats the filling and crisps the bread.
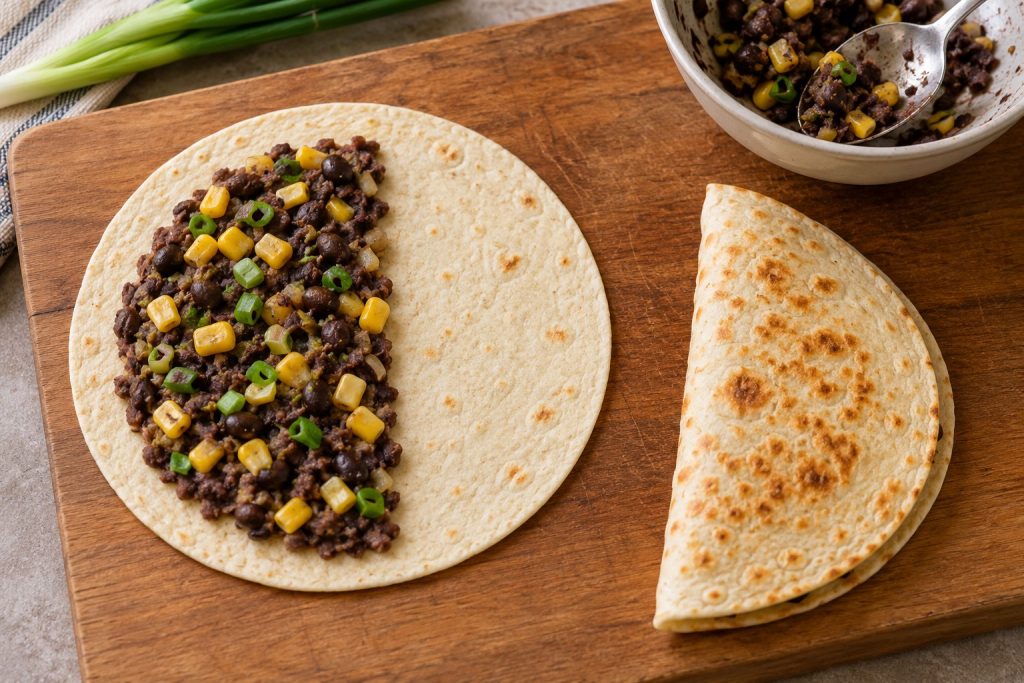
How the filling stays together without melted cheese
Mashed beans make broad contact with the tortilla and hold the whole beans and corn in place. That contact is lost if the layer is piled into a narrow mound or if loose kernels sit on top of an otherwise thin smear. Spread all the way across the filled half, keeping the border clear.
A small rest before slicing lets the filling settle. Use a sharp knife and a clean downward cut instead of sawing repeatedly through the tortilla. A little filling at the cut edge is normal; large piles spilling out suggest the layer was too thick or the beans were not mashed enough.
Fix the filling or the pan heat
| Problem | Likely cause | Adjustment |
|---|---|---|
| Corn falls out when turning | Not enough mashed-bean binder. | Mash another spoonful of beans into the remaining filling and spread it evenly around the kernels. |
| Tortilla browns before the center heats | Heat too high or filling too thick. | Reduce the burner and use a thinner layer in the next batch. Give the center time to warm through. |
| The underside stays pale and soft | Too little pan contact or excess moisture. | Keep the tortillas flat, avoid overlap and let them cook undisturbed before checking again. |
| Filling squeezes out | Overfilling or pressing too hard. | Keep the border bare and turn with broad support rather than pushing down. |
| The outside feels greasy | Oil pooled instead of forming a film. | Spread the measured oil around the pan before adding tortillas; do not pour more over the tops. |
On a small screen, scroll the table sideways to see every column.
Substitutions that respect the omissions
Canned corn: replace the cooked frozen corn with 1/2 cup drained plain canned corn. Blot it before adding. It avoids the frozen-corn cooking step, but the mixture still needs careful draining. Avoid corn mixed with tomato, cheese or a creamy sauce.
Whole-wheat tortillas: choose flexible rounds of the same diameter. They may be firmer at the fold and darker before toasting, so look for crispness and deeper golden patches. If a tortilla cracks before filling, warm it briefly according to the package rather than forcing it to bend.
Pinto beans: use the same drained quantity and mash half. Their flavor and color will differ, but the spreading method remains useful. For milder seasoning, reduce the smoked paprika; do not replace it with tomato-based salsa, which changes both the flavor and moisture balance.
Serving ideas and another use for the filling
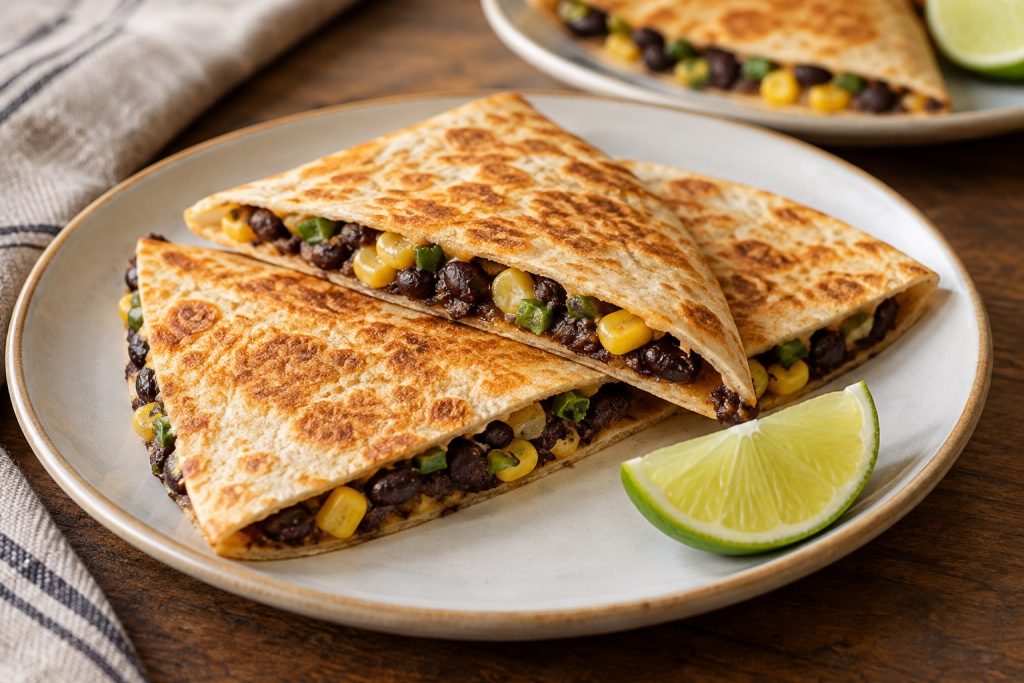
Serve black bean corn quesadillas without cheese as four wedges per person, with lime, crisp lettuce or avocado alongside. Keep wet toppings beside the quesadilla so the cut tortilla stays crisp longer. A small bowl of pumpkin white bean soup without milk or cream makes a soft, warm contrast when you want a soup-and-quesadilla lunch.
If you have filling left because your tortillas are smaller, serve it as a warm bean-and-corn bowl rather than packing more inside. Add cooked quinoa and lettuce, with lime to taste. The quinoa rinsing guide helps with grain preparation if you are starting from dry quinoa.
Make ahead, store and reheat
Refrigerate the filling or cooked quesadillas in shallow covered containers within 2 hours, or within 1 hour above 90°F. Keep at 40°F or below and use within 3–4 days. Do not wait for cooked quesadillas to sit on the counter until completely cold. These limits follow USDA leftovers guidance.
For the best texture, keep prepared filling separate and toast fresh tortillas when needed. If using refrigerated leftover filling, reheat it to 165°F before assembling. Reheat whole leftover quesadillas until their centers reach 165°F, then briefly crisp the surfaces in a skillet if needed. The tortilla may brown before a cold center warms, so use gentler heat and check the middle.
For a cold packed lunch, chill the quesadillas promptly in a shallow container before packing. Expect a softer tortilla than one served straight from the skillet. Use an insulated bag with two cold sources, following USDA lunchbox guidance; a crisp-looking tortilla is not evidence that the filling has stayed cold.
Frequently asked questions
Can I use 6-inch tortillas?
Yes, but plan on more tortillas rather than keeping the same filling in four smaller ones. Start with six, spread a thin layer and keep some filling aside if needed. Extra skillet batches will add time. The recipe’s stated yield and timing are based on four 8-inch tortillas.
Can I toast them in a dry skillet?
A good nonstick or well-seasoned skillet can toast a tortilla without added oil, but the surface will be drier and more patchy. Watch closely and keep the heat moderate. The measured oil in the main recipe helps the tortilla make consistent contact with the pan.
Can I mix thawed frozen corn straight into the beans?
Follow the corn package’s cooking directions first. Simply thawing it is not a substitute. If you want to skip that cooking step, use drained plain canned corn. Either way, remove surface liquid before mixing so the bean layer stays thick enough to bind.
Are these quesadillas vegan?
The filling uses beans, vegetables, oil and seasonings. Whether the complete dish is vegan depends on the tortillas and other products you choose; some contain animal-derived ingredients. Check their labels. Likewise, leaving out cheese does not by itself establish that every packaged ingredient is dairy-free.
Why did the first batch soften while the second cooked?
Stacked hot tortillas trap steam. Rest finished quesadillas in a single layer instead, and avoid covering them tightly while serving immediately. If needed, return the first batch briefly to the hot skillet before cutting. For storage, prompt refrigeration takes priority over keeping the crust crisp.
THE COMPLETE RECIPE
Black Bean Corn Quesadillas Without Cheese or Tomatoes
Yield: 2 lunch servings
Ingredients
- 1 15-ounce can black beans drain and rinse; usually about 1 1/2 cups drained
- 1/2 cup plain frozen sweet corn cook completely by its package instructions, then drain and pat dry
- 1/2 teaspoon ground cumin
- 1/4 teaspoon smoked paprika
- 1 teaspoon lime juice
- 2 tablespoons finely chopped scallion
- 4 ready-to-eat flour tortillas about 8 inches across
- 2 teaspoons olive oil divided between skillet batches
- salt to taste; start with a small pinch if the beans are salted
- 1/8 teaspoon black pepper or to taste
Equipment
- 12-inch skillet
- Broad spatula
- Mixing bowl
- Fork or potato masher
- Colander
- Measuring tools
- Knife and cutting board
- Saucepan or microwave-safe container for the corn
Instructions
- Prepare the corn and beans Cook the frozen corn according to its package directions. Drain, let the initial steam escape and pat dry. Rinse and thoroughly drain the black beans while the corn cooks. Finely chop the scallion. The finished filling should not have to absorb leftover rinsing or cooking water.
- Mash and season Put half the beans in a mixing bowl. Mash firmly with the cumin, smoked paprika, lime juice and black pepper until thick and spreadable. Fold in the remaining beans, cooked corn and scallion. Taste and add a small pinch of salt if needed. Mash another spoonful of beans if the kernels are not held by the mixture.
- Divide into four portions Set out the tortillas and divide the filling roughly equally. Spread each portion over one half of a tortilla in an even layer about 1/4 inch thick, leaving a 1/2-inch bare border. Fold the empty half over and press lightly. Do not try to seal the edge by crushing it flat.
- Heat the first batch Warm the 12-inch skillet over medium heat and add 1 teaspoon olive oil, spreading it into a thin film. Place two folded quesadillas in the pan if they fit flat without overlapping. If your skillet's cooking surface is smaller, cook one at a time and divide the oil across the extra batches.
- Toast and turn gently Cook for about 2–3 minutes on the first side, until golden patches develop and the underside feels crisp against the spatula. Support each quesadilla fully with the spatula and turn gently. Toast the second side for another 2–3 minutes, until golden and the filling is hot throughout. Lower the heat if the tortilla colors too quickly.
- Repeat and cut Transfer the first batch to a board in a single layer. Add the remaining teaspoon oil and cook the other two quesadillas. Let each batch rest for about 1 minute before cutting; the first batch can rest while the second cooks. Cut each folded quesadilla into two wedges and serve two folded quesadillas, or four wedges, per person.
Notes
Rate This Recipe
Made this recipe? Choose a star rating in the comment form and share how it turned out. Your cooking time and any ingredient changes can help the next reader.
Rate This Recipe