Countertop cooking • One sandwich, two golden sides
Grilled cheese in a toaster oven works best when the bread browns at the same pace as the cheese melts. Start at 375°F on the bake setting, use thin cheese slices, and flip once so both buttered faces spend time against the tray.
Plan on about 8–12 minutes of baking, with the first check at 4 minutes. The finish is golden bread and cheese melted through the center. Stay nearby: countertop ovens, tray colors, and bread thickness can change the timing noticeably.
Three ingredients, chosen for even heating
For one sandwich, use two bread slices about ½ inch thick, 2 ounces of sliced melting cheese, and 1 tablespoon of softened butter divided across the two outside faces. These quantities suit an ordinary sandwich-sized loaf. Oversized bakery slices may need a different cheese arrangement rather than simply a thicker stack.
| Ingredient | A useful starting choice | What to watch |
|---|---|---|
| Bread | Even slices of white, whole-wheat, or sourdough | Thick slices slow center heating; very soft bread tears more easily. |
| Cheese | Thin cheddar, Monterey Jack, American, or low-moisture mozzarella | A thick chunk takes longer to melt than an even layer of slices. |
| Butter | Soft enough to spread without pressure | Thick lumps make uneven coverage; use a thin coating across each face. |
Mild or medium cheddar gives a familiar flavor. American cheese is another practical option when you want a soft, even melt. A mixture of two cheeses can work, but keep the total around 2 ounces for the basic sandwich. Do not judge the amount by how tall the cheese looks before it melts.
If butter is too firm, use the quick butter-softening guide before assembling. Spread to the bread’s edges so the corners receive some coating too. Softened butter is easier to control than pouring melted butter over a filled sandwich.
Set up the oven and tray
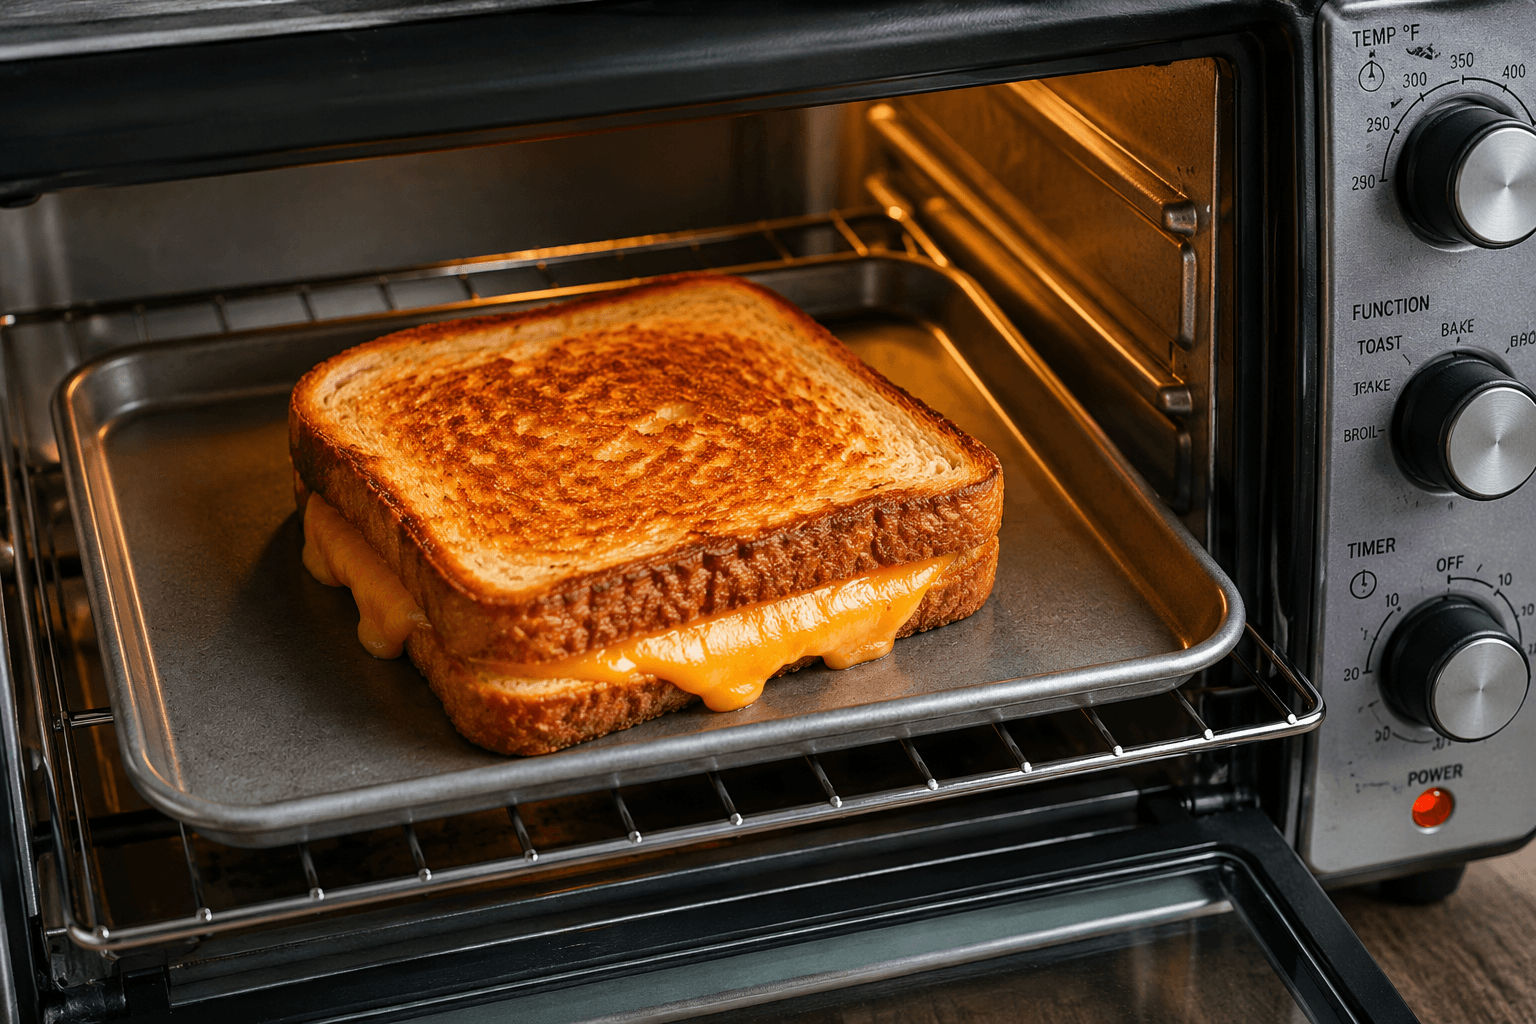
Use the supplied baking tray or another pan the appliance manufacturer approves. Choose the rack position recommended for baking with room between the sandwich and the elements. Preheat the oven to 375°F before the sandwich goes in. Assemble on a cool tray so you can arrange the bread without rushing around hot metal.
Check the manual before adding foil or parchment. KitchenAid’s countertop-oven guidance, for example, warns against covering internal parts such as racks or the crumb tray with foil because it restricts airflow. Follow the rules for your own model and liner; ordinary full-size-oven habits may not apply.
How to make grilled cheese in a toaster oven
Preheat and prepare
Set the oven to bake at 375°F. Take out the approved tray for assembly, leaving the rack in its recommended position. Have oven mitts, a wide spatula, and a heatproof surface ready so you can inspect the sandwich safely when the timer sounds.
Butter the bread
Spread half the softened butter over one side of each bread slice. Keep it thin and even. Lay the first slice butter-side down on the tray. If the bread tears, stop and let the butter soften further instead of forcing it through the crumb.
Arrange the cheese
Place the thin cheese slices nearly to the edges without letting them overhang. Break or trim them to fill gaps rather than stacking all the cheese in the middle. Close with the second bread slice, butter-side up, and press only lightly to align the sandwich.
Bake and inspect the underside
Put the tray in the preheated oven. Begin checking at about 4 minutes, using mitts and lifting a corner with the spatula. Many sandwiches take 4–6 minutes before the first side is ready to turn. Let the underside become golden without waiting for the top to match.
Flip and finish melting
Support the whole sandwich and turn it carefully. Return the tray and check again after about 3–4 minutes. Continue in short intervals until the second side is golden and the cheese has melted through the center. The total often falls around 8–12 minutes, but color and melting matter more than the clock.
Rest briefly and serve
Move the sandwich to a board or rack for about a minute, then cut carefully. Let very hot cheese cool further if needed before eating. Keep it unstacked while it rests so steam can escape instead of softening the lower face.
Make the next sandwich more consistent
Only one face is crisp
Make sure both faces spend time against the tray. Lift to inspect underneath instead of deciding from the top alone. Record when you turned the first sandwich as a starting point for the next batch.
The edges darken early
Check sooner with sweet bread or a dark tray. If your oven uses convection, follow its adjustment instructions and monitor closely. Avoid changing the bread, cheese amount, and oven mode all at once.
Cheese leaks onto the pan
Keep the cheese just inside the bread edge and distribute it evenly. Extra filling can push the slices apart. Let the tray cool before cleaning away stuck cheese between batches.
The sandwich feels greasy
Spread butter evenly instead of leaving thick patches. Some cheese releases more oil when heated; try a smaller amount or a different melting cheese next time.

Add fillings without building a tall stack
For grilled cheese in a toaster oven, a thin filling is easier to heat evenly. Try a little fully cooked oven bacon, drained jalapeños with pepper jack, or a thin smear of pesto with mozzarella. Cook mushrooms first and pat tomato slices dry so they do not release excess moisture into the bread.
This brief sandwich bake is not a method for cooking raw meat. If using refrigerated leftovers inside, make sure the center reaches 165°F. The USDA leftovers guidance also calls for prompt refrigeration and using refrigerated leftovers within 3–4 days. Adding them to a new sandwich does not restart their storage clock.
Serve now, or store a spare safely
Have soup or salad ready before the sandwich finishes. A small portion of quick pickled onions adds a sharp contrast. For a sweet skillet variation on another day, try the toasted peanut butter and jelly sandwich.
The crust is best shortly after cooking. Refrigerate leftovers within two hours, or one hour above 90°F, and keep them at 40°F or below. Reheat only what you need until the center reaches 165°F; use a moderate oven setting and watch the already-browned bread closely. Expect a different texture from a freshly made sandwich.
Quick questions
Should I use toast, bake, or broil?
Use bake for this method. Toast and broil programs vary in element behavior and timing, so they are not interchangeable with these estimates. Follow a recipe written for that mode if you choose it.
Can I start with frozen bread?
Yes, but the center may take longer to warm. Check the outside at the same early point and extend cooking only as needed. Fully thawed, evenly sliced bread makes the first attempt easier to judge.
Can I cook two at once?
Use a tray large enough for space between them. Turn and inspect each sandwich separately; different positions can brown at different rates. Increase the ingredients, not automatically the time.
Do I need a sandwich press?
No. A tray and a wide spatula are enough. Pressing firmly can flatten the bread and force melted cheese out instead of helping it heat evenly.
Printable toaster-oven sandwich
Use this one-sandwich card for the basic version. When reviewing it, include your bread and oven mode to help other readers compare results.
THE COMPLETE RECIPE
Grilled Cheese in a Toaster Oven
Yield: 1 sandwich

Ingredients
- 2 slices sandwich bread About ½ inch thick, with similar-sized slices.
- 2 ounces thinly sliced cheddar or another melting cheese Arrange evenly without overhanging the bread.
- 1 tablespoon softened butter Divided across the two outer bread faces in a thin, even layer.
Equipment
- 1 toaster oven Use bake mode and follow the manufacturer’s rack and tray instructions.
- 1 approved baking tray Assemble on a cool tray.
- 1 Wide spatula
- 1 Oven mitts
- 1 cutting board
Instructions
- Preheat and prepare. Preheat the toaster oven to bake at 375°F / 190°C. Use an approved tray and the manufacturer’s recommended rack position. Have mitts and a heatproof surface ready.
- Butter the bread. Spread half the softened butter thinly over one side of each slice. Put one slice butter-side down on the cool tray.
- Arrange the cheese. Distribute the thin cheese slices nearly to the edges without overhanging. Close with the second bread slice, butter-side up, and align the sandwich gently.
- Bake the first side. Bake in the preheated oven and check at about 4 minutes. Lift a corner to inspect the underside. The first side often takes about 4–6 minutes to become golden.
- Flip and finish. Turn carefully with a wide spatula. Check again after about 3–4 minutes and continue in short intervals until both faces are golden and the center cheese is fully melted. Total baking is usually about 8–12 minutes. Lower the setting if the bread darkens before the center melts.
- Rest and serve. Transfer to a board or rack for about 1 minute, then cut carefully. Allow the hot cheese to cool further if needed before eating. Avoid stacking hot sandwiches.
Notes
Rate This Recipe
Made this recipe? Choose a star rating in the comment form and share how it turned out. Your cooking time and any ingredient changes can help the next reader.
Rate This Recipe