THE ROASTING ROADMAP / SQUASH FIRST, BEANS LATER
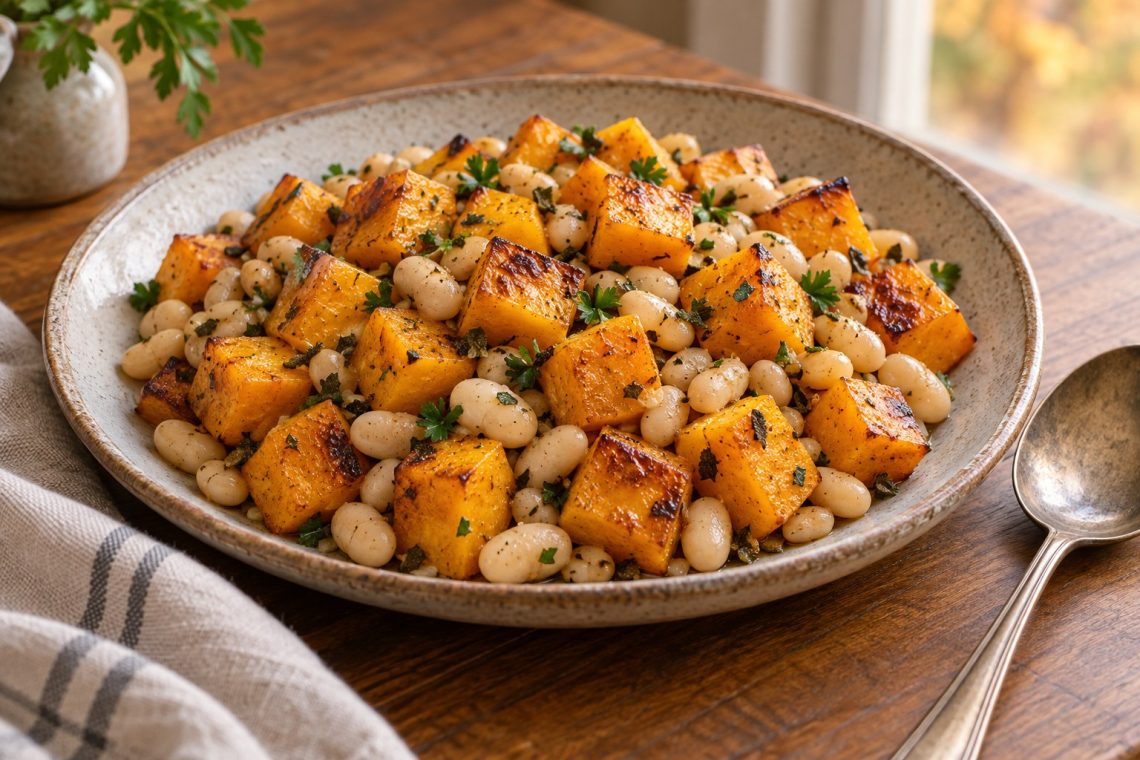
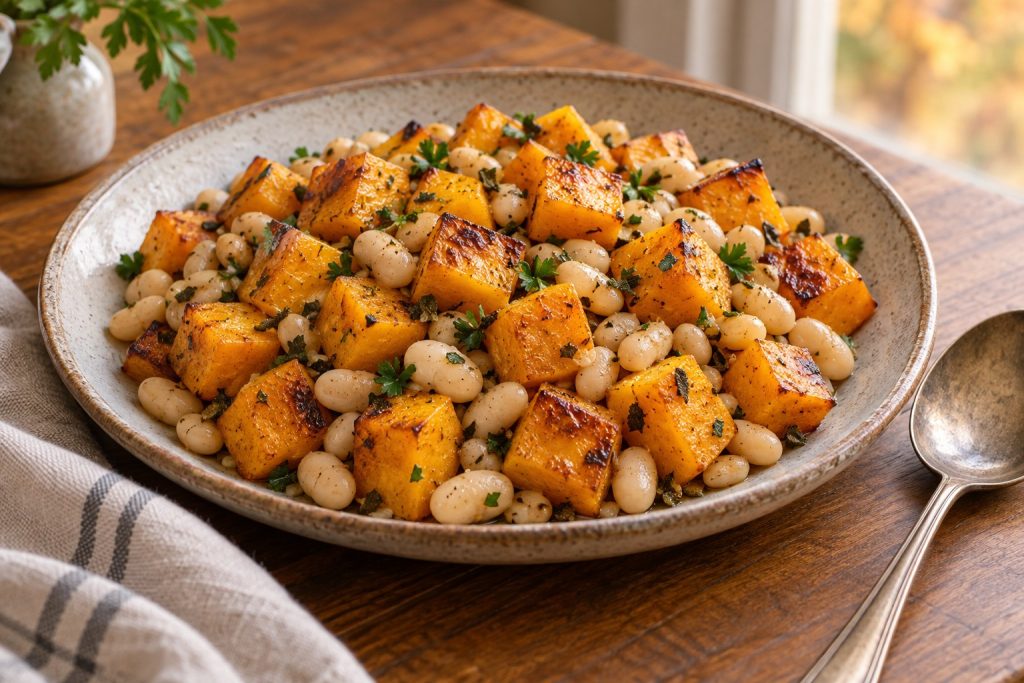
This sheet pan butternut squash pairs browned squash cubes with creamy white beans, rubbed sage, and a bright splash of apple cider vinegar. The squash supplies its own sweetness, so the tray stays savory without maple syrup or a sugary glaze. Serve it as a light lunch or spoon it alongside a separately cooked grain.
The squash gets a head start, and the already cooked beans join near the end. That gives the cubes time to soften without leaving the beans in a hot oven until their skins become tough. A roomy metal pan and evenly cut squash do more for the texture than extra seasoning.
Sheet pan butternut squash with white beans and sage
- Prep
- 15 minutes
- Cook
- 40 minutes
- Additional time
- None
- Total
- About 55 minutes
- Yield
- 2 light main-course servings
Plan on approximately 20 minutes of hands-on work, including turning and finishing the tray. The oven heats while you prepare the ingredients. Roasting commonly takes 33–40 minutes, but the largest squash cube determines when to serve. Grain or bread served alongside is separate from the recipe timing.
Equipment: an 18-by-13-inch rimmed half-sheet pan, a large mixing bowl, a sharp knife, a stable cutting board, a vegetable peeler, a colander, a wide spatula, and oven mitts. A smaller pan may need two batches.
Ingredients for the savory squash tray
- 1 pound butternut squash, weighed after peeling and seeding, cut into ¾-inch cubes
- 1 can great northern beans, 15 ounces net weight, rinsed, drained, and gently patted dry
- 2 tablespoons olive oil, divided
- ½ teaspoon dried rubbed sage
- ¼ teaspoon garlic powder
- ¼ teaspoon ground black pepper
- ¼ teaspoon fine salt to start, plus more to taste
- 1 tablespoon apple cider vinegar
- 1 tablespoon chopped fresh parsley, optional
Buy enough squash for a peeled pound
The pound refers to the usable flesh, not the weight of a whole squash with its skin and seeds. A packet of peeled cubes can save preparation time, but check the pieces before roasting. Cut any oversized chunks down so the tray has a consistent ¾-inch size.
Rinse the whole squash under running water before peeling, then dry it. Work on a stable board and cut it into manageable sections before peeling and cubing. FoodSafety.gov recommends washing produce even when you will remove the skin. Separate the narrow neck from the seed-filled bulb if that makes handling easier. Once you have flat surfaces, keep a flat side against the board while cutting. Dry the prepared flesh if it is visibly wet.
Use tender cooked beans and handle them lightly
Great northern beans give small, creamy bites between the squash cubes. The can’s net weight includes liquid; a drained can is usually around a cup and a half, with some variation. You do not need to adjust the squash for a modest difference in the amount of beans.
Rinse gently, let the beans drain, and blot surface moisture with a clean towel. The aim is to remove droplets, not squeeze the beans dry. Broken beans can smear on the pan, so turn them with a broad spatula and keep their oven time short. Dried beans must be cooked separately until tender first.
Choose rubbed sage and a clean acidic finish
Rubbed sage has a loose, leafy texture. If you only have finely ground sage, start with half the listed amount because it packs more densely in a spoon. Stir it through the oil-coated squash rather than leaving a dry mound of herb on the pan.
Apple cider vinegar balances the sweet squash after roasting. It is a finishing ingredient here; adding it before the squash browns introduces extra liquid at the wrong stage. Keep the full tablespoon ready, then distribute it across the warm tray instead of pouring it over one portion.
Roast the squash first, then add the beans
- Heat the oven and prepare the pan. Set the oven to 425°F (220°C) with a rack near the middle. Use a clean rimmed metal sheet pan. If lining it, choose parchment rated for this temperature and keep it inside the pan edges.
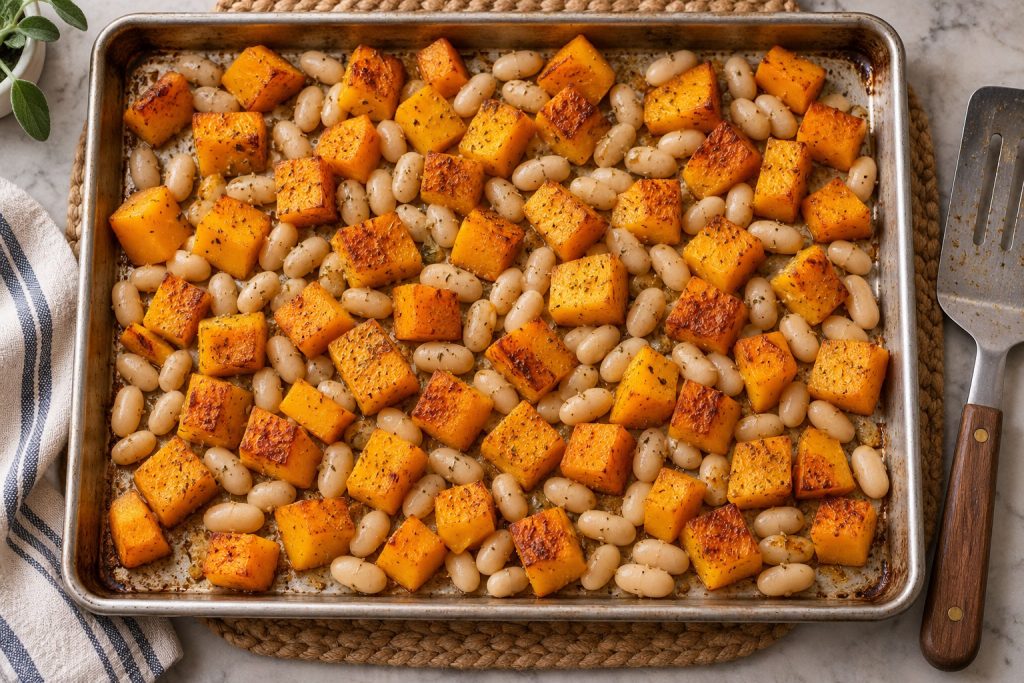
- Season the squash. Toss the ¾-inch cubes with 1 tablespoon olive oil, rubbed sage, garlic powder, pepper, and salt. Spread them in a single layer with visible gaps, placing broad cut surfaces against the pan.
- Give the squash a head start. Roast for 25–30 minutes, turning once after about 15 minutes. Check a large cube with a fork: it should be almost tender before the beans are added. If its center is still firm, continue roasting the squash alone.
- Prepare the beans. While the squash roasts, rinse, drain, and gently dry the beans. Toss them carefully with the remaining tablespoon of oil so they have a light coating without becoming mashed.
- Finish the tray. Scatter the beans among the nearly tender squash, keeping everything in a shallow layer. Roast another 8–10 minutes, until the beans are hot and the squash yields easily to a fork. Remove earlier if the beans begin to look dry, and finish any firm squash pieces separately.
- Add the vinegar and serve. Drizzle the hot tray with apple cider vinegar and fold gently once or twice. Taste a squash-and-bean bite before adding more salt. Scatter on the optional parsley and serve warm.
Give the tray room to roast
On an 18-by-13-inch pan, this quantity can sit in one layer. If you have to stack cubes or pile beans in a deep corner, use another pan. Deep baking dishes hold the food differently and are less helpful when browned contact surfaces are the goal.
A light coating of oil should reach the squash faces without collecting in a pool. Tossing in a bowl helps distribute the measured amount. Once the cubes are on the pan, let them stay still long enough to develop color. Repeated stirring can break softening edges and prevent an even roast.
Fix firm squash or dry beans
| What you notice | What helps |
|---|---|
| Squash is browned but firm | Continue roasting the squash alone. If the edges are getting too dark, lower the oven to 400°F and check frequently. |
| Squash is pale and wet | Spread pieces farther apart or divide between pans. Check that rinse water or wet beans have not collected on the tray. |
| Beans are getting tough | Lift them off the hot tray promptly. Next time, wait until the squash is nearly done before adding them. |
| The tray tastes overly sweet | Distribute the vinegar evenly and taste with pepper and a little salt. More sage alone may make it harsh. |
| Squash breaks when turned | Use a broad spatula and turn fewer times. Very small cubes or a longer roast will give a softer result. |
On a small screen, scroll the table sideways to see every column.
Variations without a sweet glaze
Cannellini beans can replace great northern beans in the same drained amount. They are larger and may need especially careful turning. Chickpeas give a firmer bite, but do not keep them roasting until crunchy if the squash is already soft.
You can replace part of the squash with peeled carrot pieces, but keep the pieces small and judge them separately: a thick carrot may take longer. Avoid adding several different vegetables at once unless you are ready to remove them at different stages.
For another way to use sage and white beans, try our pumpkin white bean soup with sage. It offers a soft, spoonable option when you want those flavors without roasting.
Turn the roasted tray into lunch or dinner
Serve the sheet pan butternut squash in shallow bowls with the beans divided evenly. A separately cooked portion of barley, rice, or quinoa makes a heartier meal. Add sautéed greens or a crisp salad alongside for contrast, rather than crowding extra vegetables onto the same tray.
For a simple plate built around beans, our white bean quesadillas without cheese offer another use for a spare can. Keep this tray’s vinegar finish light if serving it with an already sharp dressing or condiment.
Storage and reheating
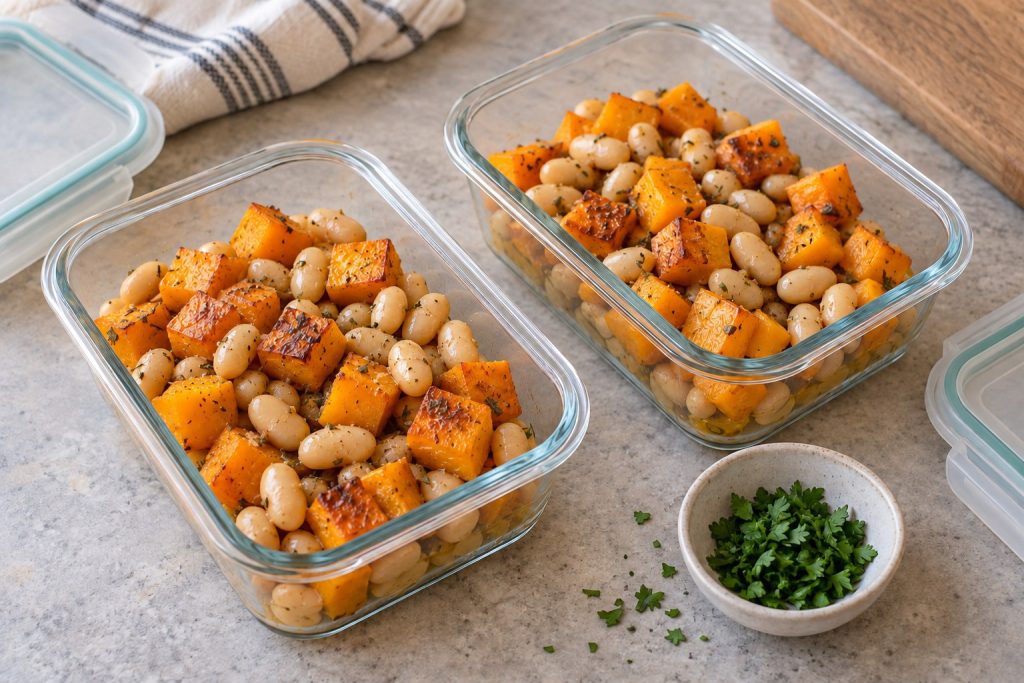
Refrigerate in shallow containers within 2 hours, or 1 hour above 90°F. Store at 40°F (4°C) or colder, use within 3–4 days, and reheat to 165°F (74°C), following USDA leftover guidance.
For texture, warm leftovers in a skillet or oven in a shallow layer, checking the beans before they dry out. A teaspoon or two of water can help a refrigerated portion warm gently. Add fresh parsley after reheating. The squash will be softer than it was straight from the oven.
Questions about roasting squash with beans
Can I use frozen butternut squash?
Yes, as a variation, but follow its package cooking instructions and expect more moisture and softer pieces. Keep the beans separate until the squash is fully cooked. Do not assume thawing and drying alone replace any required cooking step.
Can I leave the skin on?
The measured recipe uses peeled squash so the texture is consistent with the soft beans. Leaving the skin changes the bite and makes the final tenderness less predictable. If buying prepared cubes, remove any remaining tough peel.
Does it need sugar or maple syrup?
No. The flavor depends on the squash, sage, browning, and vinegar. Taste the finished tray before adding anything sweet; the original balance is intended to be savory.
How do I double the recipe?
Double the ingredients and use two full half-sheet pans. Rotate their positions during roasting and check each pan separately. Cooking time may shift, but it should not simply be doubled.
Can I use fresh sage?
Yes. Start with about 1 teaspoon finely chopped fresh sage in place of the dried rubbed sage. Mix it well into the oiled squash and remove any large tough stems. Taste the finished dish before adding more.
THE COMPLETE RECIPE
Sheet Pan Butternut Squash and White Beans with Sage
Yield: 2 light main-course servings
Ingredients
- 1 pound butternut squash 454 g usable flesh, weighed after peeling and seeding; cut into 3/4-inch (about 2 cm) cubes
- 1 can great northern beans 15 ounces net weight including liquid; rinsed, drained, and gently patted dry
- 2 tablespoons olive oil divided: 1 tablespoon for squash and 1 tablespoon for beans
- 1/2 teaspoon dried rubbed sage
- 1/4 teaspoon garlic powder
- 1/4 teaspoon ground black pepper
- 1/4 teaspoon fine salt plus more to taste
- 1 tablespoon apple cider vinegar for finishing after roasting
- 1 tablespoon chopped fresh parsley optional
Instructions
- Heat the oven and prepare the pan Heat the oven to 425°F (220°C) with a rack near the middle. Use an 18-by-13-inch rimmed metal half-sheet pan. If lining it, use parchment rated for this temperature and keep it within the pan edges. Rinse whole squash under running water before peeling; dry and prepare the measured cubes.
- Season the squash Toss the 3/4-inch cubes with 1 tablespoon olive oil, the rubbed sage, garlic powder, pepper, and salt. Spread in one layer with visible gaps, with broad cut surfaces against the pan.
- Give the squash a head start Roast for approximately 25–30 minutes, turning once after about 15 minutes. Pierce a large cube with a fork: it should be nearly tender before the beans join the tray. If the center is still firm, continue roasting the squash alone.
- Prepare the beans While the squash roasts, rinse and drain the canned beans, then blot gently with a clean towel. Toss carefully with the remaining 1 tablespoon olive oil without mashing them.
- Finish the tray Scatter the beans among the nearly tender squash in a shallow layer. Roast for another 8–10 minutes, until the beans are hot and the squash yields easily to a fork. If the beans begin drying out first, lift them off and finish any firm squash separately.
- Add the vinegar and serve Drizzle with the apple cider vinegar and fold gently once or twice. Taste a bite containing squash and beans before adding more salt. Finish with the optional parsley and serve warm.
Notes
Rate This Recipe
Made this recipe? Choose a star rating in the comment form and share how it turned out. Your cooking time and any ingredient changes can help the next reader.
Rate This Recipe