BANANA / FINE OATS / A GENTLE TURN
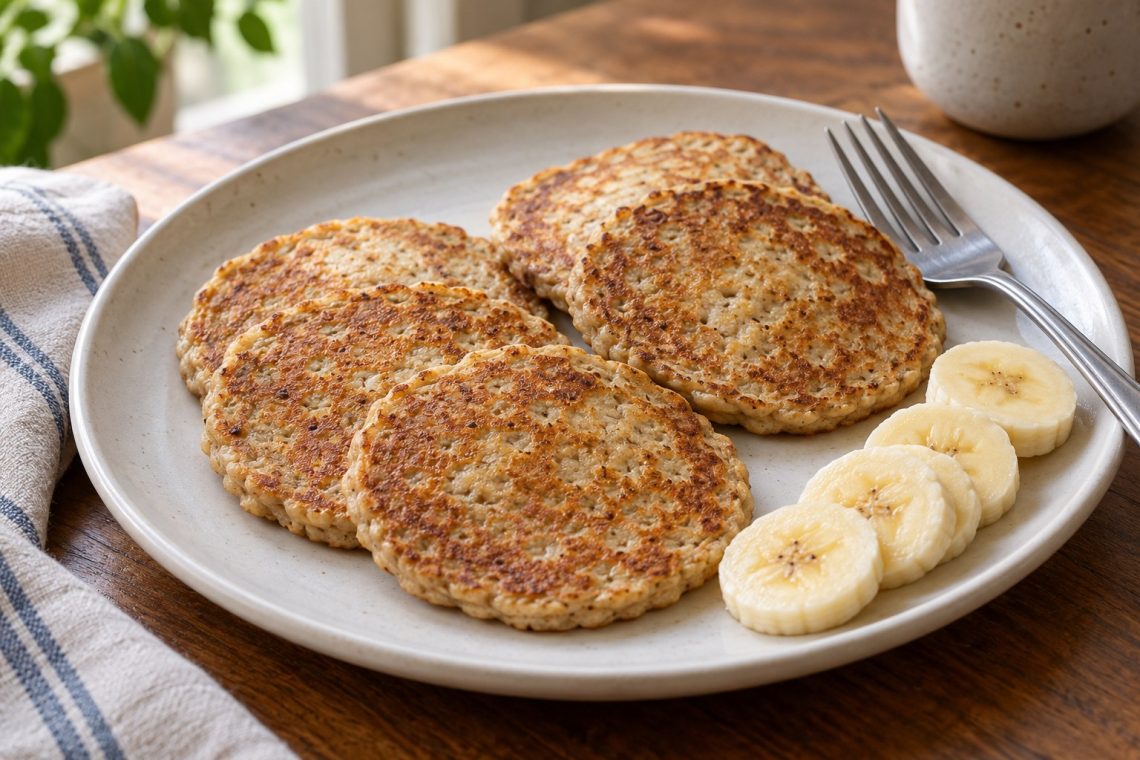
These small-batch banana oat pancakes use ripe banana, finely ground oats, and water to make a soft breakfast without eggs or milk. They have a gentle banana sweetness, a little cinnamon, and lightly golden surfaces. Keep the pancakes small and give them time to set before turning: that simple choice makes this delicate batter much easier to handle.
This is a good recipe for half a ripe banana and a quiet breakfast for one or two. Expect tender, modestly risen pancakes with an oat texture, rather than tall diner-style rounds. Measure the mashed banana, rest the batter, and check the first pancake’s center before cooking the rest.
Banana oat pancakes: a small-batch cooking plan
- Prep
- 10 minutes
- Cook
- 15 minutes
- Batter rest
- 5 minutes
- Total
- About 30 minutes
- Yield
- About 6 small pancakes; 2 light servings
The 15-minute cooking allowance assumes three small pancakes fit at once, giving two batches. If your pan holds only two at a time, allow another 5–7 minutes for a third batch. Most of the time is hands-on, apart from the five-minute batter rest. If you are grinding whole oats, do that before measuring the flour.
Equipment: a 10-inch nonstick skillet, a thin wide turner, two small bowls, a fork, measuring spoons, and preferably a kitchen scale. A blender or spice grinder is useful if starting with rolled oats.
Ingredients and exact starting amounts
- 50 g finely ground oat flour, approximately ½ cup, spooned into the cup and leveled
- ¼ cup thoroughly mashed ripe banana, approximately 60 g or about ½ medium banana
- ¼ cup water, plus 1–2 tablespoons only if needed after resting
- ½ teaspoon baking powder
- ¼ teaspoon ground cinnamon
- A small pinch of fine salt, approximately 1/16 teaspoon
- 1 teaspoon neutral oil, divided between batches, for the skillet
Measure the banana after mashing
A banana with plenty of brown freckles is easier to mash and distributes through the batter more evenly than a firm, underripe one. Mash until there are no large slippery pieces. Small flecks are fine; thick chunks can make a pancake break where the turner meets them.
Use the quarter-cup measure rather than automatically adding half of any banana. Fruit size varies, and too much banana can make the centers dense and sticky. Save the remaining fruit for serving. If using a previously frozen banana, thaw it in the refrigerator and measure the mashed fruit; add the recipe water cautiously because the texture may be looser.
Make the oats fine enough to act like flour
Store-bought plain oat flour is convenient. For homemade flour, grind rolled oats until they look powdery, with no large flakes remaining, then measure 50 g. A half cup of unground oats is not interchangeable by volume with a half cup of flour. Regrind any coarse pieces that remain.
Fine flour makes it easier to spread a small round and gives the center a more even texture. Quick oats can also be ground into flour. Steel-cut oats are harder to grind finely with a small household blender, so they are not the simplest starting point for this batch.
The batter texture matters more than a splash of water
Oat flour continues to absorb moisture after mixing. A batter that seems loose immediately can become much thicker during the rest, which is why the extra water waits until afterward. Different flour textures and bananas will not need exactly the same final amount.
Drag a spoon through the rested batter. It should leave a groove that softens slowly, not pour like milk or sit as a dry lump. If it runs rapidly across the skillet, pause and let it stand another minute or two. If it remains very loose, mix in a teaspoon of oat flour and let that hydrate before reassessing.
The batter may thicken again while the first batch cooks. A teaspoon of water can loosen the remaining portion. Avoid adding a large splash: this is a small recipe, and a tablespoon can noticeably change how well the pancakes hold together.
Mix, rest, and cook the small pancakes
- Mash and measure. Mash the banana thoroughly with a fork and measure ¼ cup. In a separate bowl, stir together the oat flour, baking powder, cinnamon, and salt so no little pockets of baking powder remain.
- Mix the batter. Stir the banana and ¼ cup water into the dry ingredients until evenly combined. Let the batter stand for 5 minutes. It should become thick enough to mound briefly on a spoon but still spread when gently nudged.
- Adjust and warm the pan. If the rested batter is too stiff to spread, stir in extra water 1 teaspoon at a time, using only what is needed. Warm the nonstick skillet over medium-low heat for 2–3 minutes, then spread about ½ teaspoon oil across its surface.
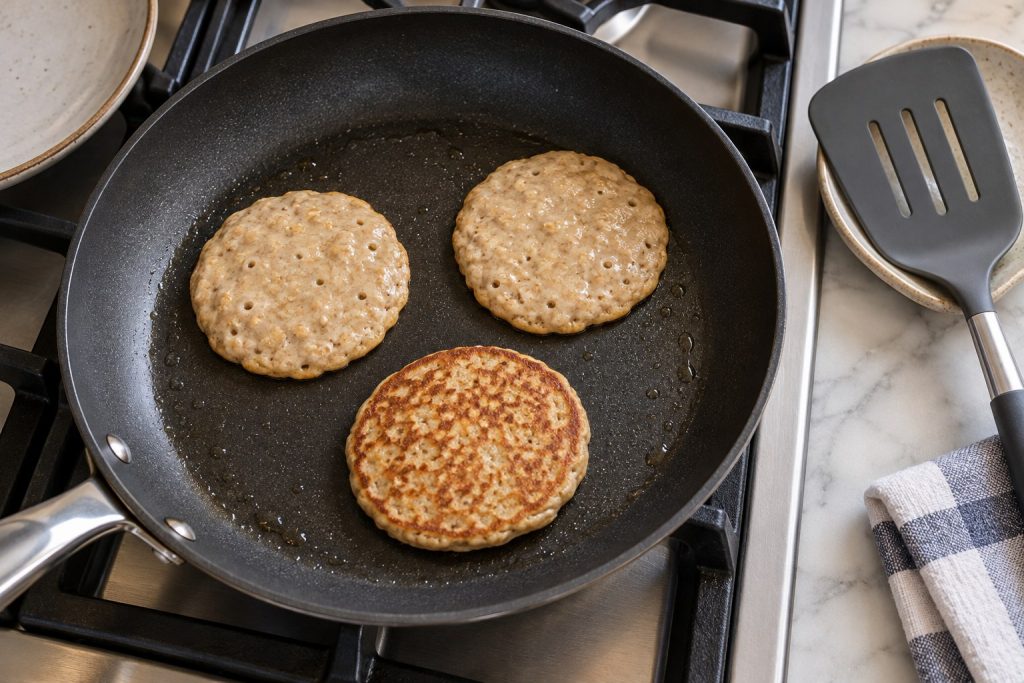
- Portion small rounds. Spoon 2 tablespoons batter per pancake into the pan, leaving room to slide the turner underneath. Gently spread each to about 3 inches across and no more than about ¼ inch thick. Cook two or three at a time rather than filling every gap.
- Wait, then turn. Cook the first side for approximately 3–4 minutes, until the outer edge looks set and a turner can lift the whole pancake without smearing it. Turn carefully and cook the second side for about 2–3 minutes. Lower the heat if the surface darkens before the center sets.
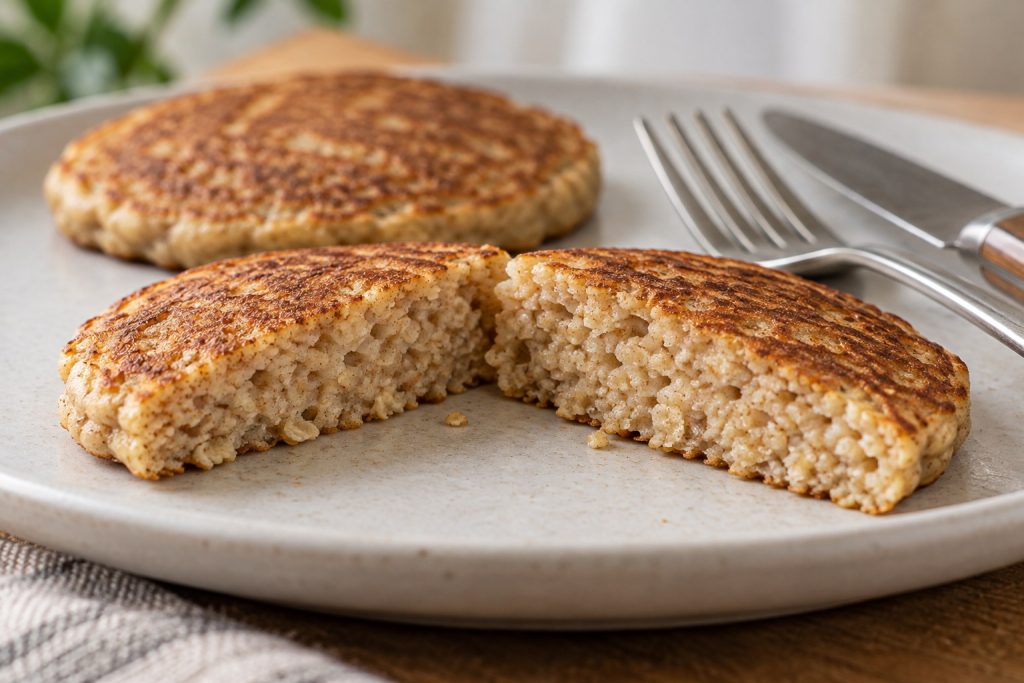
- Check and finish the batch. Cut the first pancake in half: the middle should be set and tender, without a wet stripe of batter. If necessary, return it to the pan and allow the next pancakes more time over gentler heat. Add the remaining oil as needed and cook the rest. Serve warm.
Fix broken pancakes and sticky centers
| Problem | What to change |
|---|---|
| Pancake breaks while turning | Wait longer on the first side, use a wider turner, and keep the next round at the measured small size. |
| Outside is dark but center is wet | Lower the heat and spread the next pancake slightly thinner. Extra browning is not a substitute for setting the middle. |
| Batter spreads too far | Give it the full rest. If still thin, add oat flour a teaspoon at a time and pause before checking again. |
| Pancakes feel dense or gummy | Check banana quantity, flour fineness, pancake thickness, and cooking time. Avoid large banana pieces. |
| Pancakes stick | Use an intact nonstick surface with a thin oil film. Let the first side set before trying to release it. |
| Later pancakes brown faster | The skillet has accumulated heat. Lower the burner slightly or lift the pan off it briefly between batches. |
On a small screen, scroll the table sideways to see every column.
Small flavor changes that keep the batter manageable
For a different aroma, add a few drops of vanilla or replace some cinnamon with a tiny pinch of nutmeg. Keep additions small so the banana remains the main flavor. There is no need to add sugar to the batter before tasting the finished pancakes.
Serve fruit on top instead of folding a large handful into this delicate mixture. Blueberries or chocolate pieces create weak spots and change the way a small pancake turns. If you want to try an addition, press only a few small pieces into an individual pancake rather than changing the entire bowl of batter.
Applesauce and pumpkin puree do not give exactly the same texture as banana. They change sweetness, moisture, and how the pancake holds together, so they are not dependable direct replacements in these measured proportions. A recipe designed for those ingredients is a better starting point.
Serve the pancakes while the edges are warm
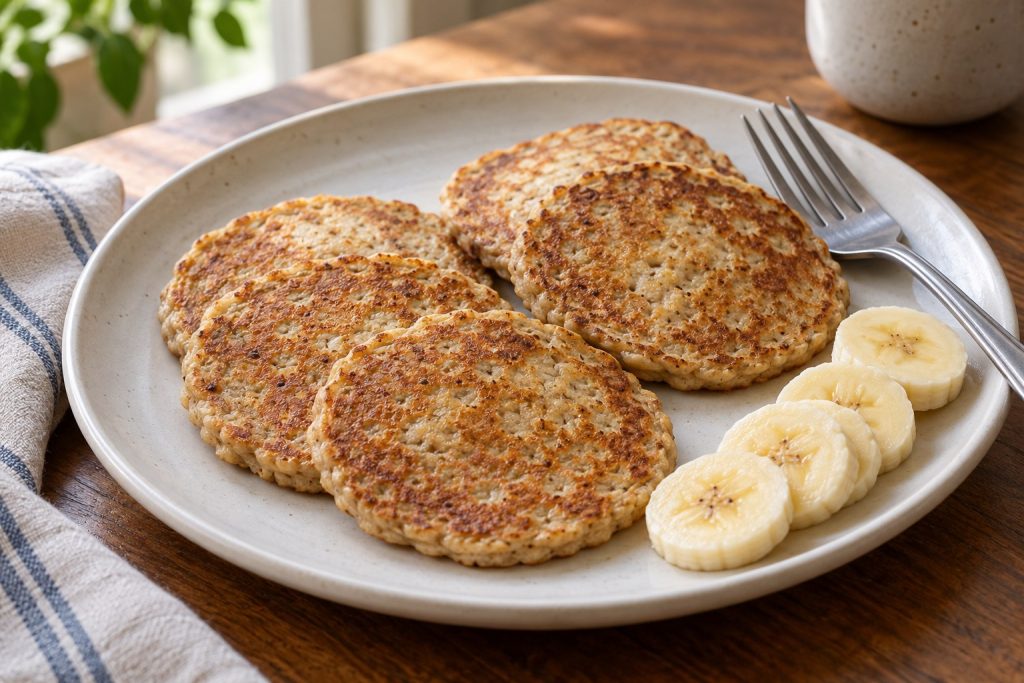
Arrange the banana oat pancakes in a short stack or a single overlapping layer. Add the remaining banana, other sliced fruit, or a small spoonful of nut or seed butter. Avoid covering them with a deep pool of topping if you want the browned surfaces to remain noticeable.
Our guide to homemade peanut butter offers a simple topping option. For a breakfast with a savory side, serve a smaller pancake portion with potato and spinach hash without eggs. Keep all chosen toppings consistent with your milk-free and egg-free preferences.
Store and reheat leftovers
Refrigerate in a shallow container within 2 hours, or 1 hour above 90°F. Keep at 40°F or below, use within 3–4 days, and reheat leftovers to 165°F, following USDA leftover guidance.
Place parchment between layers to make the soft pancakes easier to separate. Reheat gently in a lightly greased covered skillet or microwave, checking the center. They may soften more after chilling. Add fresh fruit or nut butter after reheating rather than storing a fully topped stack.
Questions about egg-free oat pancakes
Can I use plant milk instead of water?
Yes, use the same starting amount of an unsweetened plant beverage, then adjust after resting. A thick or sweetened product may change the texture and flavor. Water keeps the measured recipe simple and avoids needing any kind of milk.
Can I make the whole batter in a blender?
You can, but a very small quantity may sit below the blades. Grind the oats first, then add the other ingredients. Scrape the blender well so the flour and banana proportions in the skillet match what you measured.
Are these automatically gluten-free?
No. If that matters for your meal, choose oat flour or oats labeled gluten-free and check the other ingredients. The FDA explains how gluten-free labeling applies to oats; simply seeing oats on an ingredient list is not the same assurance.
Can I double the recipe?
Yes. Double the measured ingredients, but continue making small rounds and cook in additional batches. Let the batter rest before adjusting water, and check it again as you work because a larger batch sits longer.
Should I wait for lots of bubbles before flipping?
Do not rely on bubbles alone. This batter may show only a few. Look for a set outer edge, a golden underside, and a pancake that lifts as one piece, then check the first center after both sides have cooked.
THE COMPLETE RECIPE
Small-Batch Banana Oat Pancakes Without Eggs or Milk
Yield: 2 light servings (about 6 small pancakes total)
Ingredients
- 50 g finely ground oat flour approximately 1/2 cup, spooned and leveled; weight is the more reliable measure
- 1/4 cup thoroughly mashed ripe banana approximately 60 g; about half a medium banana, measured after mashing
- 1/4 cup water plus 1–2 tablespoons only if needed after resting, added a teaspoon at a time
- 1/2 teaspoon baking powder
- 1/4 teaspoon ground cinnamon
- 1/16 teaspoon fine salt a small pinch
- 1 teaspoon neutral oil divided between batches, for the skillet
Equipment
- 10-inch nonstick skillet
- Thin, wide turner
- Two mixing bowls
- Fork
- Kitchen scale
- Measuring cups and spoons
- Blender or spice grinder, only if making flour from rolled oats
Instructions
- Mash and measure Mash the banana thoroughly with a fork and measure ¼ cup. In a separate bowl, stir together the oat flour, baking powder, cinnamon, and salt so no little pockets of baking powder remain.
- Mix the batter Stir the banana and ¼ cup water into the dry ingredients until evenly combined. Let the batter stand for 5 minutes. It should become thick enough to mound briefly on a spoon but still spread when gently nudged.
- Adjust and warm the pan If the rested batter is too stiff to spread, stir in extra water 1 teaspoon at a time, using only what is needed. Warm the nonstick skillet over medium-low heat for 2–3 minutes, then spread about ½ teaspoon oil across its surface.
- Portion small rounds Spoon 2 tablespoons batter per pancake into the pan, leaving room to slide the turner underneath. Gently spread each to about 3 inches across and no more than about ¼ inch thick. Cook two or three at a time rather than filling every gap.
- Wait, then turn Cook the first side for approximately 3–4 minutes, until the outer edge looks set and a turner can lift the whole pancake without smearing it. Turn carefully and cook the second side for about 2–3 minutes. Lower the heat if the surface darkens before the center sets.
- Check and finish the batch Cut the first pancake in half: the middle should be set and tender, without a wet stripe of batter. If necessary, return it to the pan and allow the next pancakes more time over gentler heat. Add the remaining oil as needed and cook the rest. Serve warm.
Notes
Rate This Recipe
Made this recipe? Choose a star rating in the comment form and share how it turned out. Your cooking time and any ingredient changes can help the next reader.
Rate This Recipe