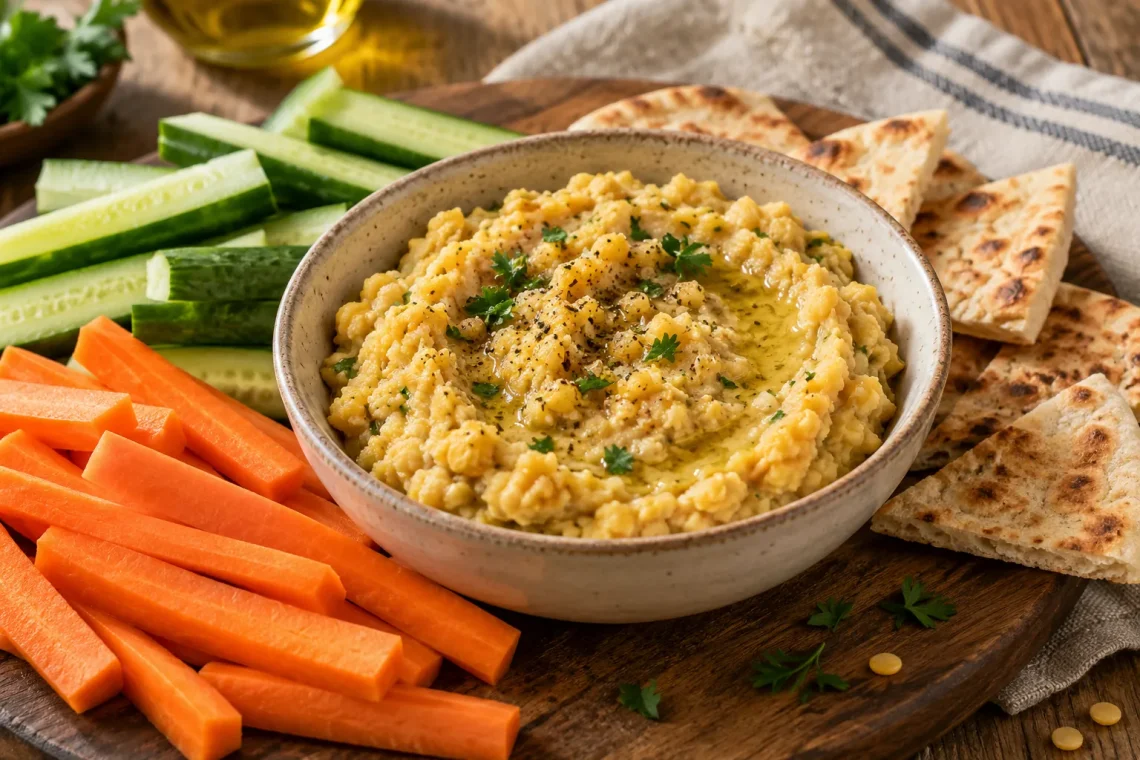
A yellow split pea dip without a blender begins with a saucepan and ends with a creamy, lightly textured spread. Yellow split peas simmer with onion until they are soft enough to collapse under a fork, then olive oil and lemon bring the mixture together. It is an approachable way to make a substantial dip when you do not have a food processor or do not want another appliance to wash.
Affiliate disclosure: As an Amazon Associate I earn from qualifying purchases. These paid links open Amazon search results so you can compare suitable tools.
A potato masher (paid link) is useful for the hand-mashing stage once the split peas are fully soft. A heavy saucepan (paid link) handles the simmering step without adding a blender to the method.
This is inspired by the simple yellow split pea purees often called Greek fava. The hand-mashed finish is intentionally rustic: a few soft onion pieces and tiny flecks of pea may remain. The important point is that everything is tender, with no gritty or chalky centers. More patient simmering improves the texture more reliably than vigorous mashing of undercooked peas.
Cook the peas past soup texture for hand mashing
| Simmer | Cook until the split peas crush easily against the side of the pot with no firm centers. |
| Reduce gently | Once the peas are fully soft, simmer uncovered if the mixture is soupy. Do not drain away the onion and cooking liquid. |
| Mash while warm | A sturdy fork or potato masher works best before the peas cool and firm. |
| Finish gradually | Add the measured oil and lemon, then loosen with hot water a spoonful at a time if needed until the spread holds soft ridges. |
The dip thickens as it cools. Adjust the serving texture after a short rest and recheck salt whenever more liquid is added.
Buy yellow split peas, then check the package
Use dried yellow split peas, not whole yellow peas, chickpeas, or dried fava beans. These ingredients have different cooking behavior. Split peas are small halves that soften readily; whole peas can retain a tougher outer structure and need a different preparation method. The word “fava” on a prepared dip does not mean every recipe uses dried fava beans.
Pick through the peas on a plate, remove debris, and rinse in a fine strainer. North Dakota State University’s pulse guide notes that split peas do not require soaking. Their actual cooking time still varies with age and storage, so this recipe uses texture checkpoints rather than promising that every bag finishes at the same minute.
Yellow split pea dip without a blender
Yield: approximately 2 cups, enough for 6 appetizer portions. Preparation: 10 minutes. Cooking: about 60–70 minutes. Total: about 70–80 minutes, with extra time if the peas remain firm.
Equipment: a heavy 2-quart saucepan, fine strainer, cutting board, knife, wooden spoon, and a fork or potato masher.
Ingredients
- 3/4 cup dried yellow split peas, about 150 grams, picked over and rinsed
- 2 tablespoons extra-virgin olive oil, divided
- 3/4 cup finely diced yellow onion
- 1 small garlic clove, minced
- 2 1/2 cups water, plus additional hot water as needed
- 1 dried bay leaf
- 1/2 teaspoon fine salt, divided, then adjust to taste
- 2 tablespoons fresh lemon juice, then adjust to taste
- 1/8 teaspoon freshly ground black pepper
- 1 tablespoon chopped parsley, for finishing
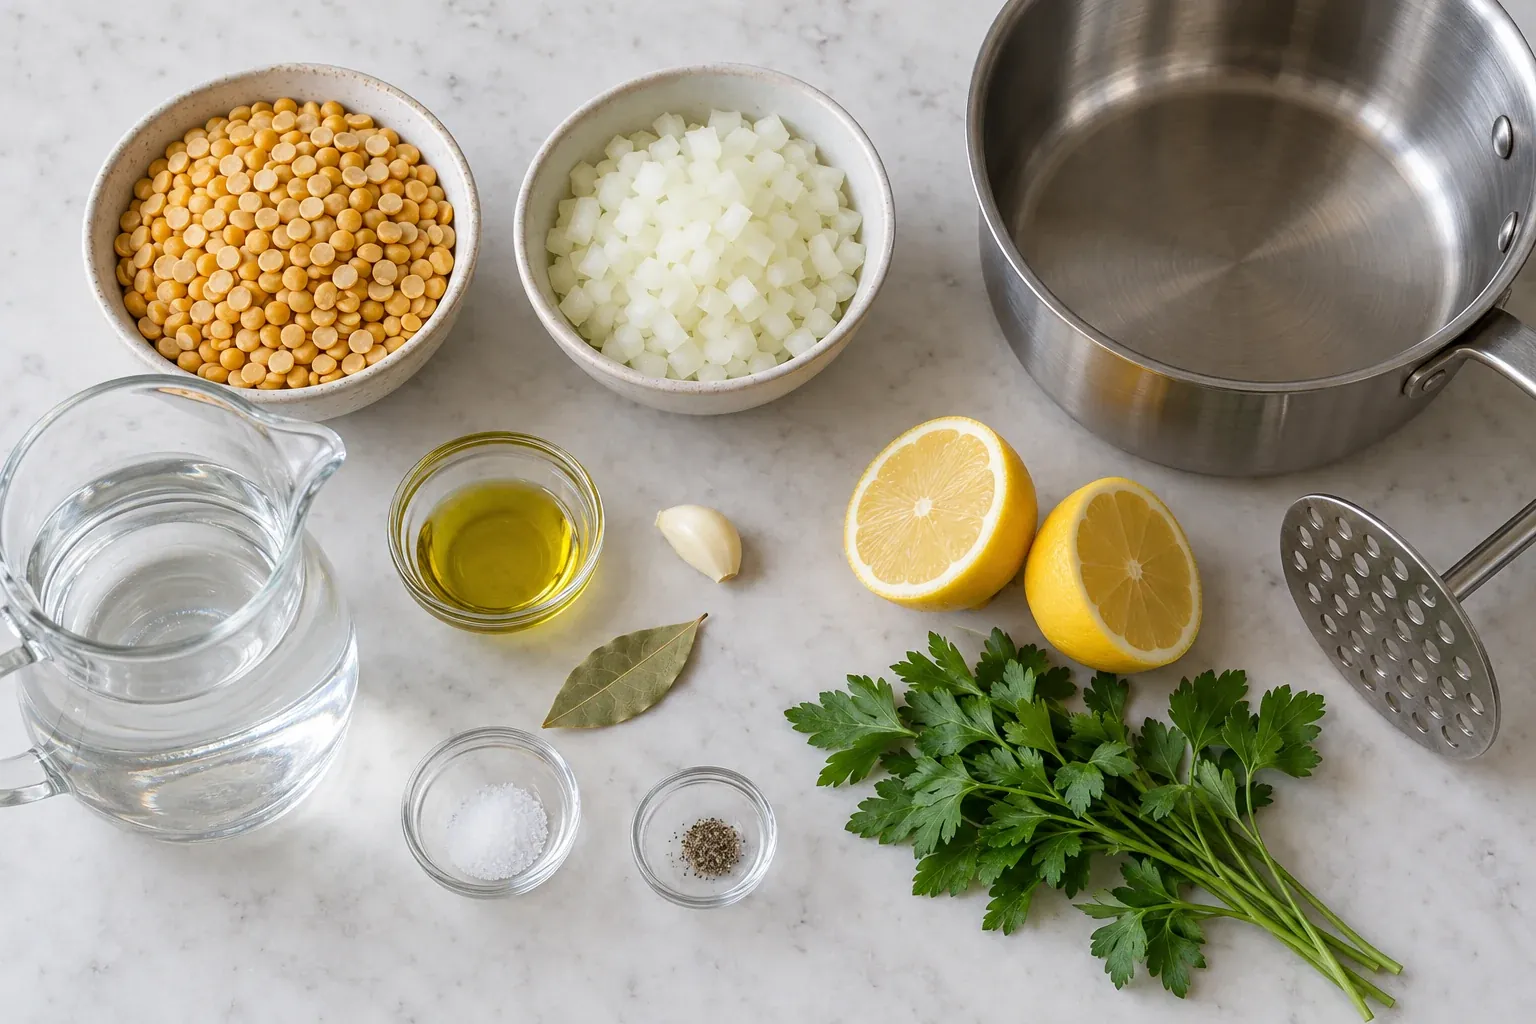
Cook, mash, and season
- Soften the onion thoroughly. Heat 1 tablespoon olive oil in the saucepan over medium-low heat. Add the onion and 1/4 teaspoon salt. Cook for 7–9 minutes, stirring regularly, until very soft and translucent. Avoid deep browning, which would make a darker, sweeter dip. Stir in the garlic for 30 seconds.
- Add peas and water. Pour in the rinsed split peas and 2 1/2 cups water, then add the bay leaf. Bring just to a boil. If foam collects on top, skim it with a spoon so you can see the simmer clearly.
- Simmer gently. Reduce the heat to low and leave the lid slightly ajar. Cook for 45–60 minutes, stirring every 10 minutes at first and more often as the mixture thickens. Add hot water in 1/4-cup amounts whenever the peas look dry before becoming soft.
- Check the center of several peas. Remove a spoonful and let it cool enough to handle. Press a few pieces against a plate with a fork. They should flatten easily into paste, without a pale, firm center. Continue simmering if they resist; do not begin the final mashing stage just because the timer rang.
- Reduce excess liquid if necessary. If the peas are completely soft but the pot still looks soupy, uncover and simmer gently for a few minutes, stirring frequently along the bottom. Leave the mixture slightly looser than your preferred serving texture because it thickens as it cools.
- Mash off the heat. Remove and discard the bay leaf. Use a potato masher or sturdy fork to mash the peas against the base and sides of the saucepan. Stir vigorously with a wooden spoon between passes. Continue until the texture is cohesive and only soft flecks remain.
- Finish with lemon and oil. Stir in the remaining tablespoon olive oil, lemon juice, remaining 1/4 teaspoon salt, and pepper. Taste and adjust gradually. Transfer to a shallow serving bowl, scatter with parsley, and serve warm or let it cool briefly until comfortably spoonable.
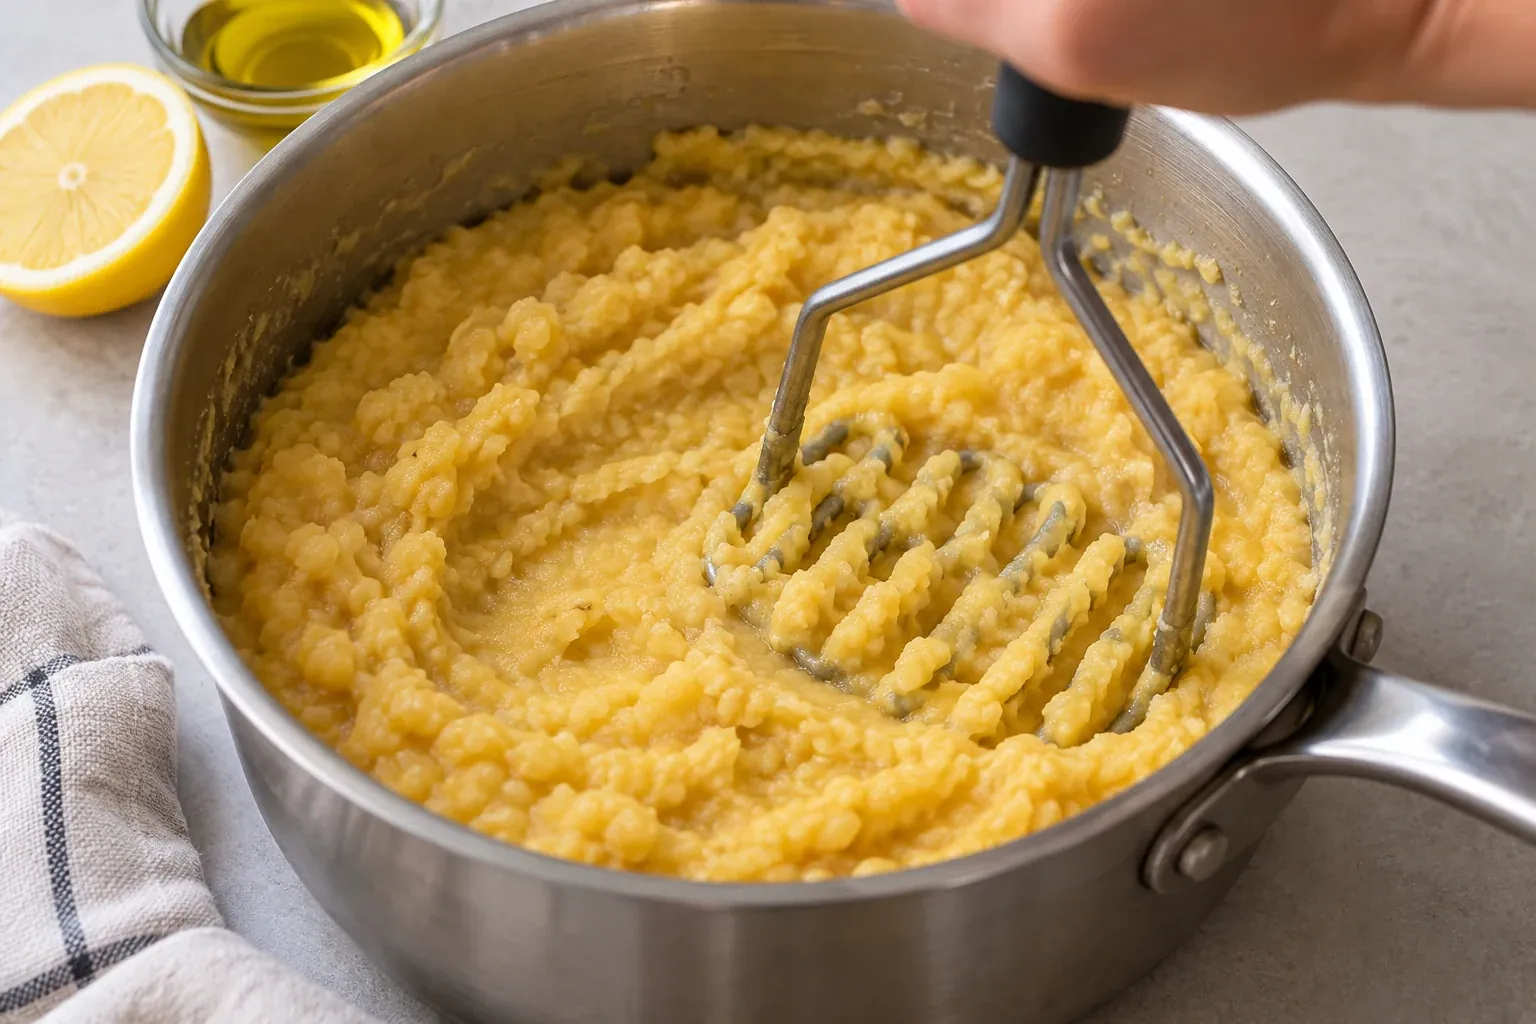
How to get a creamy result by hand
For a creamy hand-mashed dip, cook the peas until they are completely soft before you begin mashing. The cooking liquid should look creamy because some peas are already breaking down naturally. If the grains still look separate and feel chalky, give them more water and time.
Finely chopping the onion also matters. Large slices remain visible even when they are soft, which can make a spread difficult to scoop. A small dice melts into the peas more easily. This is a good place to spend an extra minute with the knife rather than expecting a fork to turn large vegetable pieces into a fine puree later.
Use the saucepan as a mixing bowl while the peas are still warm. Its flat bottom gives the masher something firm to press against. If using a fork, work in sections and press downward before stirring. Do not attempt to mash a deep bowlful all at once; shallow layers make the work easier.
Water, lemon, and seasoning
A heavy pan on a low burner loses water differently from a thin pan on a powerful burner. Keep an eye on the edges: dry rings and a thick mound that no longer moves indicate that more water may be needed. Add hot water gradually and stir it all the way through so the bottom does not scorch while the top appears moist.
Lemon is added after the peas are tender, which also lets you control its brightness at serving time. Start with the measured amount and taste a slightly cooled spoonful. Very hot food can make subtle seasoning difficult to judge. An extra teaspoon of lemon is often enough to lift a whole bowl.
If you plan to serve the dip cold, make it slightly looser and taste again after chilling. Cold split pea puree becomes firmer, and the lemon can seem less prominent. Stir in a tablespoon of water at a time to restore a scoopable texture rather than automatically adding more oil.
Three ways to serve the same saucepan
As a shared appetizer: Spread the warm puree into a shallow bowl and serve with toasted pita and washed cucumber or carrot sticks. A wide bowl gives everyone access without digging into a deep mound. Keep any additional toppings separate if people prefer different levels of sharpness.
As part of lunch: Spread a modest layer into a sandwich with crisp lettuce and sliced tomato. The dip is moist, so assemble shortly before eating or pack the bread separately. It can also replace another bean spread on an open-faced toast.
As a dinner component: Spoon it beneath roasted vegetables or beside a grain salad. The site’s delicata squash with Parmesan and sage offers a contrasting roasted vegetable texture. For another use of split peas with a completely different consistency, see split pea soup without ham.
Corrections before serving
- The dip is gritty: Return it to the saucepan with hot water and cook longer. Mashing harder will not fix firm pea centers.
- It is too thin: Simmer uncovered over low heat and stir frequently. Wait a few minutes before judging again because cooling adds thickness.
- It is too stiff: Stir in warm water a tablespoon at a time. Stop when it spreads easily without running across the plate.
- The bottom smells scorched: Move the unburned upper portion into a clean pan without scraping the bottom. A strongly burned flavor is difficult to remove.
- It tastes flat: Adjust salt first in a small pinch, then lemon in a small splash. Adding several seasonings together makes it harder to know which one helped.
Store a small batch safely
Move leftovers into shallow containers and refrigerate within 2 hours, or within 1 hour if the temperature is above 90°F. Keep at 40°F or below and use within 3–4 days. These are the general limits in USDA’s leftover guidance. Do not leave the serving bowl out all afternoon simply because it contains no meat.
To serve warm again, add a little water and reheat gently, stirring until the dip reaches 165°F throughout. Microwave in a covered, vented container and stir partway through. Freeze in small containers if needed, aiming to use within 3 months for quality. Thaw in the refrigerator and whisk well after reheating to restore an even consistency.
Frequently asked questions
Can I use green split peas?
Yes, they can make a similar hand-mashed spread, but the color and flavor will be different. Follow their package instructions and the same fully tender texture cue. Keep the water adjustable rather than assuming an identical finish time.
Is a fork enough to mash the dip?
Yes, when the peas are cooked until they collapse. A potato masher is quicker, but a sturdy fork works in a shallow layer. Leave a little soft texture rather than spending a long time chasing a perfectly smooth finish.
Can I leave out the garlic?
Yes. The onion, olive oil, and lemon still provide flavor. Do not add extra raw onion as a replacement unless you want a much sharper dip; the gently cooked onion is part of this version’s mild character.
Why did my peas take much longer than an hour?
Older peas, a very gentle burner, or mineral-rich water can affect tenderness. Check that the pot is actually simmering and that there is enough liquid. If a bag repeatedly refuses to soften, try a fresher package for the next batch.
Can yellow split pea dip without a blender be served cold?
Yes. Chill promptly, then stir in water as needed before serving. Keep it cold until close to mealtime and follow the same time limits for perishable food once it is on the table.
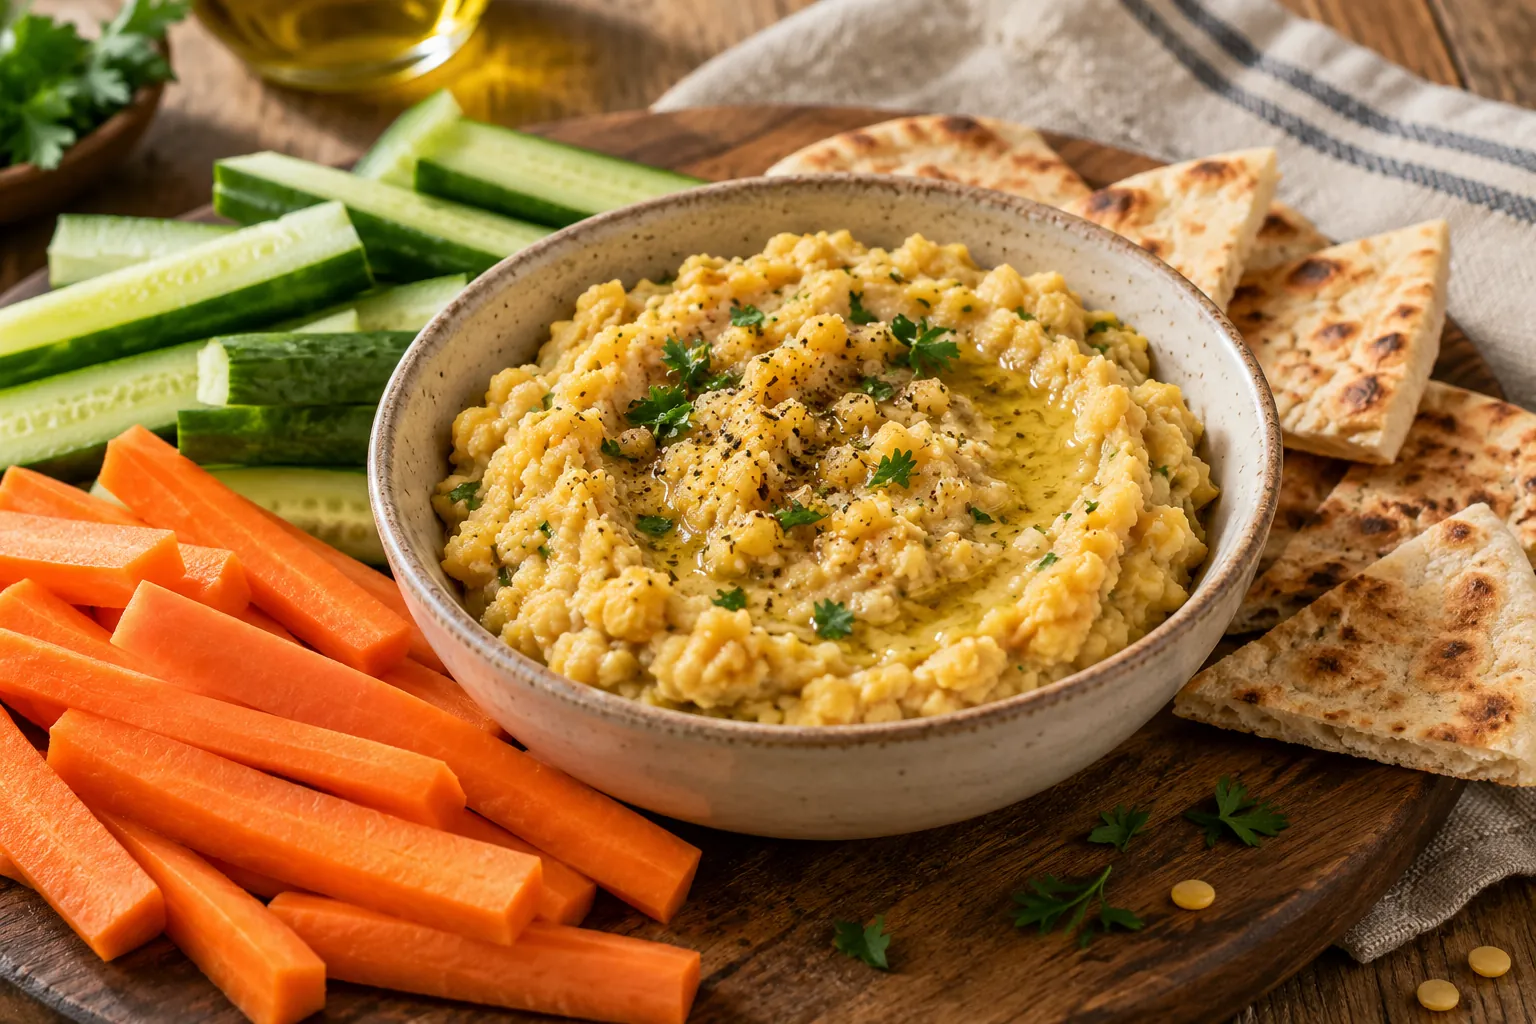
Yellow Split Pea Dip Without a Blender
Ingredients
Equipment
Method
- Soften the onion thoroughly. Heat 1 tablespoon olive oil in the saucepan over medium-low heat. Add the onion and 1/4 teaspoon salt. Cook for 7–9 minutes, stirring regularly, until very soft and translucent. Avoid deep browning, which would make a darker, sweeter dip. Stir in the garlic for 30 seconds.
- Add peas and water. Pour in the rinsed split peas and 2 1/2 cups water, then add the bay leaf. Bring just to a boil. If foam collects on top, skim it with a spoon so you can see the simmer clearly.
- Simmer gently. Reduce the heat to low and leave the lid slightly ajar. Cook for 45–60 minutes, stirring every 10 minutes at first and more often as the mixture thickens. Add hot water in 1/4-cup amounts whenever the peas look dry before becoming soft.
- Check the center of several peas. Remove a spoonful and let it cool enough to handle. Press a few pieces against a plate with a fork. They should flatten easily into paste, without a pale, firm center. Continue simmering if they resist; do not begin the final mashing stage just because the timer rang.
- Reduce excess liquid if necessary. If the peas are completely soft but the pot still looks soupy, uncover and simmer gently for a few minutes, stirring frequently along the bottom. Leave the mixture slightly looser than your preferred serving texture because it thickens as it cools.
- Mash off the heat. Remove and discard the bay leaf. Use a potato masher or sturdy fork to mash the peas against the base and sides of the saucepan. Stir vigorously with a wooden spoon between passes. Continue until the texture is cohesive and only soft flecks remain.
- Finish with lemon and oil. Stir in the remaining tablespoon olive oil, lemon juice, remaining 1/4 teaspoon salt, and pepper. Taste and adjust gradually. Transfer to a shallow serving bowl, scatter with parsley, and serve warm or let it cool briefly until comfortably spoonable.
Notes
- Yield and timing: Makes approximately 2 cups for 6 appetizer portions. Allow 10 minutes to prepare and about 60–70 minutes to cook, roughly 70–80 minutes total. Older peas may need longer.
- Peas and equipment: Use dried yellow split peas, picked over and rinsed, in a heavy 2-quart saucepan. Whole peas, chickpeas and fava beans need different cooking methods. A sturdy fork or potato masher works once the split peas are completely soft.
- Tenderness: Cool and press several peas against a plate. They should mash into paste without firm centers. Add hot water in the stated ¼-cup amounts if needed during cooking; harder mashing cannot fix undercooked peas.
- Consistency: Remove the bay leaf before mashing. Leave the warm mixture slightly loose because it thickens as it cools. Reduce excess liquid gently or loosen a stiff finished dip with warm water by the tablespoon. Add the remaining oil and lemon off heat.
- Leftovers: Refrigerate shallow portions within 2 hours, or 1 hour above 90°F (32°C), at 40°F (4°C) or below. Use within 3–4 days and reheat to 165°F (74°C). FoodSafety.gov storage guidance.