A hot dog seems easy until the fire pit turns it black on the outside and lukewarm on the inside. That happens when the heat is too fierce, too close, or too uneven.
- Fully cooked hot dogs only
- Embers + two heat zones
- Heat through before browning

To learn how to cook hot dogs over a fire pit, focus on heat control: let the flames settle, create a gentler and hotter zone, and turn the hot dogs frequently. Surface browning is separate from heating the center.
Product scope: This short method is only for packaged hot dogs or frankfurters labeled fully cooked. It is not a timing guide for fresh bratwurst or other raw sausage, which requires different handling, longer cooking, and thermometer verification.
Start with the right fire, tools, and setup
Hot dogs cook best over a small fire that’s burned down to glowing coals, not tall flames. If you’re using logs, give the fire 30 to 60 minutes to settle. Hardwood burns longer and more steadily. Charcoal is also a smart choice when you want faster setup and more even heat.
You’ll also want a few basic tools. Long tongs help on a grate. A two-prong metal skewer gives you better control than a single stick. Heat-safe gloves help when you need to shift coals or move a grate. Keep water nearby, and never leave the fire unattended.
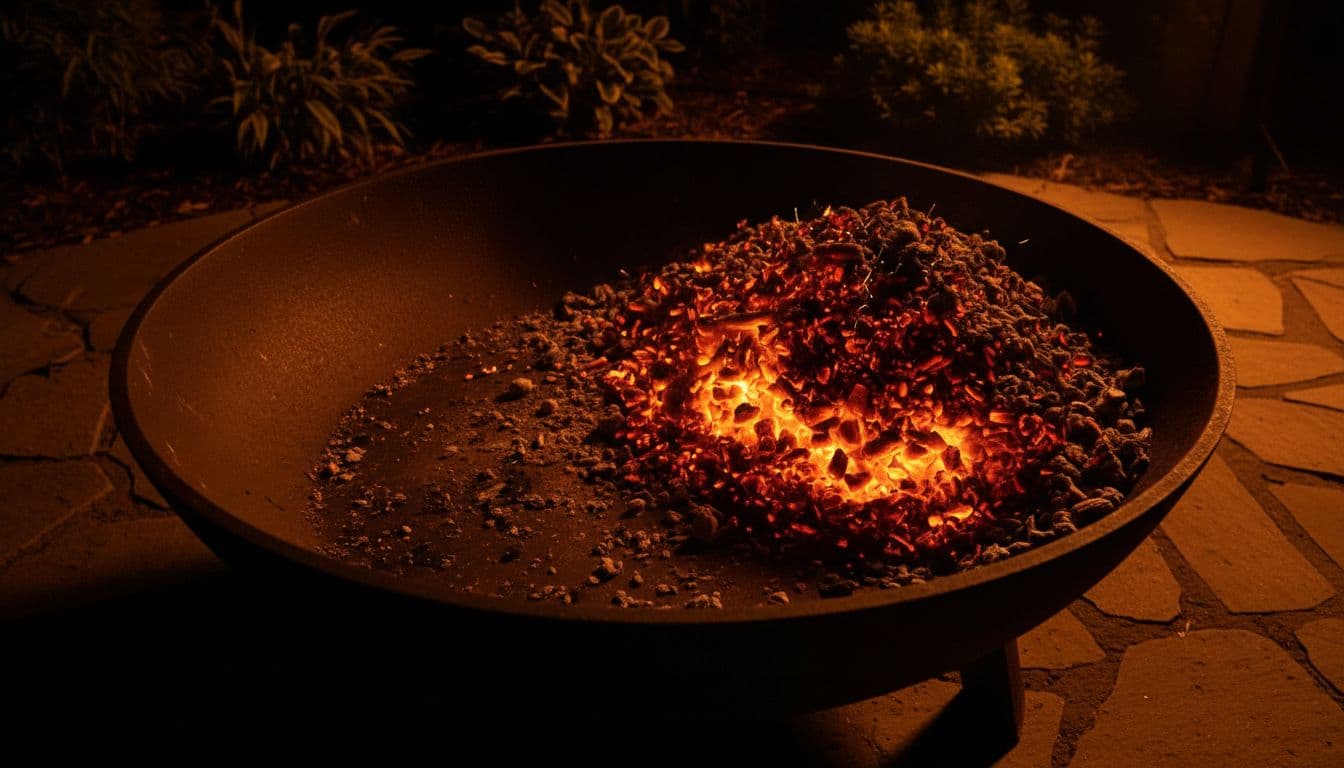
Why do embers cook better than open flames
Flames lick and scorch. Embers radiate steady heat.
That’s the whole battle. Open flames can blister the casing before the middle is hot. They also leave soot and bitter black spots. By contrast, a bed of embers gives you a slower, cleaner cook, so the skin browns rather than bursts.
How to build a two-zone fire pit for better control
Push more coals to one side of the pit and leave fewer on the other side. Now you have a hot zone and a cool zone.
Start on the cool side first. That gives the hot dog time to heat through without the skin snapping. Then move it to the hotter side for a quick finish and a little color. Think of it like warming bread before toasting it.
How to cook hot dogs over a fire pit, step by step
High heat isn’t your friend here. You want a calm fire, steady turning, and a short finish over stronger coals.
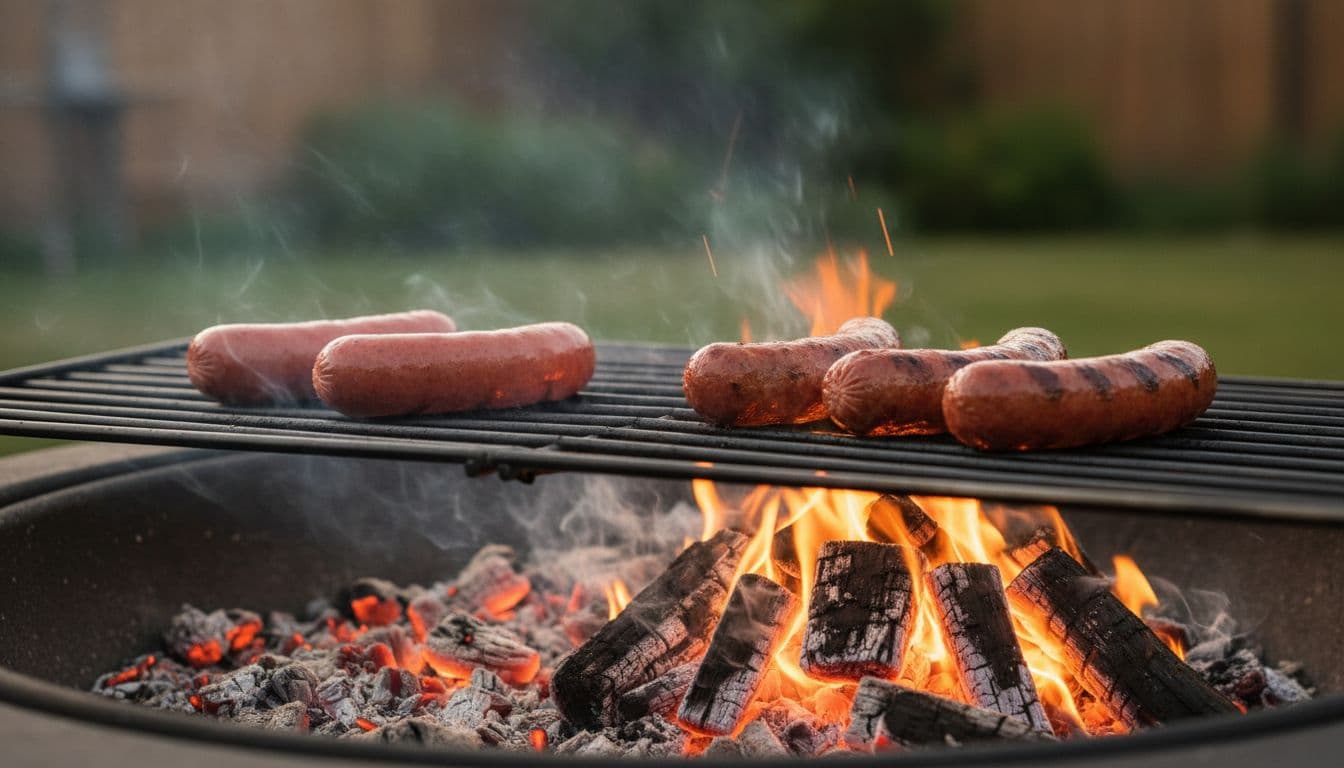
Use the cool zone first, then finish over hotter coals
Follow this order:
- Wait for the right fire. Cook only when the pit has glowing coals and little to no flame.
- Prep the hot dogs. Pat them dry if they’re wet from the package. Dry skins brown better and stick less.
- Start in the cool zone. On a grill grate, place the hot dogs over the gentler side first. Turn every 45 to 60 seconds.
- Finish over hotter coals. After they’ve heated through, slide them to the hotter side for brief browning.
- Check the center before serving. Browning is a surface cue. Heat packaged hot dogs until steaming hot throughout; move them to gentler coals if the skin darkens first.
Thin, fully cooked hot dogs may brown in about 3 to 5 minutes, but a large or refrigerator-cold frank can need longer. Start over the cooler coals, turn frequently, and finish briefly over hotter coals only after the center is hot. The time is a checking range, not proof of doneness.
For stick roasting, hold the hot dog about 6 to 8 inches above the embers. Turn it every 30 seconds. Most cook in 2 to 5 minutes, depending on the fire and the distance from the coals.
Fully cooked hot dogs are not raw sausages
Do not apply the short hot-dog timing ranges to fresh bratwurst or other raw links. Cook raw beef, pork, lamb, or veal sausage to 160°F (71°C); cook raw chicken or turkey sausage to 165°F (74°C). Follow package directions and verify the thickest part with a food thermometer. See the FoodSafety.gov minimum internal temperature chart.
Keep raw sausage and its juices separate from fully cooked hot dogs, buns, and toppings. Use a clean plate and utensils after handling raw links, and do not partially grill raw sausage for later finishing.
The best timing cues so the skin stays intact
Use plumpness and light browning to judge the skin, then check the center. USDA hot-dog guidance advises people at greater risk of foodborne illness to reheat fully cooked hot dogs until steaming hot because ready-to-eat products can carry Listeria. For an easy measured reheating target for fully cooked hot dogs, use 165°F (74°C), checking from the end into the center. This is not the raw-sausage rule; use the separate temperatures above for raw links.
Fast blistering, heavy smoke, or split skin means the heat is too high.
If that happens, move the hot dog to the cooler zone or lift it farther from the coals. Low, steady heat keeps more juice inside. Rush it, and the casing tightens as a balloon stretched too far.
Best methods, easy fixes, and mistakes to avoid
Some methods are easier than others. Here’s the quick side-by-side view.
| Best Method: | Best for you: | Timing guide: |
|---|---|---|
| Stick roasting | Campfire feel and fast cooking | 2 to 5 minutes, turn every 30 seconds |
| Grill grate | Most even cooking | 3 to 5 minutes total, turn often |
| Foil in coals | Gentle heating with less risk | 5 to 8 minutes |
| Poach then grill | Juicy center with crisp skin | Simmer 5 to 7 minutes, then brown 1 to 2 minutes per side |
Poach-then-grill separates heating the center from browning the skin. Gently simmer the hot dogs until steaming hot throughout, then transfer them to the grate for a short brown finish, turning often. For foil packets, use a long-handled tool and open them away from your face; trapped steam can burn. Check the center rather than serving after a fixed number of minutes.
When to use stick roasting, a grate, foil, or poach, then grill
Stick roasting feels classic, but it takes attention. A grate is easier because the hot dogs stay put and brown more evenly. Foil lowers the risk of burning, though you lose some snap. Meanwhile, poach-then-grill gives you the best balance of juicy inside and lightly crisp skin.
Here are the mistakes that burn hot dog skin fast
A few common mistakes that ruin hot dogs in a hurry:
- Cooking over flames: Flames scorch fast. Wait for embers instead.
- Using a fire that’s too large: Big fires are hard to control. Build smaller and cook later.
- Rushing before coals form: Hot logs aren’t the same as steady embers. Give the fire time.
- Using a single-prong stick: The hot dog spins and cooks unevenly. Switch to a two-prong skewer.
- Not turning often enough: One side overheats while the other lags. Turn on a steady rhythm.
Good hot dogs come from a simple pattern, not luck. Wait for embers, build two heat zones, start low, turn often, and finish with a short kiss of hotter heat.
Keep hot dogs cold and leftovers safe outdoors
- Keep packaged hot dogs and other perishables in a cooler at 40°F (4°C) or below until they go on the grill.
- If cooked hot dogs are not served immediately, keep them at 140°F (60°C) or above.
- Refrigerate them or return them to a properly chilled cooler within 2 hours, or within 1 hour when the air temperature is above 90°F (32°C).
- Discard hot dogs left outside those limits; reheating does not undo unsafe holding.
- Reheat refrigerated leftovers to 165°F (74°C).
For cooler setup and outdoor cold-holding details, see FoodSafety.gov’s summer food-safety guidance.
Once you stop cooking over flames, the whole process gets easier. Next time the fire pit is going, trust the coals and let the control do the work.
For related kitchen guidance, see How to Make the Best Camping Pancake Mix Anywhere: The Complete Guide and Sheet Pan Bacon for a Crowd: Direct Pan vs Wire Rack.
Pack quick pickled onions as a topping in a chilled container. For fresh sausages instead of fully cooked hot dogs, use the separate sausage temperature guide.