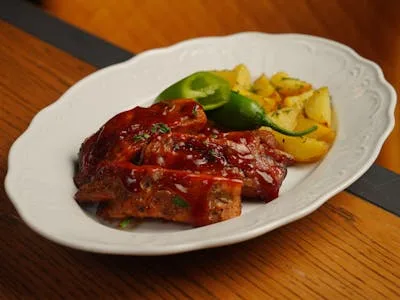
Few barbecue questions matter more than figuring out how to know when ribs are done. Ribs can look perfect on the outside while still being tough inside, or they can be so overcooked that they fall apart before you even get them to the table. Learning the right signs of doneness is the key to consistently great results whether you’re smoking, grilling, or baking ribs.
This guide breaks everything down in simple, practical terms so you can confidently judge rib doneness every time.
Why Ribs Are Tricky to Get Right
Ribs are not like burgers or chicken breasts. They contain a large amount of connective tissue and collagen that needs time to break down. If you remove them too early, they’ll be tough. If you leave them too long, they can become mushy.
The challenge is that ribs don’t rely on a single “safe temperature” like many meats. Instead, tenderness, texture, and visual cues matter just as much as internal heat.
That’s why understanding the full process of cooking ribs is essential before you can master how to know when ribs are done.
The Science Behind Tender Ribs
During low-and-slow cooking, collagen inside the ribs gradually breaks down into gelatin. This transformation is what creates that juicy, tender bite people love.
At the same time:
- Fat renders slowly
- Muscle fibers relax
- Moisture redistributes throughout the meat
If this process is stopped too early, ribs will remain chewy and tight. If pushed too far, they lose structure completely.
Ideal Internal Temperature for Ribs
Temperature is helpful, but it should never be your only guide.
Most pork ribs are considered properly cooked when they reach:
- 195°F to 203°F (best range for tenderness)
At this stage:
- Collagen has mostly broken down
- Meat is tender but still structured
- Bones begin to loosen inside the meat
Below this range, ribs may still feel tough. Above it, they can become overly soft.
However, temperature alone does not fully answer how to know when ribs are done, which is why other tests are critical.
How to Know When Ribs Are Done
This is the most important part of the entire process. There are several reliable methods that professionals use together.
1. The Bend Test
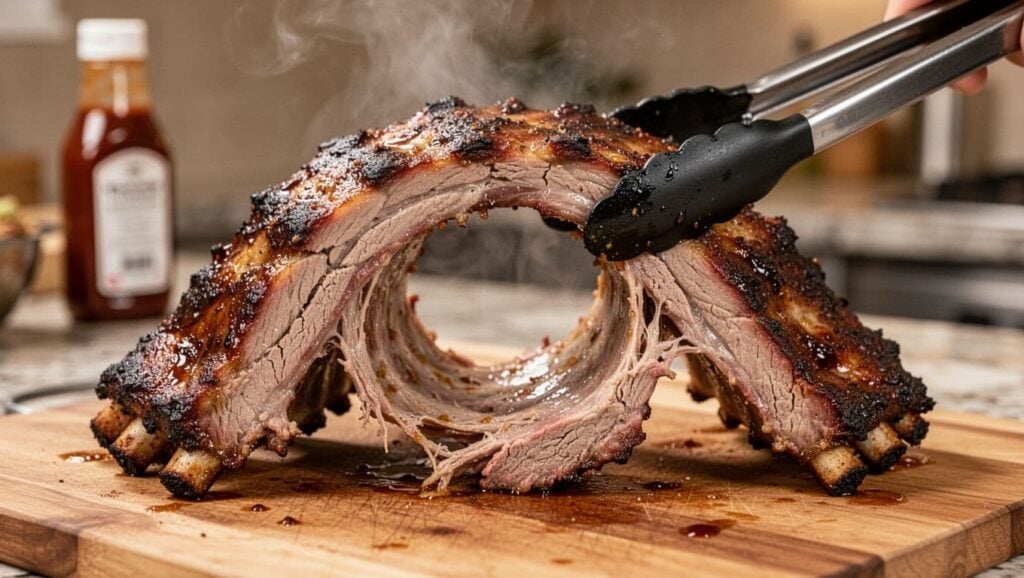
Pick up the rack with tongs and lift it from one end.
- If the ribs bend deeply and crack slightly on the surface → they are done
- If they stay stiff → they need more time
- If they nearly fall apart → they may be overcooked
2. The Toothpick Test
Insert a toothpick between the bones.
- Slides in easily → ribs are ready
- Feels tight or rubbery → not done yet
3. Bone Pullback
Look at the ends of the bones.
- ¼ to ½ inch of exposed bone usually indicates doneness
- Excessive pullback may indicate overcooking
4. Surface Texture
Properly cooked ribs will:
- Show slight cracking on the bark
- Feel tender when pressed
- Hold together but still be soft
All of these combined give you a reliable system for how to know when ribs are done without guessing.
Cooking Times (General Guide Only)
Cooking time varies depending on method and temperature:
Smoking Ribs
- 225°F: 5–7 hours (spare ribs)
- 225°F: 4–6 hours (baby back ribs)
Oven Ribs
- 275°F: 2.5–3.5 hours
Grilled Ribs (indirect heat)
- 275°F–300°F: 2–4 hours
Time is only an estimate. Ribs are done when they pass tenderness tests, not when the clock says so.
Baby Back vs Spare Ribs
Baby Back Ribs
- Smaller and leaner
- Cook faster
- More tender when done correctly
Spare Ribs
- Larger and fattier
- Require more time
- More forgiving in cooking process
Both types require the same doneness tests, especially when determining how to know when ribs are done.
Common Mistakes People Make
Relying only on time
Cooking times vary too much between smokers, ovens, and grills.
Using temperature alone
Temperature helps but does not measure tenderness.
Cutting too early
Ribs need resting time after cooking.
Ignoring texture tests
Bend and toothpick tests are often more accurate than thermometers.
The Myth of “Fall-Off-The-Bone”
Many people think ribs should fall apart completely when they are done. In reality:
- Competition BBQ ribs should hold together
- They should bite cleanly off the bone
- Fall-off-the-bone ribs are often slightly overcooked
The ideal rib has structure but is still tender and juicy.
Resting Ribs After Cooking
Once ribs are done cooking, rest them for:
- 10–20 minutes
This allows:
- Juices to redistribute
- Meat fibers to relax
- Better slicing results
Skipping this step can cause juices to run out too quickly.
Signs Your Ribs Are Undercooked
- Tough texture
- Lack of flexibility
- No bone pullback
- Toothpick resistance
- Chewy bite
If you see these signs, continue cooking in 20–30 minute increments.
Signs Your Ribs Are Overcooked
- Meat falls apart too easily
- Dry texture despite tenderness
- Mushy consistency
- Bones separate from meat completely
Overcooked ribs are still edible but lose their ideal BBQ texture.
Why Temperature Isn’t Everything
A thermometer can tell you heat, but not texture. Two racks of ribs at the same temperature can feel completely different depending on:
- Fat content
- Collagen breakdown
- Cooking method
- Humidity and smoker conditions
That’s why learning multiple methods is key.
The Best Method for Beginners
If you’re just learning, combine all three:
- Check temperature (195°F–203°F)
- Perform the bend test
- Try the toothpick test
This combination removes guesswork and makes it much easier to understand how to know when ribs are done in real-world cooking.
Frequently Asked Questions
How to know when ribs are done without a thermometer?
Use the bend test and toothpick test. If the rack bends easily and the toothpick slides in with little resistance, the ribs are done.
Can ribs be slightly pink and still be done?
Yes. A smoke ring or slight pink color is normal and does not mean undercooked.
Why are my ribs still tough after hours?
They likely need more time for collagen breakdown. Keep cooking until they become tender.
Should ribs be falling off the bone?
Not necessarily. Slight resistance is ideal for texture and structure.
Final Thoughts
Mastering ribs takes practice, but once you understand the process, it becomes easy to repeat great results. The key is combining temperature, texture, and visual cues instead of relying on just one method.
At the end of the day, how to know when ribs are done comes down to tenderness, flexibility, and confidence in the feel of the meat—not just the clock or thermometer.
Once you learn these signs, you’ll never second-guess your ribs again.